Manage Project Roles
Project roles are defined in a specific project by a project admin, and can grant permissions to assets within that project. You can combine global and project-specific roles within a project role to provide additional granularity when setting access permissions to projects.
When creating a new project, the project admin can create new project roles for each of the projects to which they are assigned.
Note
Note the following limitations for project roles:
- Project roles must grant at least one permission (e.g., read artifacts): roles cannot be empty.
- A project member (user or group) must have at least one project role assigned
- Actions granted via project roles are applied to all project resources of the relevant type and environment (e.g., the read artifacts action will be permitted on all project repositories in the DEV environment)
The following example demonstrates the permissions in the case of a Developer global role and a Lead Developer project role:
-
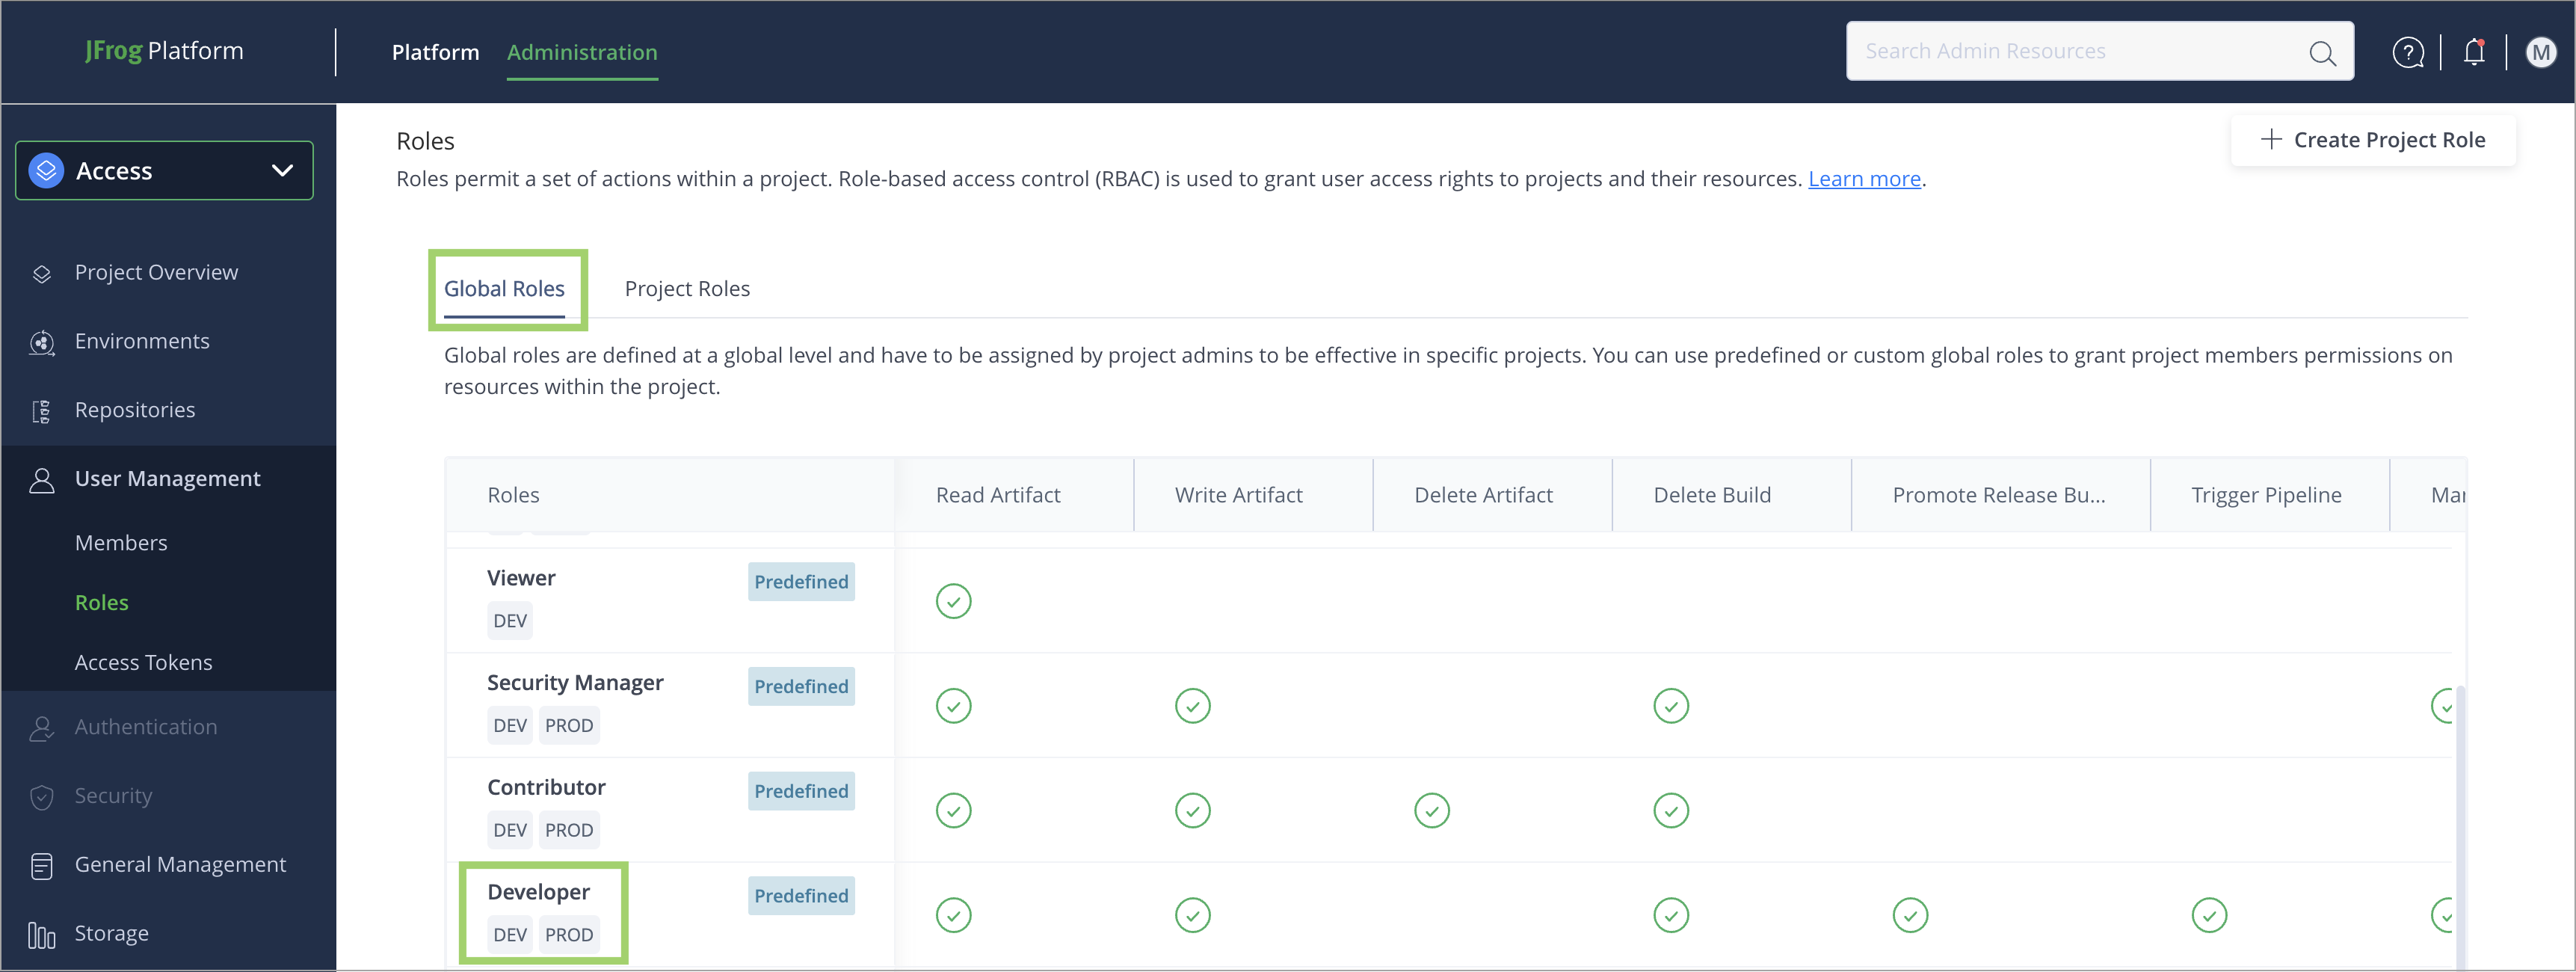
The Developer global role is granted the Read and Write actions in the DEV and PROD environments. This role is seen in the Global Roles tab.
-
The Lead Developer project role is granted the Read, Write, and Delete actions in the DEV environment. This role is seen in the Project Roles tab.
The user or group assigned to the Developer role will be able to Read and Write artifacts in DEV and PROD environments. Adding the Lead Developer to the same user or group will also provide them with the ability to delete artifacts in the DEV environment only.
Step 1: Create Project Roles
Note
To create a project role, you must be assigned a Platform Administrator role or a Project Admin role.
You can create a maximum of 30 roles per project.
-
From the Projects list, select the project on which to assign the role.
-
Click Administration on the taskbar, then navigate to User Management | Roles.
On the Project level, navigate to User Management | Roles, if you use the classic navigation. Classic navigation is available for JFrog self-hosted customers with version 7.90 or previous only.
-
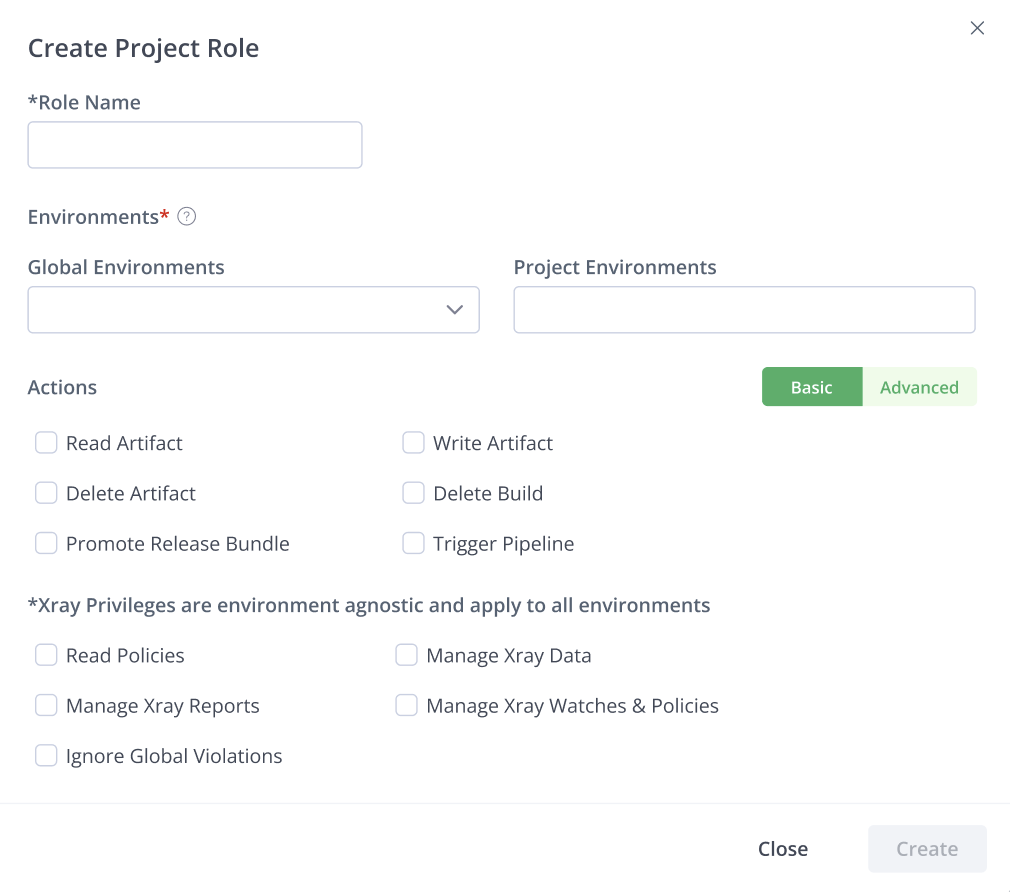
In the Project Roles tab, click Create Project Roles and configure the role settings:
-
Type your user-defined Project Role name.
-
(Optional) Assign one or more environments to the role by selecting from the Global Environments and Project Environments lists.
-
Set the Basic or Advanced role actions to assign to the role:
-
The Basic tab simplifies administration by bundling granular actions and resource types into logical categories. It allows you to grant broad functional capabilities without managing dozens of individual permissions. Use this view for standard roles where speed and ease of setup are the priorities.
-
The Advanced tab unbundles the categories defined in the Basic tab, providing direct control over every resource type and action. This allows you to create highly specific roles - such as allowing a user to “read” artifacts but not builds. Use this view to implement a strict “Least Privilege” model for specialized technical roles.
-
-
Important
Any actions settings made in the Advanced tab are removed if you move back from Advanced to Basic mode.
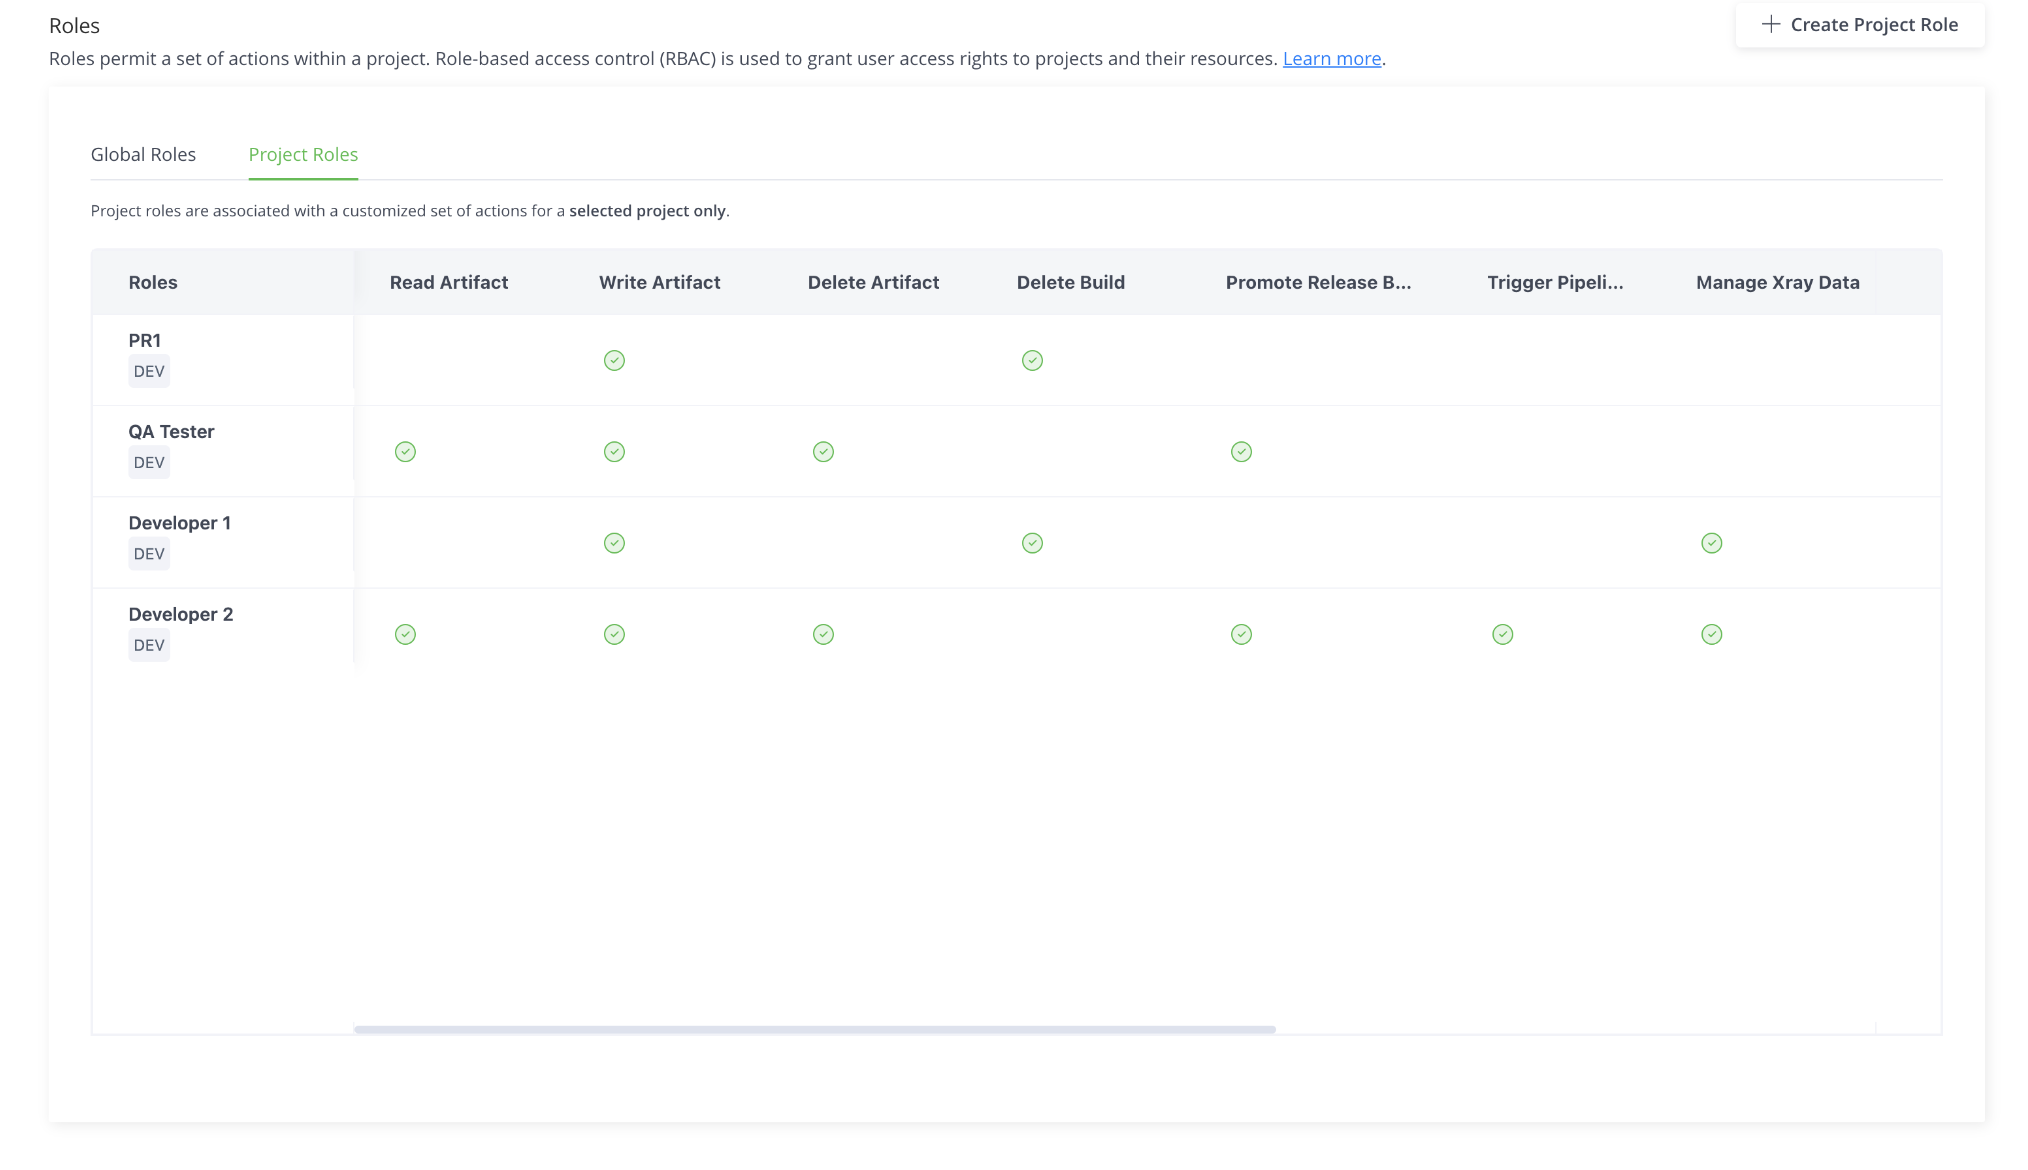
The following example shows the QA Tester role in the US R&D Project with advanced actions including Read and Write on repositories, delete Builds, promote Release Bundles, and the Trigger action on Pipelines.
Step 2: Add Members to Projects
Project members are users that have been assigned a role. Unlike Project Admins, which are added by the Platform Admin as part of the process of creating a Project, Project members are simply users that have been added to the Members tab.
To add members to a project, select Administration in the taskbar, then navigate to User Management | Members.
Updated 5 months ago