Assign Resources to a Project
You can include Repositories, builds, and Pipeline resources in a project. Projects as an entity are not viewable to users, but rather serve as a filter, whereby users gain access to the resources in the Platform module based on their assigned roles.
Repository Resources for Projects
The JFrog Platform hosts local, remote, virtual and federated repositories. Local and remote repositories are true physical repositories, while a virtual repository is actually an aggregation of these repositories, which is used to create controlled domains for search and resolution of artifacts. For more information, see Repository Management.
Rules and guidelines when working with repositories:
- Platform Admins can both create new repositories and assign existing resources, whereas Project Admins can only create new repositories.
Working with Federated Repositories in Projects
Federated Repositories are first created under the Assigned tab, and can then be assigned to a project, by the Platform Admin
- Local and remote repositories can be created in one project and assigned to other projects.
- Each repository is assigned to a single environment. If an environment is not chosen when creating the repository, it is assigned to the DEV environment by default.
- Multiple environments can be created within a project. In addition, global environments can also be used within a project. See Environments.
- You can assign a set of roles to project members for each environment, providing you with an additional layer of role-based access granularity. See Managing Project Roles and Members.
- Repositories created in the project receive the Project Key added as a prefix to the repository name.
The following example shows how to assign the Docker-Local and Generic-local repositories to the US_Dev project.

The following example shows how to create a remote Docker repository and set the environment to DEV within the US Dev project. Note that the us-dev project prefix was added to the docker_remote repository.

Build Resources for Projects
The Artifactory Build Integration is supported and available in projects. All the information collected by the build agent which includes details about the build can be associated with a specific project.
Members of the project are assigned build-related roles to perform actions of the builds.
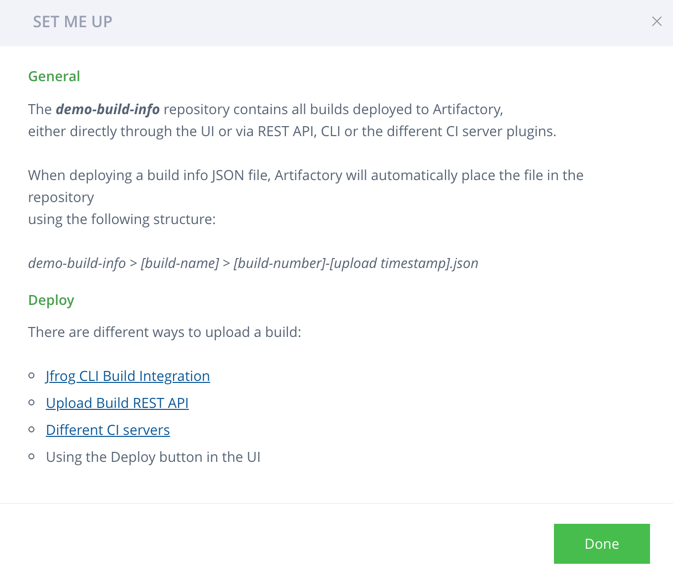
Project Build-Info
When a new project is created, a corresponding build-info repository is automatically created for the project. The naming convention of the build-info repository is:<project key>-build-info. For example, for a project named docker-local, the build-info repository name will be:docker-local-build-info. Note that the build-inforepository is created by the system repository and cannot be deleted by the Platform Admin or Project Admin.
Rules and guidelines when uploading builds to a project:
- Platform Admins can upload builds to a project
- A single build can be uploaded to a single project at a time.
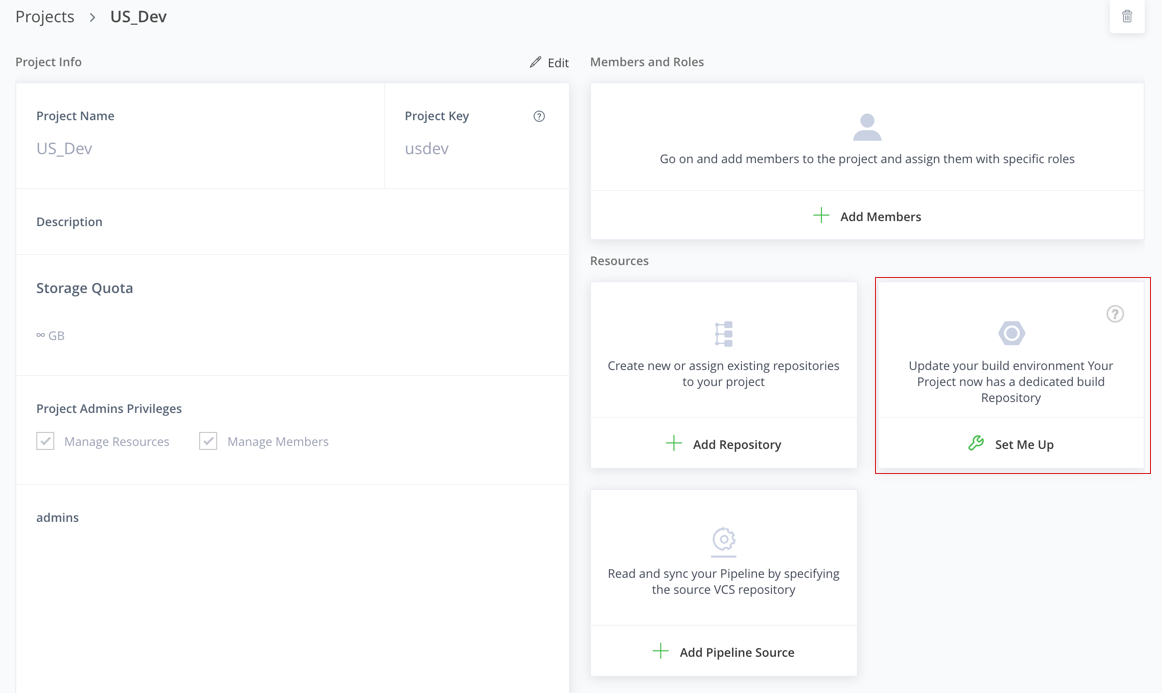
To upload a build to a project:
-
From the Projects list, select the required project.
-
To upload a build to the Project:
-
In the Resources| Builds section, click Set Me Up.
-
Use one of the following methods to upload the build.
- JFrog CLI Build Integration
- Upload Build REST API
- CLI Integration
- Deploy the build in the Artifact Browser
-
Pipelines Resources for Projects
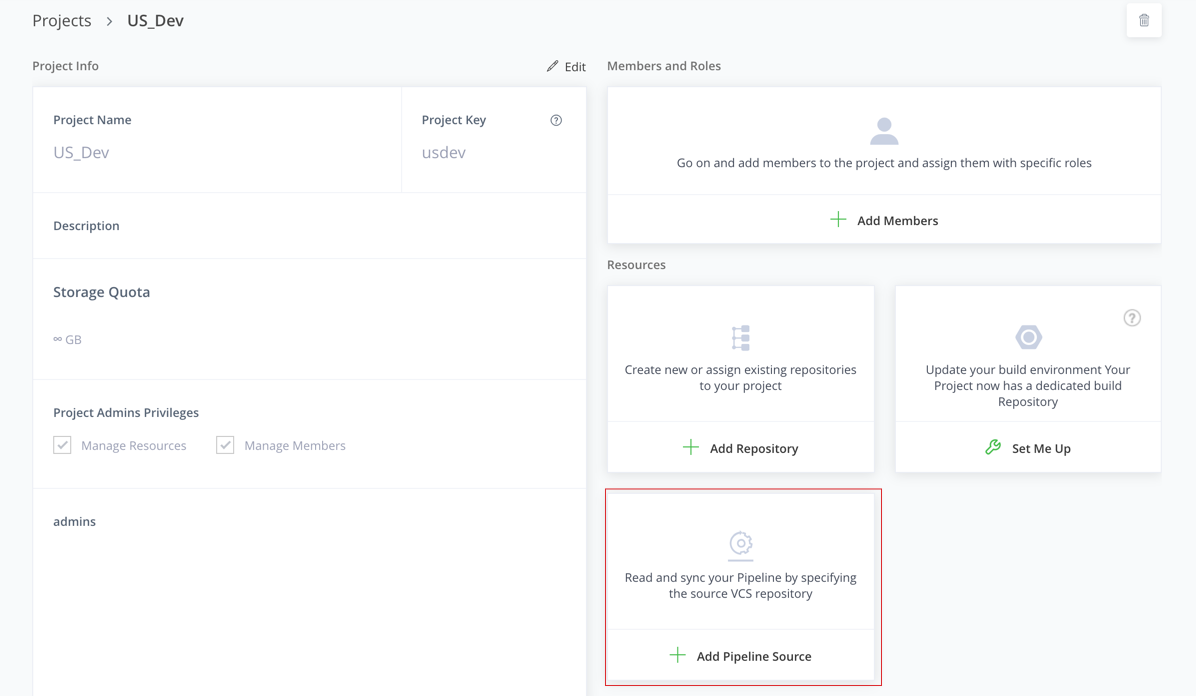
Only Project Admins can set the Pipelines Data Sources for a project in the Project page.
Platform users can set Integrations and Node Pools under Applications | Pipelines or Project Settings | Pipelines.
Add Pipeline Integrations to a Project
Pipelines integrations provide the mechanisms that enable an external service to inter-operate with Pipelines, as well as securely store the credentials for access to that service. They are necessary for Pipelines to connect to a pipeline source, and for Pipelines to access external services through resources and steps. For more information, see Managing Pipelines Integrations.
-
Select the required project from the All Projects list in the taskbar.
-
Go to Applications | Pipelines | Integrations and click Add an Integration.
-
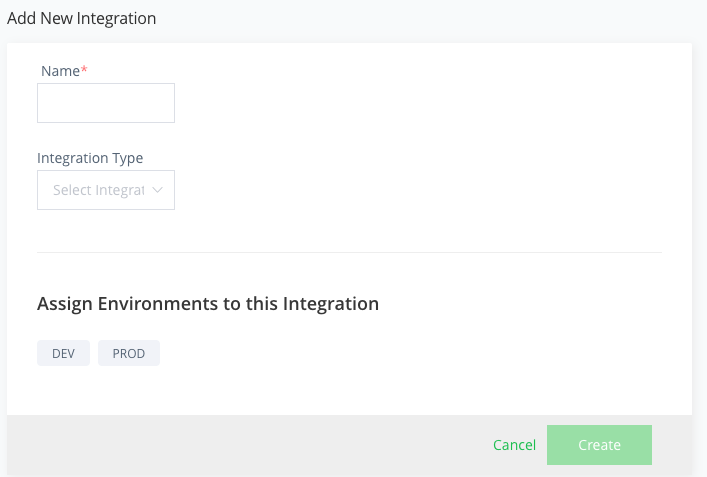
In the Add New Integration page:
-
Name: Enter a unique name for the integration. By default, the name is prefixed with the Project Key. After an integration is saved, its name cannot be edited.
-
Integration Type: From the Integration Type list, select an integration type from the dropdown list. For example, a GitHub Integration that enables a Pipeline to assign source control repositories in GitHub to GitRepo resources.
-
-
Associate this integration with the DEV or PROD environment in this project at the integration level.
-
Click Create.
Add Pipeline Data Sources to a Project
Required Permissions
To add a Data Source to a project, you need to be assigned the 'Project Admin' role.
A Pipeline source represents a source control repository (such as GitHub or Bitbucket) where Pipelines definition files can be found. A Pipeline source connects to the repository through an integration. Once a pipeline source is added, Pipelines will automatically load all config files from the repository that matches the specified filename filter. For more information, see Managing Pipelines Integrations.
-
Select the required project from the All Projects list in the taskbar.
-
Go to Applications | Pipelines | Pipelines Sources and click Add Pipeline Source.
For more information, see Adding Pipeline Source.
Add Pipeline Node Pools
Required Permissions
To add a node pool to a project, you need to be assigned the 'Platform Admin' role.
Node pools provide a convenient way to logically group build nodes in a JFrog Pipelines environment. This enables you to run steps simultaneously on different nodes. Platform Admins can create any number of node pools. There must be at least one node pool created, designated as the default node pool, and assigned at least one build node for Pipelines to execute. For more information, see Managing Pipelines Node Pools.
There are two types of Node Pools:
- Dynamic Node Pools: spin build nodes up and down on-demand from a cloud or Kubernetes service. To create a dynamic node pool, you must configure and provide an administration integration. A dynamic node is provisioned when a step is triggered, then either cached or destroyed after a preset amount of idle time if no new step is triggered during that interval. When used on a cloud service, this can help manage costs by not incurring charges to run idle nodes.
- Static Node Pools: are collections of persistently available build nodes (virtual machines). Static nodes enable you to execute Pipeline steps on your own infrastructure.
To add a node pool to a Project:
-
Select the required project from the All Projects list in the taskbar.
-
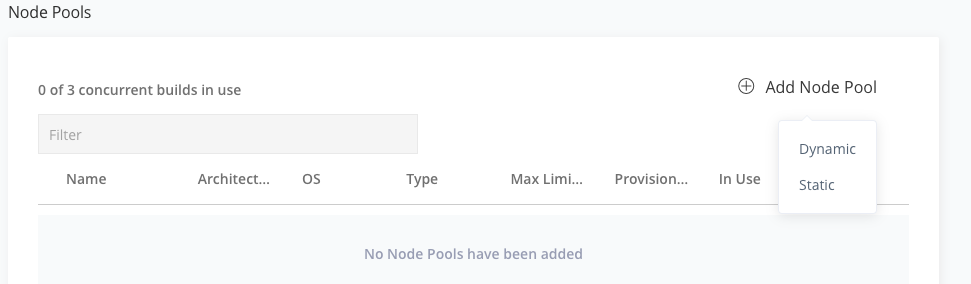
Navigate to Project Settings | Pipelines | Node Pools and click Add Node Pool.
JFrog Platform New Navigation
If you use the new navigation, click Applications on the taskbar, and select Pipelines | Node Pools, and click Add Node Pool. For more information on the new navigation, see JFrog Platform Navigation
-
Select Dynamic or Static.
-
Configure the node pool.
-
To configure a dynamic node pool, see Add a Dynamic Node Pool.
Fields that are not required may be left blank. For example, you may not wish to set the fields to limit node count, disk usage, or timeout.
-
To configure a static node pool, see Add a Static Node Pool.
-
-
When finished, click Save Node Pool.
Updated 5 months ago