

Create a Project
Create a JFrog Platform Project with a unique key, storage quota, Project Admins, repositories, and optional distribution destinations.
To create a new JFrog Project, you must be a Platform Administrator.
Prerequisites
Typically, you assign the following previously defined resources to the new project:
- Users and groups of users
- Repositories
- Build destinations and policies
- Cleanup and retention policies
How to Create a New Project
-
In the JFrog Platform interface, select Administration > All Projects > + Create New. The Create New Project dialog opens.
-
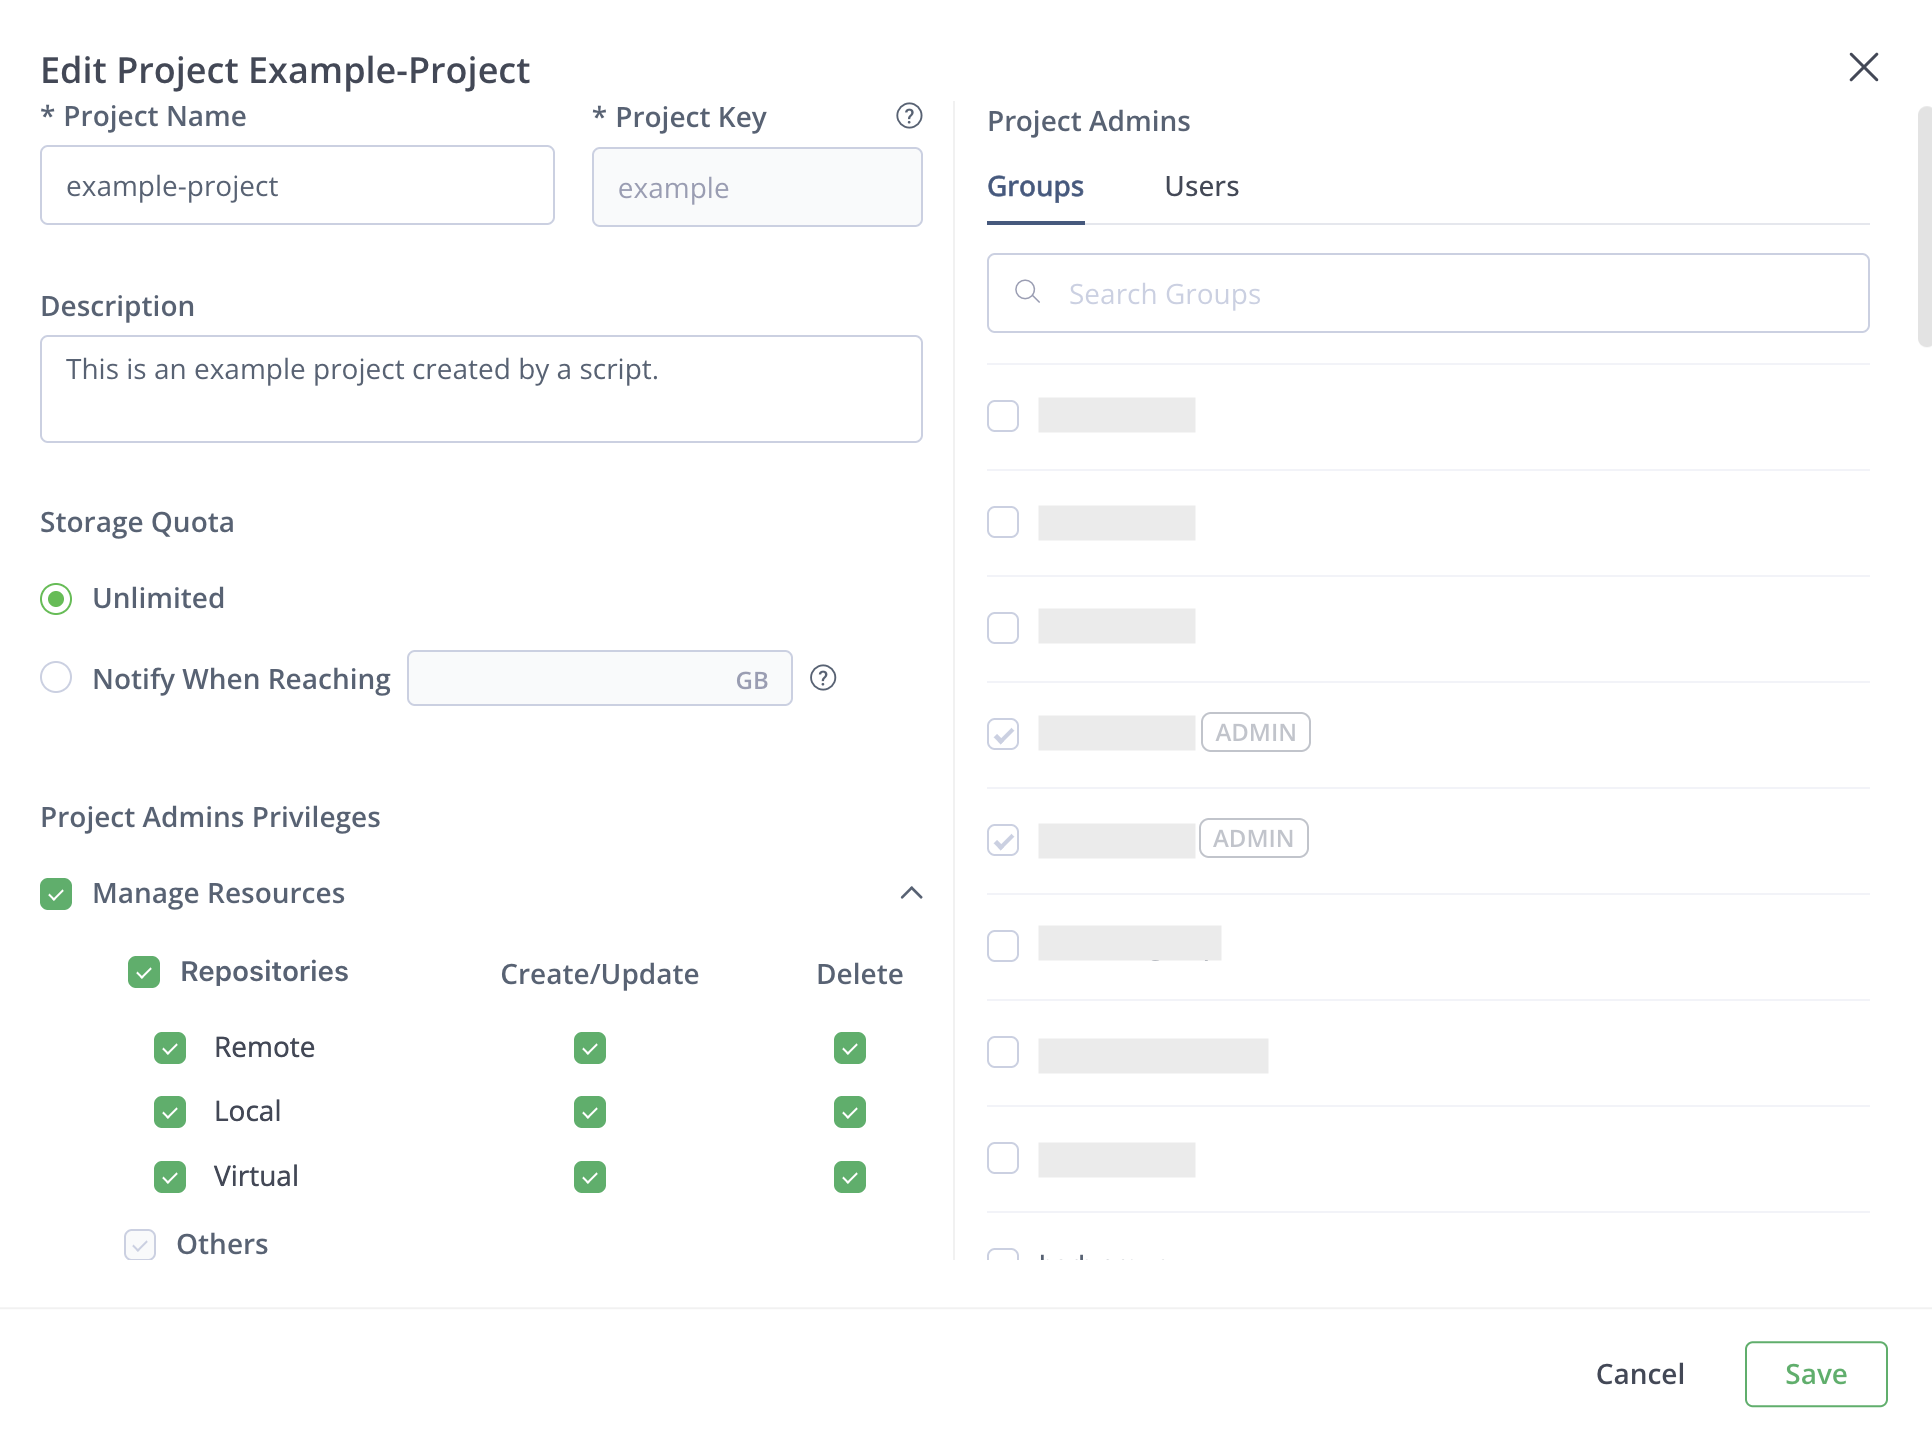
In the Configure Project tab, configure the following settings:
-
Project Name: Enter a name.
-
Project Key: Enter a unique key used to identify your Project resources. The Project Key is added as a prefix to resources created within the Project. This field is mandatory, supports 2 to 32 lowercase alphanumeric characters and hyphens, and must start with a letter. For example:
r1fact. -
Description: Enter text to help other users understand the scope of your project.
-
Storage Quota: By default the Storage Quota is Unlimited. To limit the storage quota, select Notify When Reaching and specify the storage quota in GB. This quota applies to the total virtual size of repositories assigned to the project. If the storage quota is exceeded, project users cannot deploy artifacts. A status warning message appears when 75% of the storage quota is reached. An error is generated when the storage quota is reached (100%).
-
Project Admin privileges: By default, Project Admins can Manage Resources and/or Manage Members.
Manage Remote Repositories
From Artifactory version 7.146.0, project admins can assign create/update or delete permissions for remote, local, and Virtual repositories separately.
From Artifactory version 7.134.0, project admins can grant Manage Resources permission, but prevent Admins from creating or managing remote repositories.
- Index Resources: Allows a Project Admin to select the repositories manually, builds, and release bundles to be indexed. For more information, see Indexing Resources.
-
-
In the Project Admins area, select users and groups you want to receive the Project Administrator role. Users or Groups assigned to the Platform Administrator role are tagged Admin in the Project Admins list.
-
(Optional) In the Assign Repositories tab, assign repositories to the project.
-
(Optional for Enterprise+ licenses) In the Add Destinations tab, add distribution targets (for example, Edge nodes) to which you can distribute Release Bundles from the project. For more information, see:
- For Release Bundles v1, see Distribute Release Bundles (v1)
- For Release Bundles v2, see Distribute Release Bundles (v2)
-
Click Create. Project Admins assigned to the Project can now assign users and resources to the Project. If they have Xray privileges, Project Admins can create Watches and Policies, and trigger scanning of indexed resources.
Distribution is supported for Projects starting from Artifactory version 7.104.2 and Distribution version 2.28.0.
Distribution in Projects
Distribution is supported for Projects starting from Artifactory version 7.104.2 and Distribution version 2.28.0.
Related Topics
Updated 27 days ago