How to Identify Affected Artifacts Using Impact Search
Use Case
This guide explains how to use Impact Search in Xray to identify artifacts that are affected by known vulnerabilities or contain specific software packages. Impact Search helps you quickly assess exposure across your software supply chain and prioritize remediation based on accurate, scan-backed data.
Before You Begin
Before using Impact Search, verify the following:
- Xray indexing is enabled for the repositories you want to search
- Artifacts have been scanned by Xray
- The SBOM Service is enabled and operational
This capability depends on the SBOM Service.
Self-Hosted users must enable the SBOM feature and complete the SBOM migration.
If SBOM is disabled, the API returns 403 – “SBOM is disabled”.
Step 1: Access Impact Search
- Navigate to Xray.
- Select Scans List from the main navigation.
- Click on Impact Search.
The Impact Search panel opens and is ready to accept search criteria.
Self-Managed Installations
Starting Xray 3.137.16, access Impact Search from Xray > Scans List > Impact Search.
Step 2: Search for Affected Artifacts
You can search using vulnerability or package-based criteria.
Search by Vulnerability
To find artifacts affected by a specific vulnerability:
- Enter a CVE ID or vulnerability identifier (for example,
CVE-2021-44228). - Run the search.
Xray returns all scanned artifacts affected by the specified vulnerability.
Search by Package
To find artifacts that include a specific package:
- Enter a Package Name.
- Select the corresponding Package Type (ecosystem).
- (Optional) Specify a Package Version.
- Run the search.
Important
When searching by package, both Package Name and Package Type are required.
This ensures accurate results across ecosystems where package names may overlap.
Use Structured Search Syntax
You can refine searches using structured key-value queries.
Example: Search by CVE
"CVE ID": "CVE-2021-44228"Example: Combine Multiple Criteria
"Package Name": "log4j" AND "Package Type": "maven"Using multiple criteria helps narrow results and focus on relevant artifacts.
Step 3: Review Search Results
Search results display a table of affected resources, providing visibility into where vulnerabilities or risky packages exist across your environment.
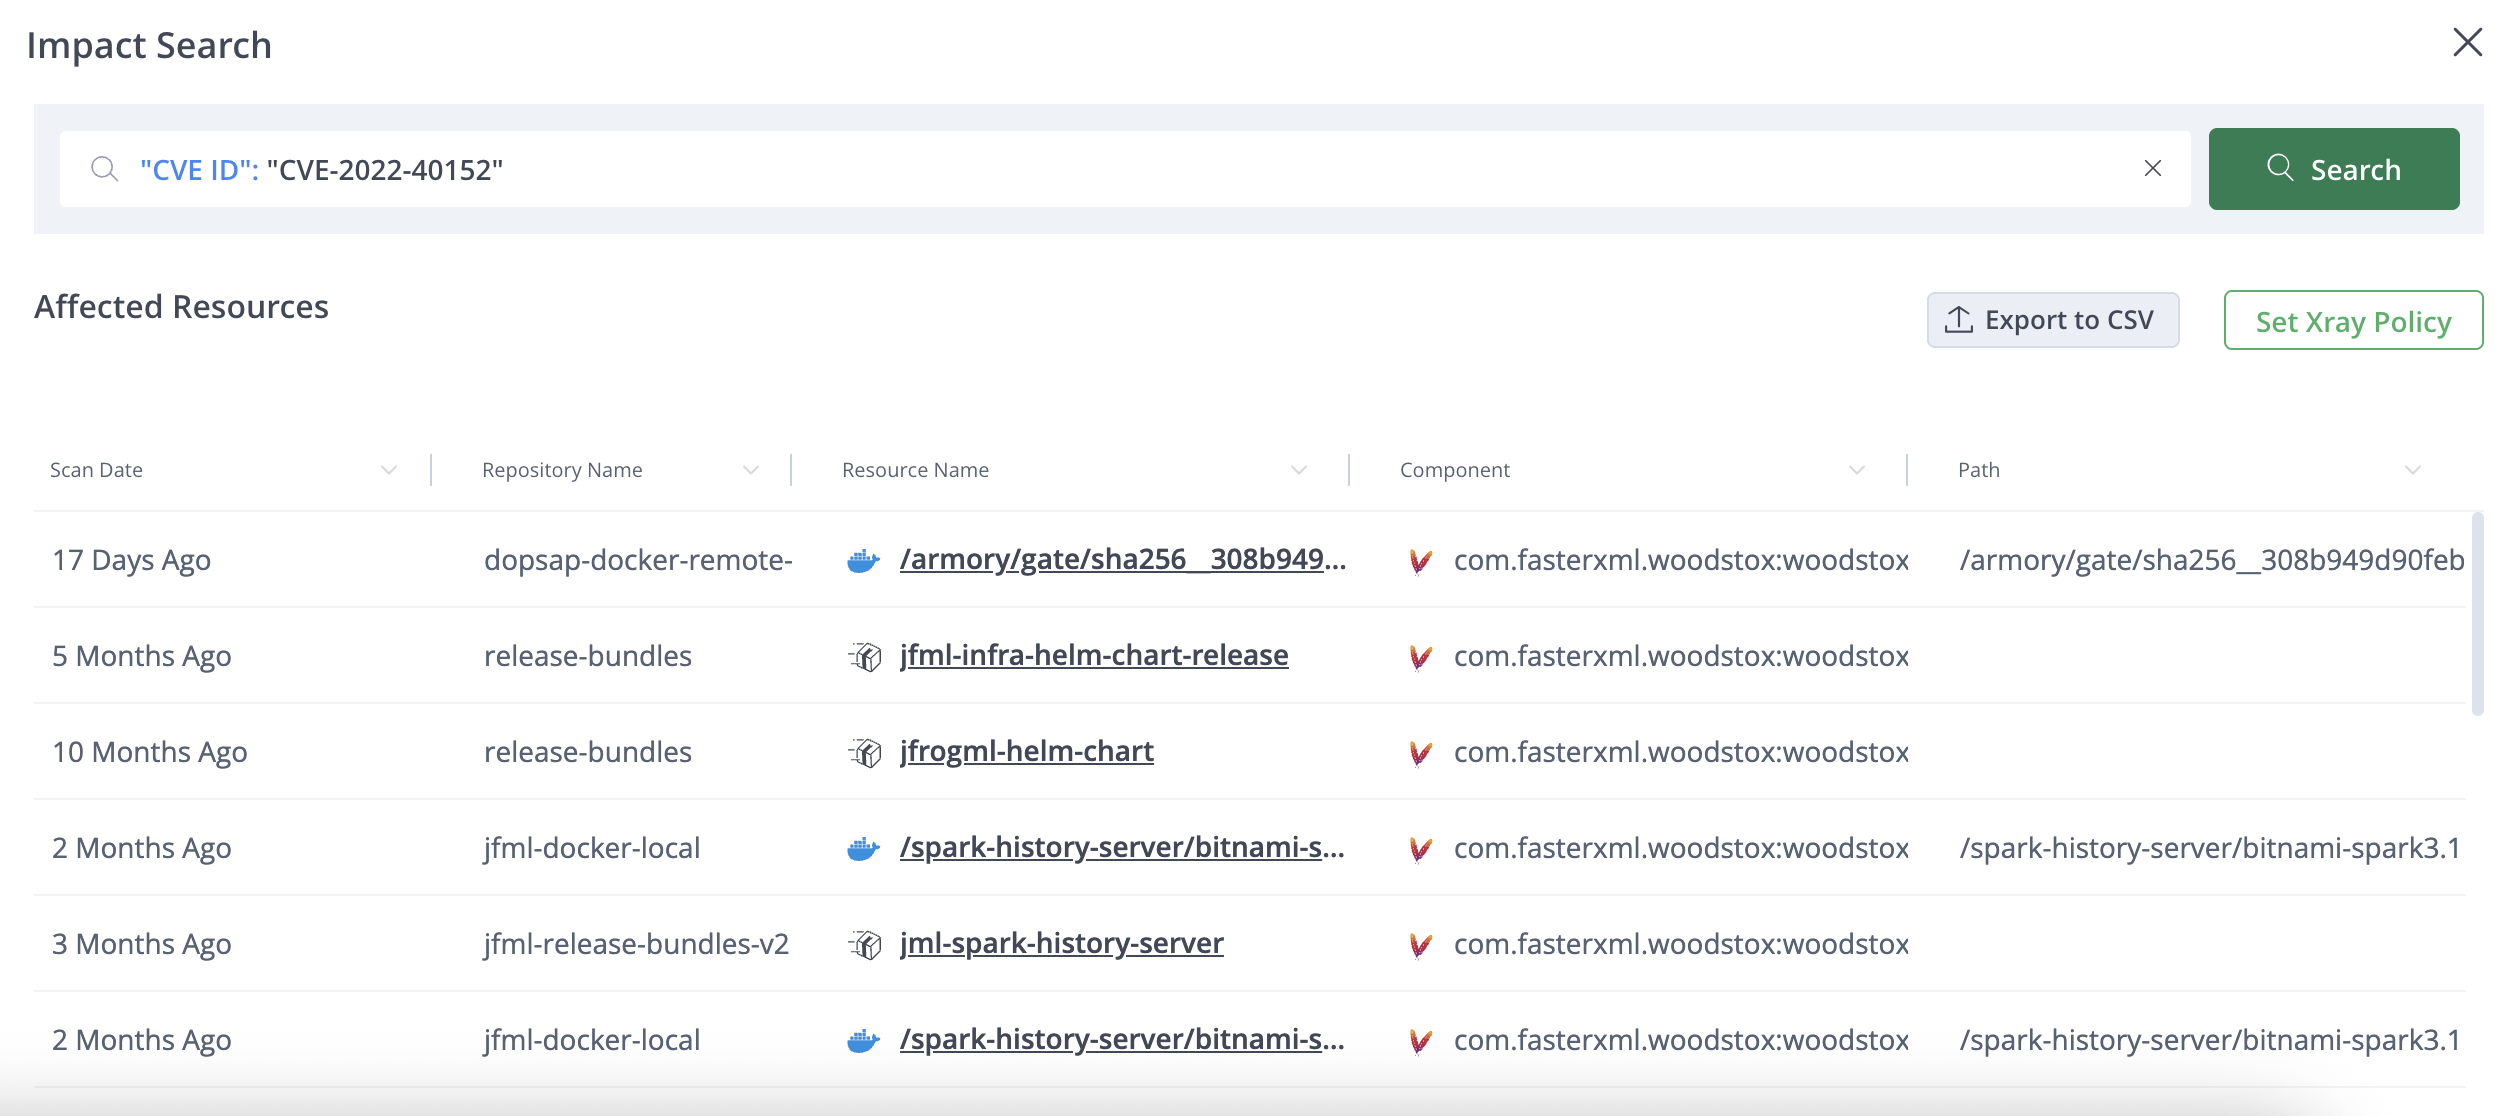
Each result includes:
- Resource name with a direct link to the scanned artifact
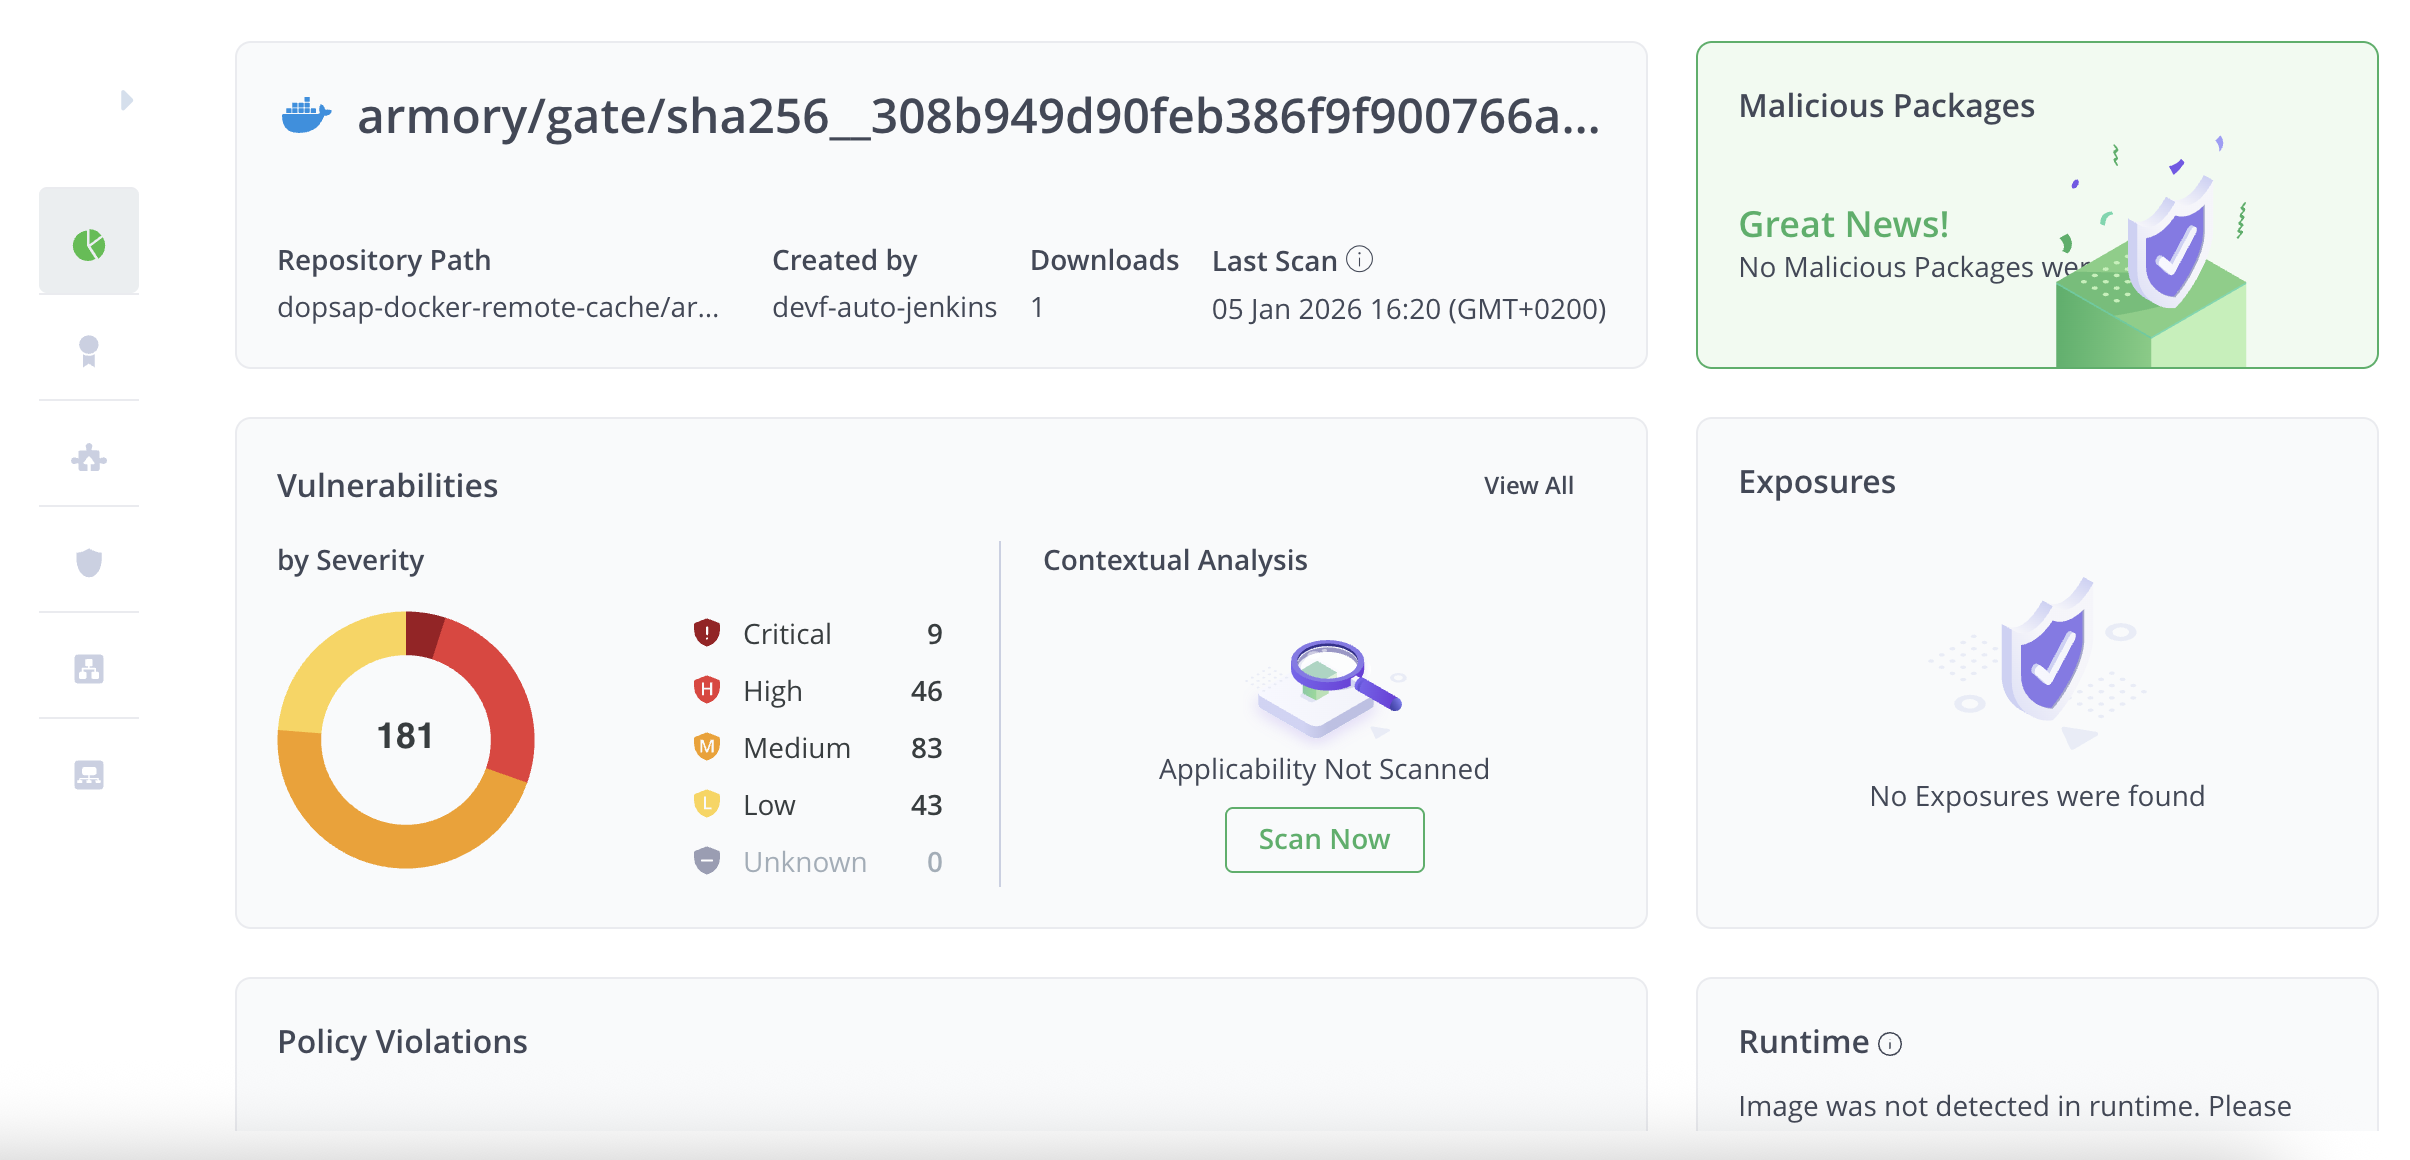
- Repository location
- Component and package details
- Artifact path
- Last Xray scan date
Use this information to understand the scope of exposure and prioritize remediation efforts.
Step 4: Take Action on Results
From the Impact Search results, you can take the following actions:
-
Export results to CSV to support offline analysis, reporting, or audits
-
Create Xray policies based on identified vulnerabilities or packages to prevent similar issues in the future

These actions help you move from impact analysis to remediation and prevention.
Updated 13 days ago