Part 2: Prepare for Curation Rollout
Install Curation (Xray service ) for Self-Managed Customers.
Before getting started, ensure you have installed Xray and Catalog services in your environment. You can find the installation guidance here:
- Xray
- Catalog
Define Permissions and Roles.
To better control and segregate responsibilities and permissions on the platform, Curation supports the same roles as Xray for the following responsibilities:
- Administer Platform: This role is typically assigned to system administrators or DevOps engineers. Individuals in this role are responsible for configuring and maintaining the Curation platform, managing repositories, and overseeing policy management.
- Manage Policies: This role suits security teams or compliance managers who require the authority to create and manage policies. They also monitor Curation coverage and usage statistics to ensure adherence to organizational standards.
- Read Policies: This role is designed for stakeholders such as developers or project managers. Individuals in this role have access to view policies and understand Curation coverage without the ability to make any changes to settings or conditions.
By establishing these distinct roles and permissions, organizations can ensure effective oversight and governance of the Curation platform.
Detailed description of roles and where to set them up
Set User Roles and Permissions
Enable Curation Product
Starting Curation requires three easy steps from here:
- Activate the service
- Connect package types or single repositories
- Create policies to protect your organization
To start, we’ll go ahead and navigate in the Platform UI to the Administration Tab → Curation Settings.
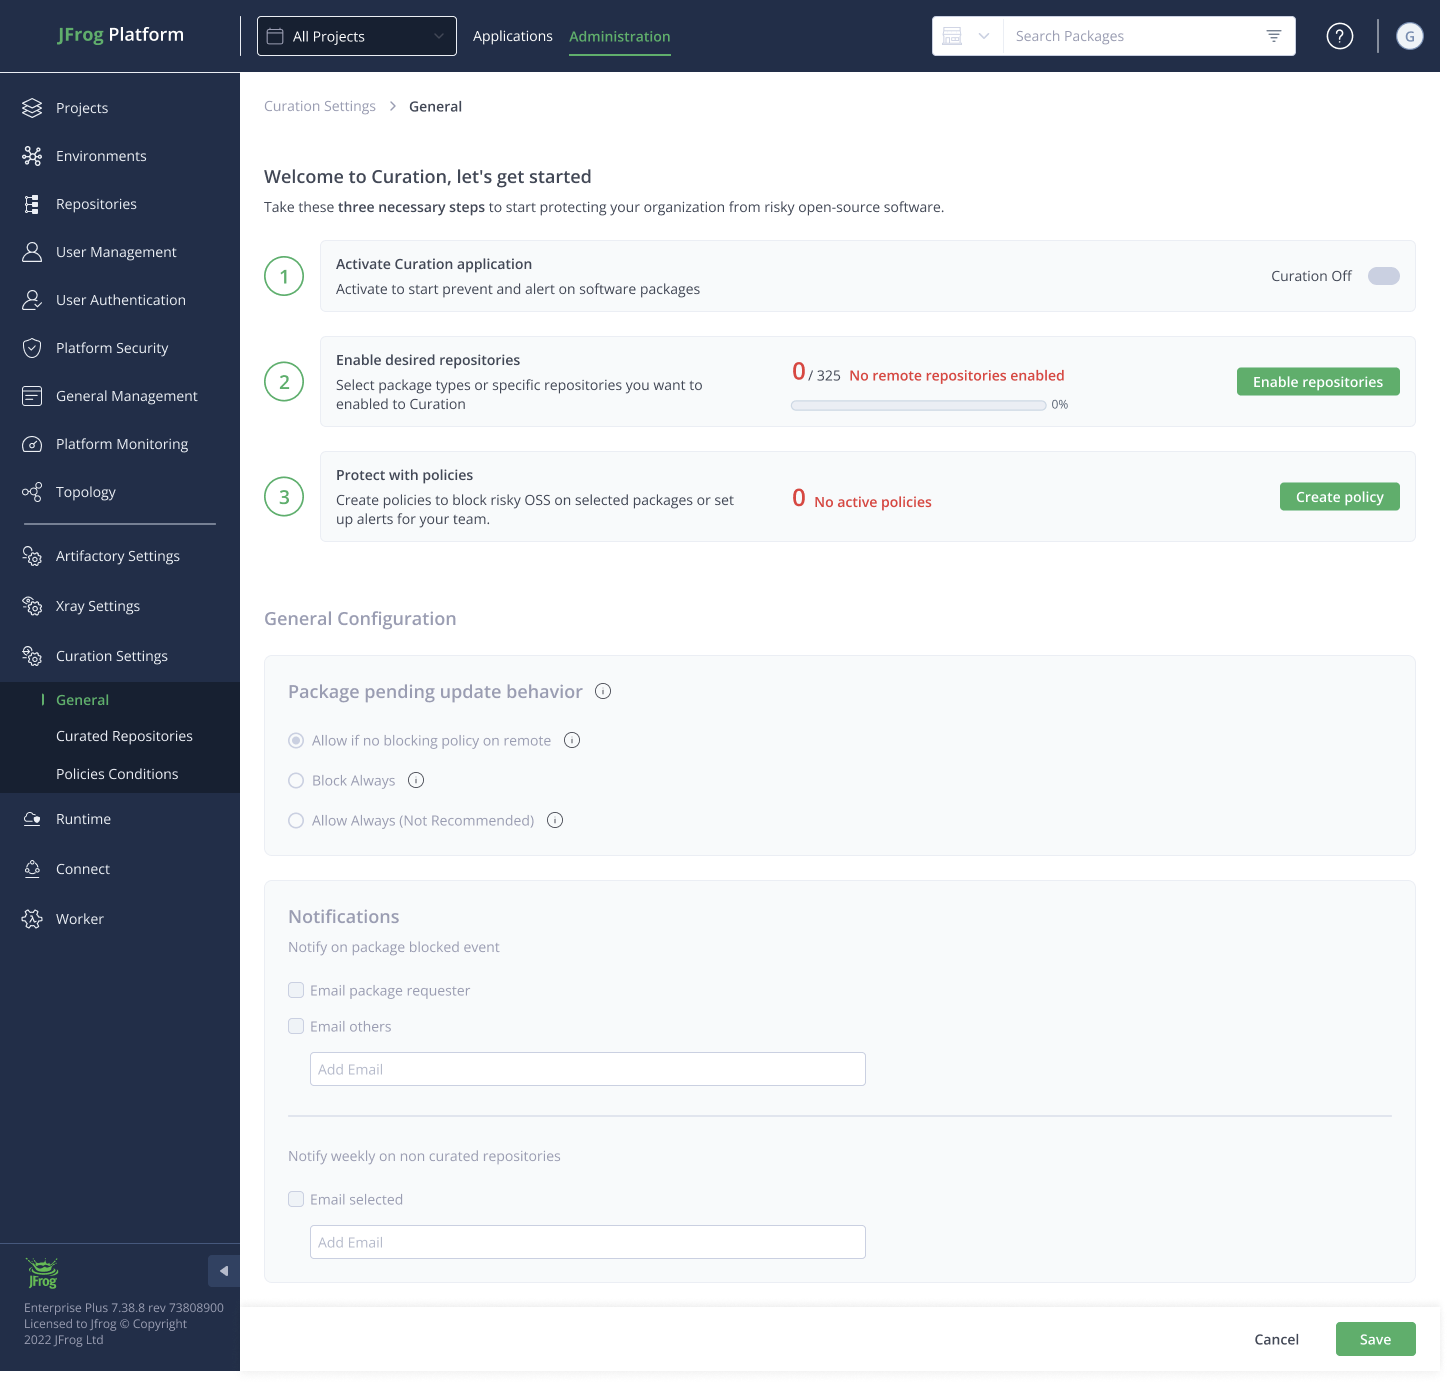
This is how it should look at the end of the process:

Important: Package Pending Update settings **
When configuring settings in Curation for package management, there may be instances where the Catalog cannot find a package. Please note that it can take up to 4 hours for the Catalog to update its database and return an answer the next time the package is downloaded. In these scenarios, your organization can choose from the following options for handling access to packages that are not found:

-
Allow if No Blocking Policy on Remote :
- Description: This setting permits access to a package only if no blocking policies exist for remote repositories.
- Implication: This option helps maintain some level of security while allowing flexibility for packages that might not have been previously identified as risky.
-
Block Always:
- Description: This setting completely restricts access to any package that the Catalog cannot find, regardless of whether there are existing policies in place.
- Implication: Selecting this option enhances security by preventing access to unverified packages but may hinder the development process.
-
Allow Always (Not Recommended) :
- Description: This setting allows access to all packages, even if the Catalog cannot find them or the package is unverified.
- Implication: While it provides maximum flexibility, this option is not recommended due to significant security risks.
Important: It is strongly recommended that new clients testing the system set the Allow if No Blocking Policy to Remote.
Notify on Package Blocked Event
This setting sends notifications whenever a package download is blocked due to policy violations or other issues.
- Email Package Requester: This option ensures that the individual who requested the package receives an email notification informing them of the block and the reason behind it.
- Email Others: This setting allows additional stakeholders or team members to receive email notifications about the blocked package event, ensuring broader awareness within the team or organization.
When to move on
Once preparation is complete, you are ready to begin hands-on enforcement with minimal risk.
Proceed to Part 3: Block Malicious Packages
Updated about 1 month ago