Migrate to Projects
Use the Projects Migration wizard to move from legacy global permission targets to the JFrog Projects model.
The JFrog Project Migration Tool is a step-by-step wizard that automates the transition of existing repositories and access controls into a unified project structure. The tool maps legacy user actions directly to the resources they use and converts them into project-based role structures. It automatically designs a recommended target repository structure, combines local and remote repositories into Virtual Repositories, and provisions the new Project container and configurations without interrupting existing storage or breaking existing CI/CD pipelines.
For background on migration strategy and brownfield considerations, see Projects Migration Best Practices.
Note
Projects Migration is available as a beta feature. To enable it for your environment, contact JFrog Support.
Prerequisites
To use Project migration, make sure you have:
- Platform Administrator role.
Note
Projects Migration is available to all customers. The automated migration is primarily intended for Enterprise customers that have a large number of permission targets to migrate to project roles.
Create a New Migration
To migrate to Projects:
-
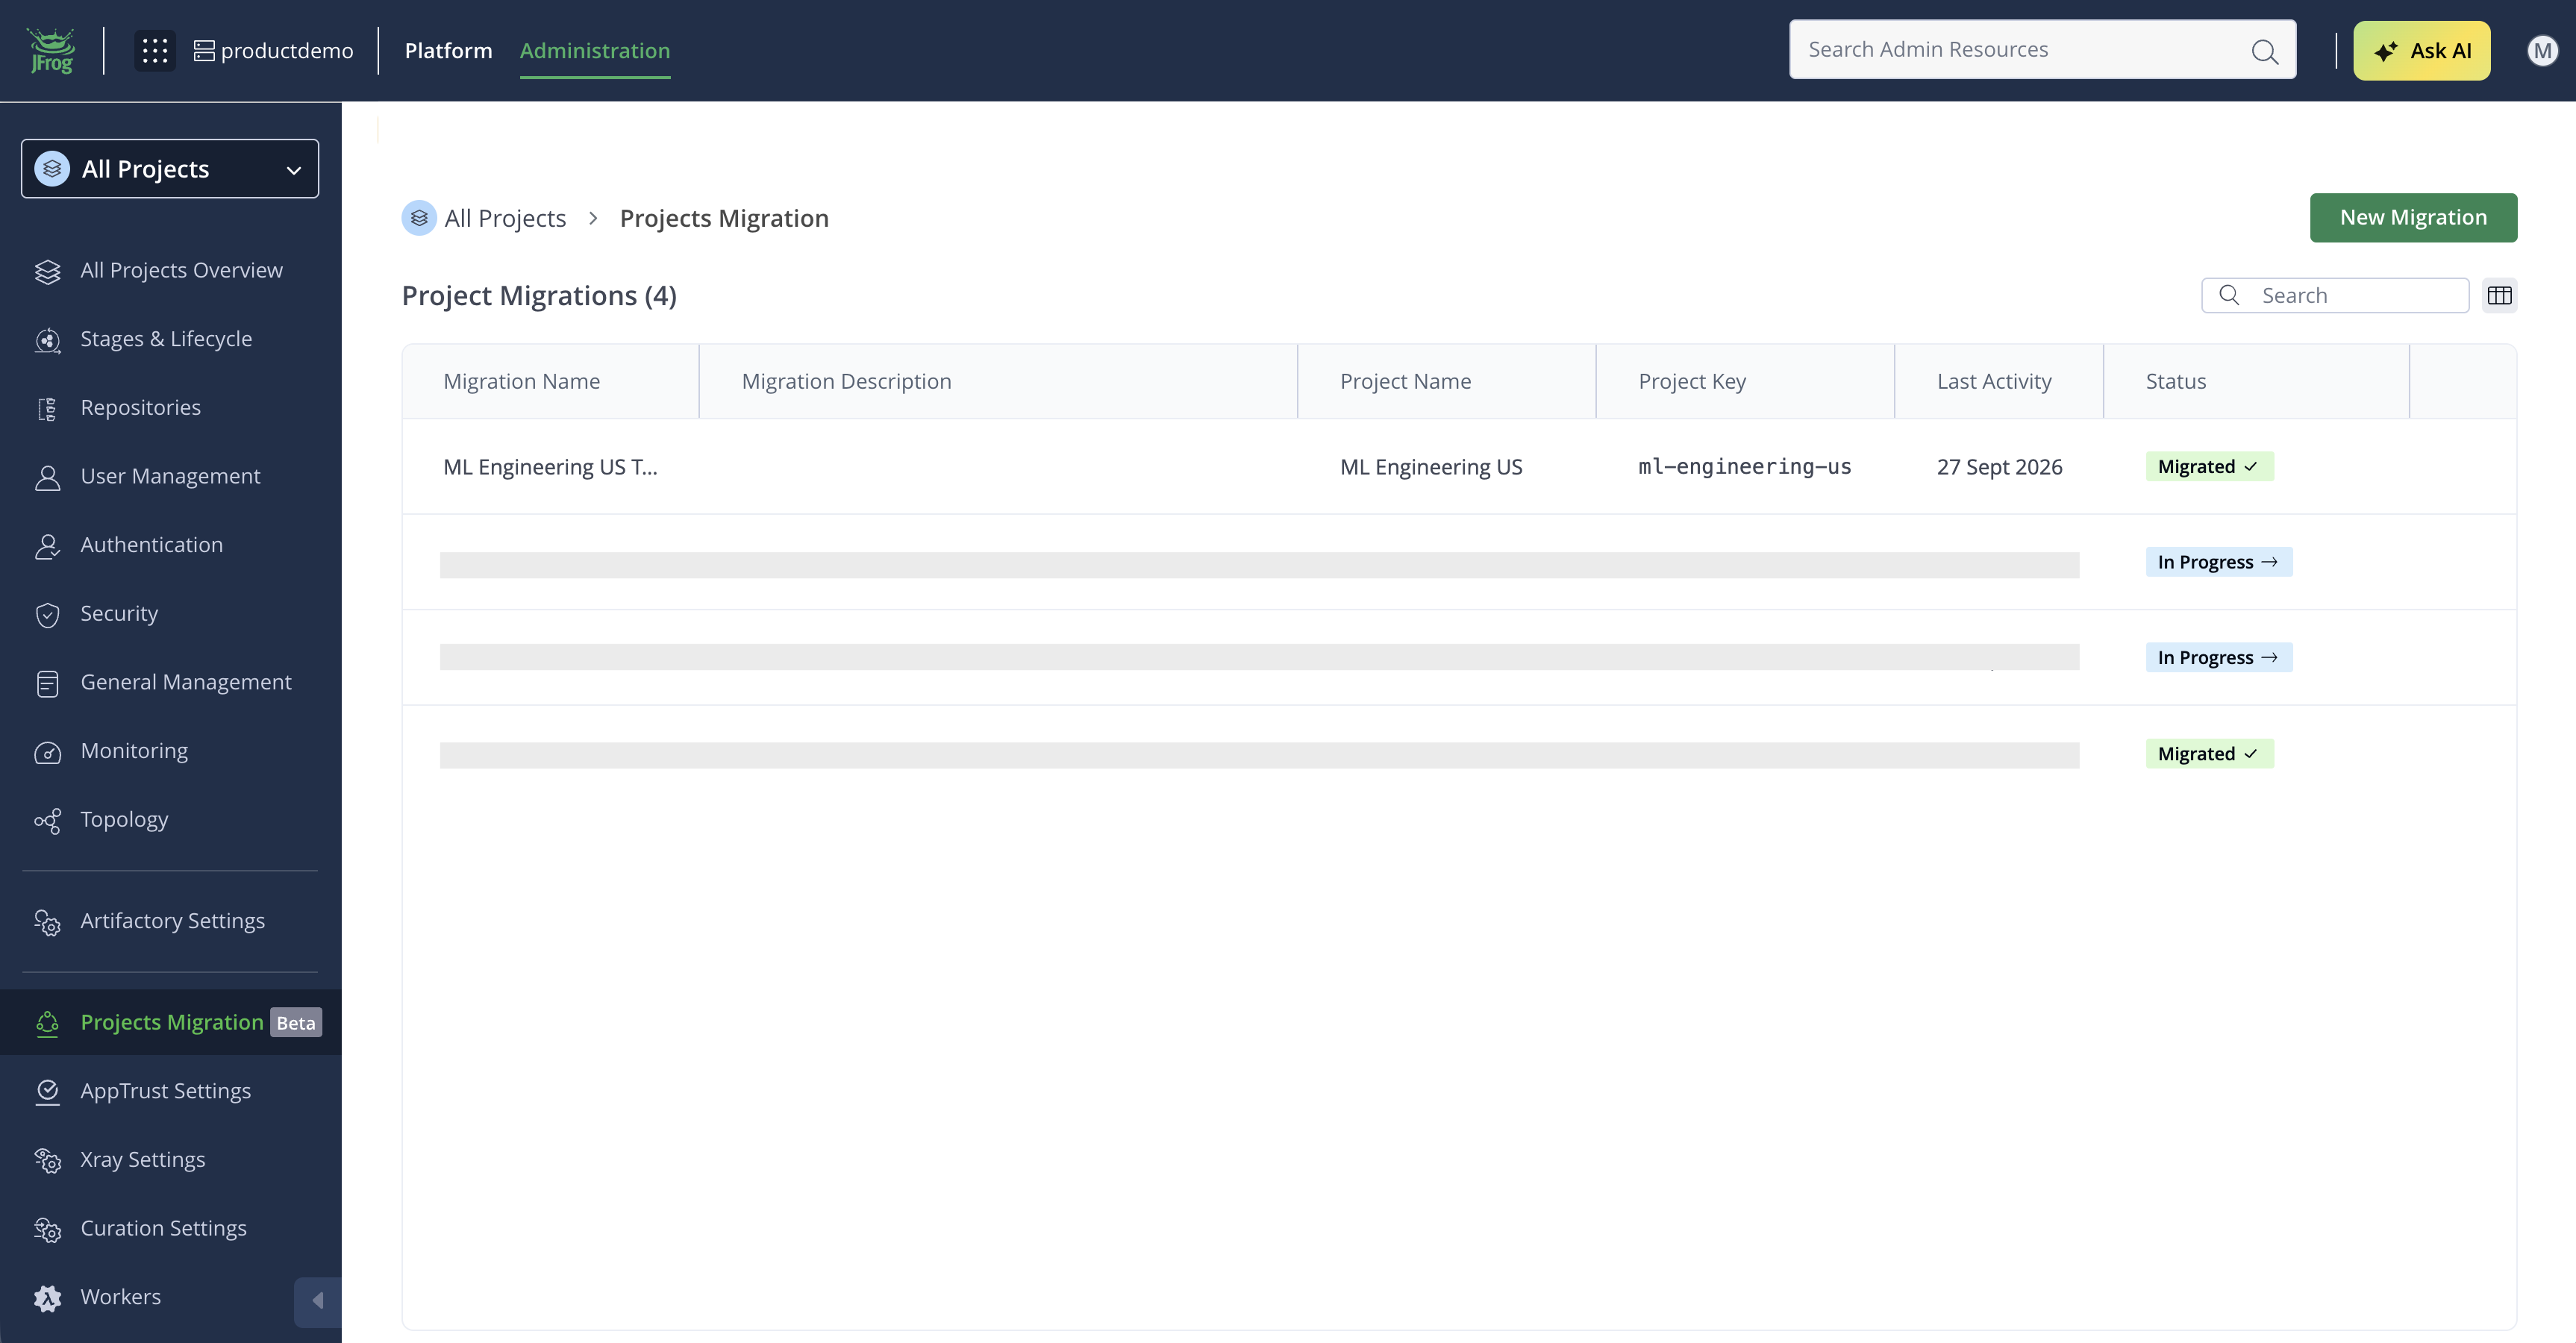
In the Administration module, go to Projects Migration and click New Migration.
-
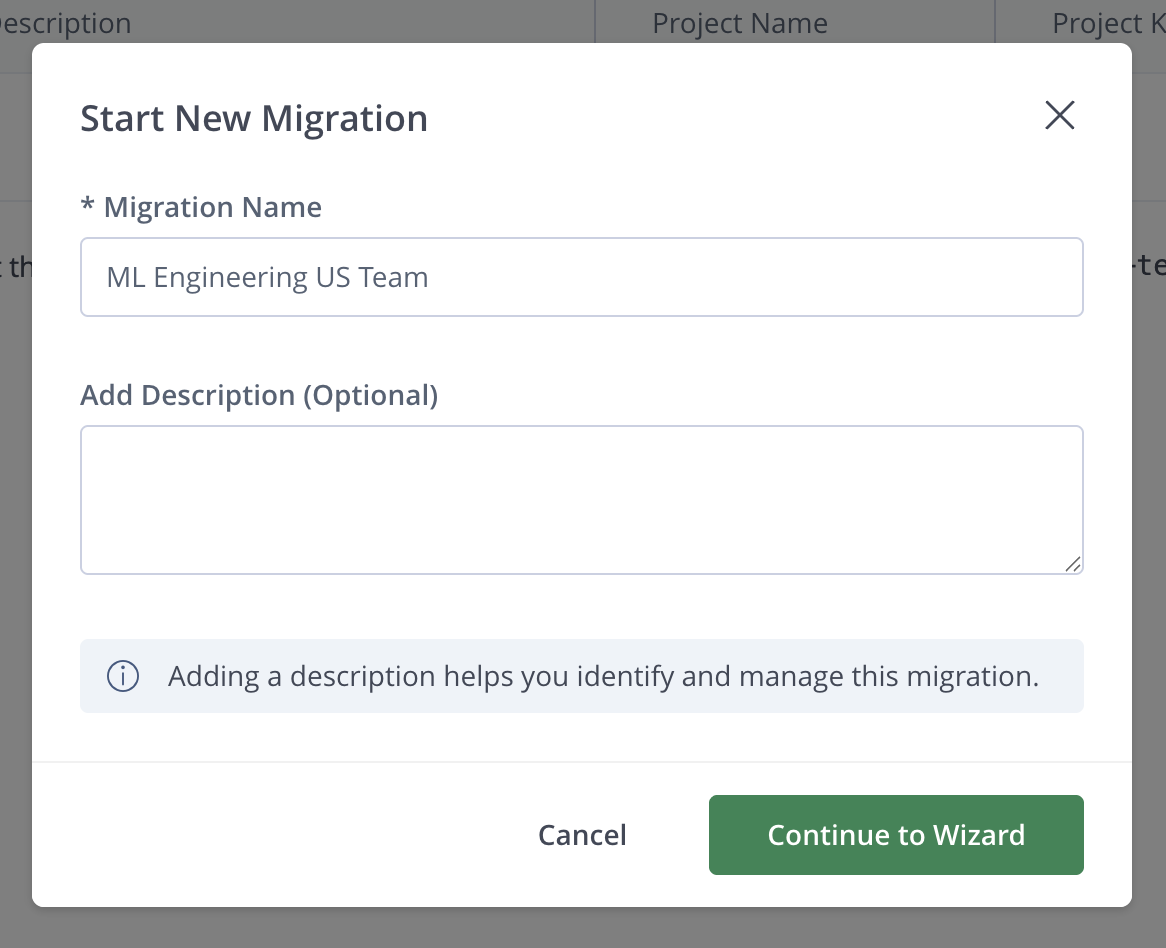
In the Migration Name field, enter a name for the migration and a description to help you identify it, then click Continue to Wizard.
-
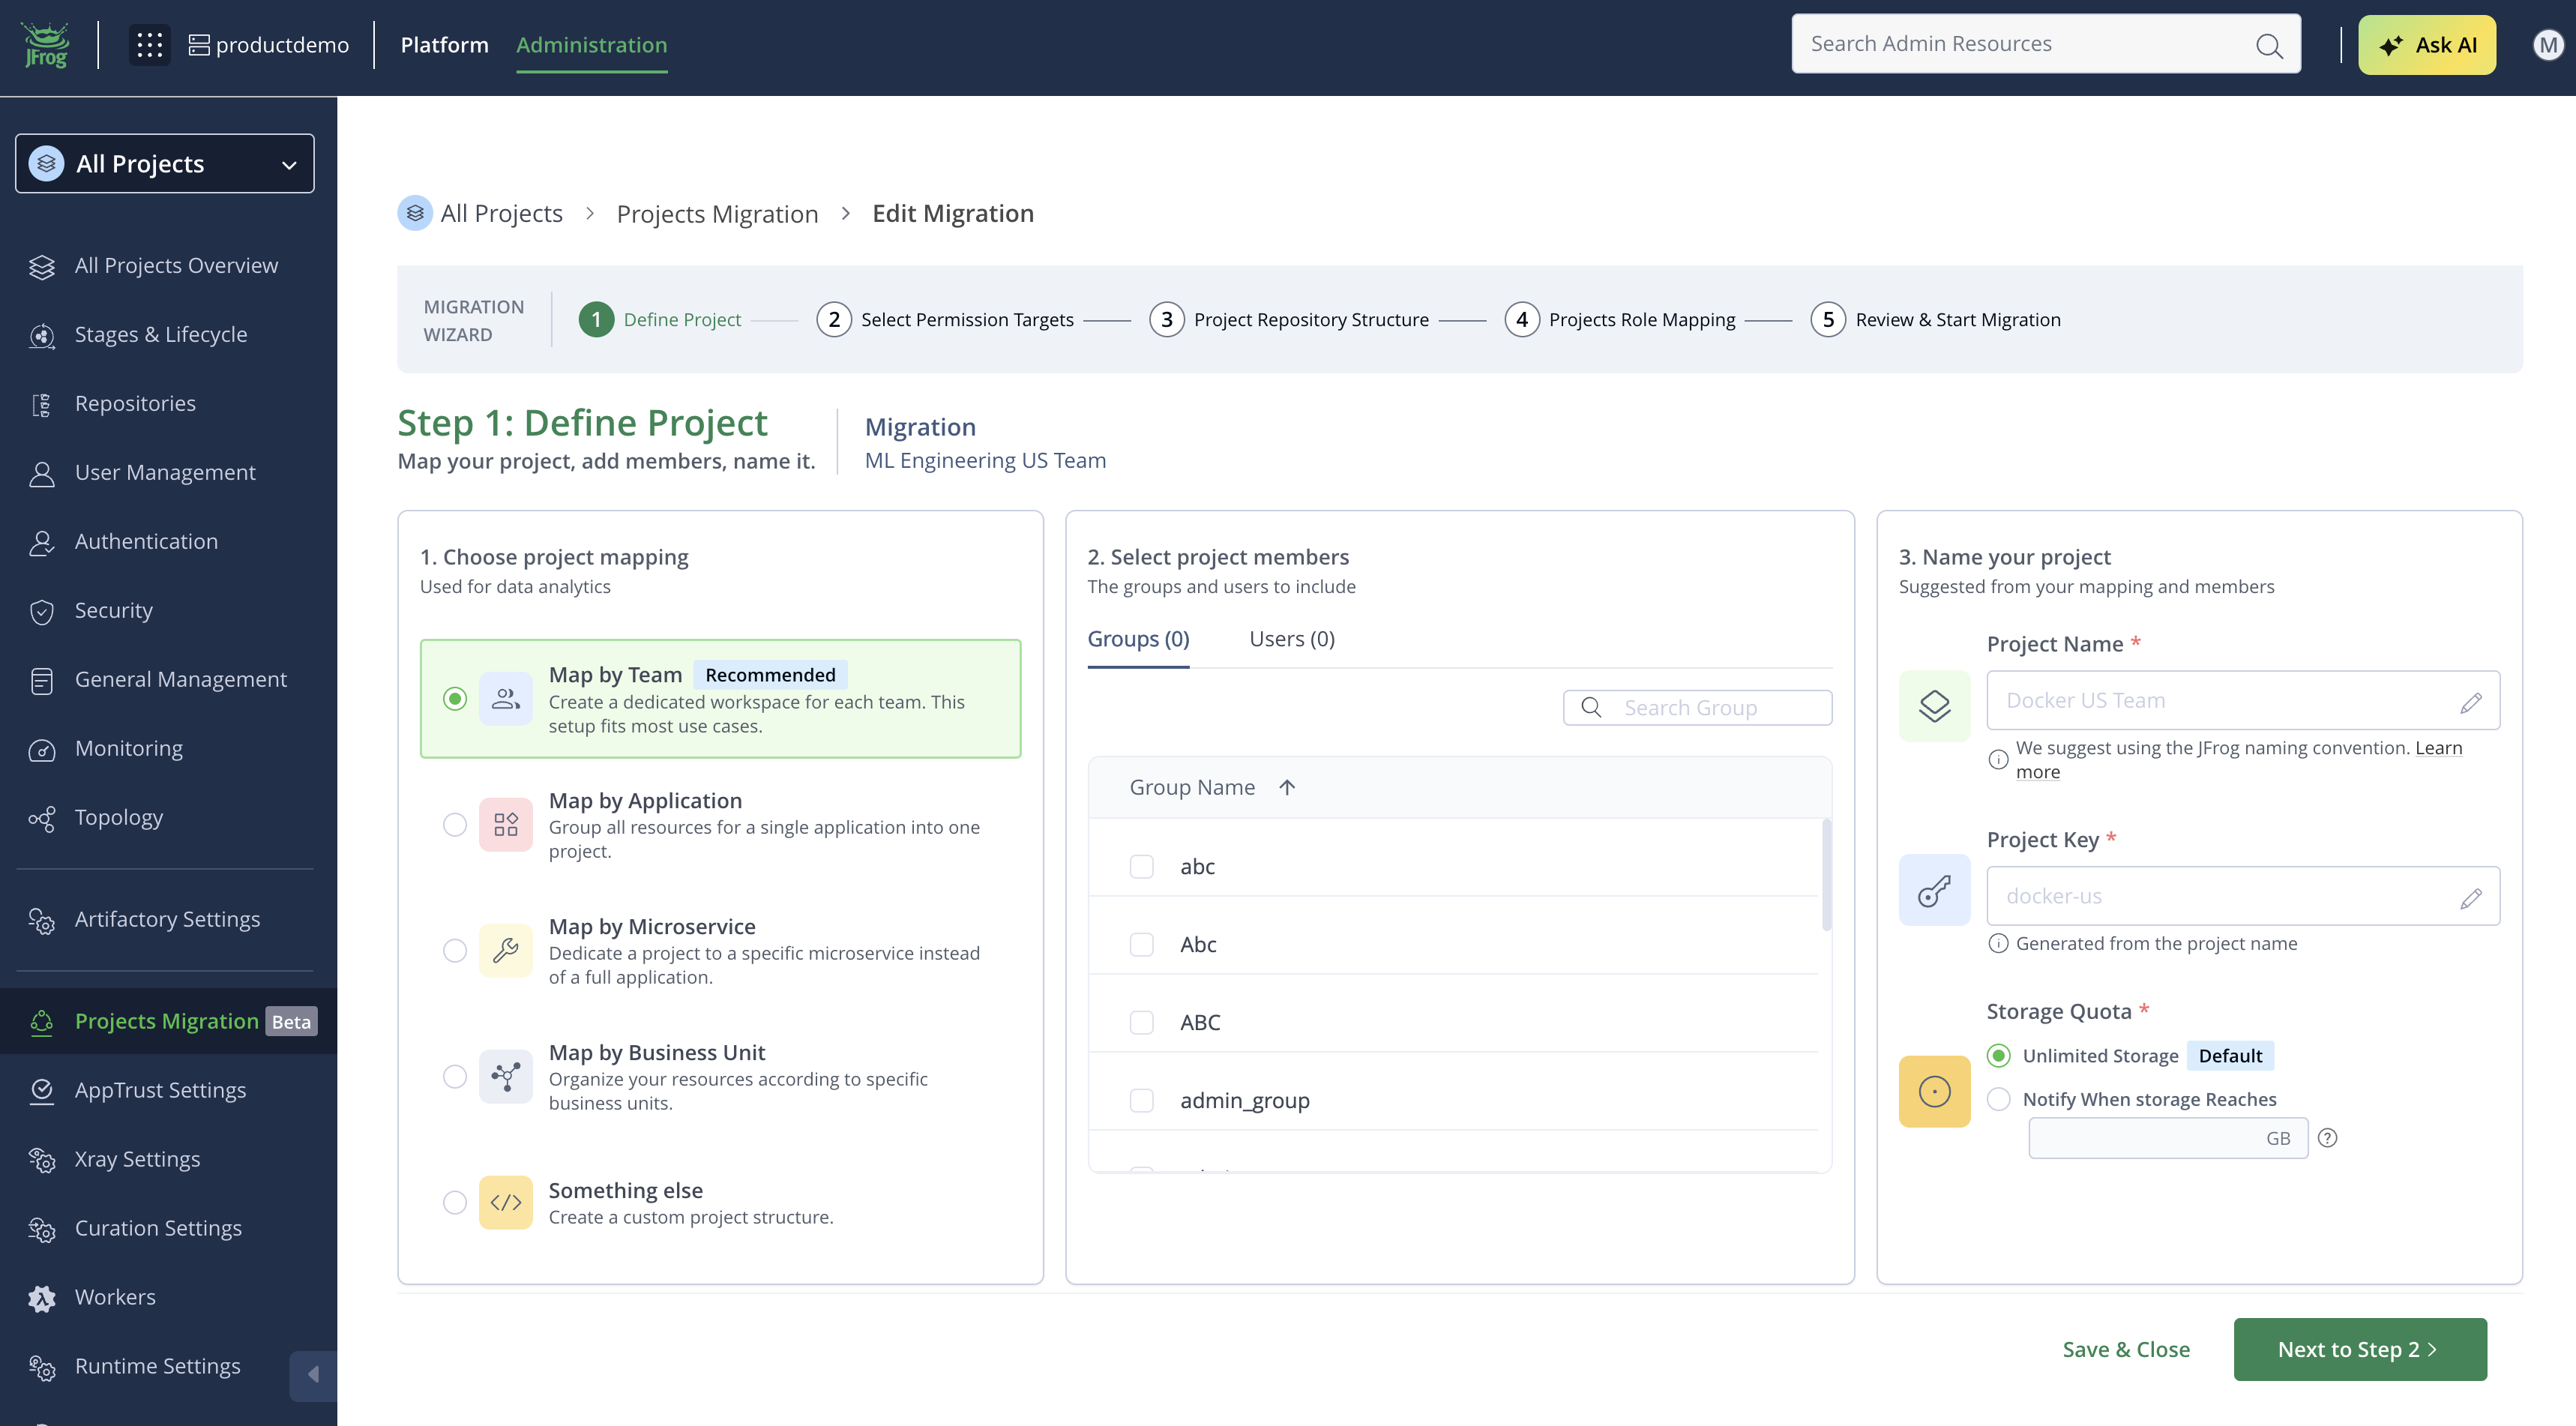
In Step 1: Define Project, select your preferences for the following fields. For more information and best practices, see Defining the Project Entity.
When you are done, click Next to Step 2 >.
-
For 1. Choose project mapping, select how projects are divided in your organization: whether you have a project per team, per application, or any other division. This helps you decide which users and groups should be assigned to the project in the migration process.
Note
Make the architectural design decision on the right project mapping for your organization before starting the migration process, to ensure the mapping is aligned with your business structure and requirements. For more information, see Projects Best Practices.
-
For 2. Select project members, select the checkboxes next to the groups and users you want to include in your project. Use the search bar to find a specific user or group.
-
For 3. Name your project, Enter a Project Name, Project Key, and Project storage quota.
Description Field name Example The name of the project, identifying its purpose and mirroring the mapping. Note the project key limitations: The characters :|?<>"*/@are not allowed.Project Name ML Engineering USA unique identifier for the project. Project Key ml-eng-usThe maximum storage allocated to the project. Note that this will not restrict your storage, and only send notifications when getting near the quota. Storage Quota 50 GB
-
-
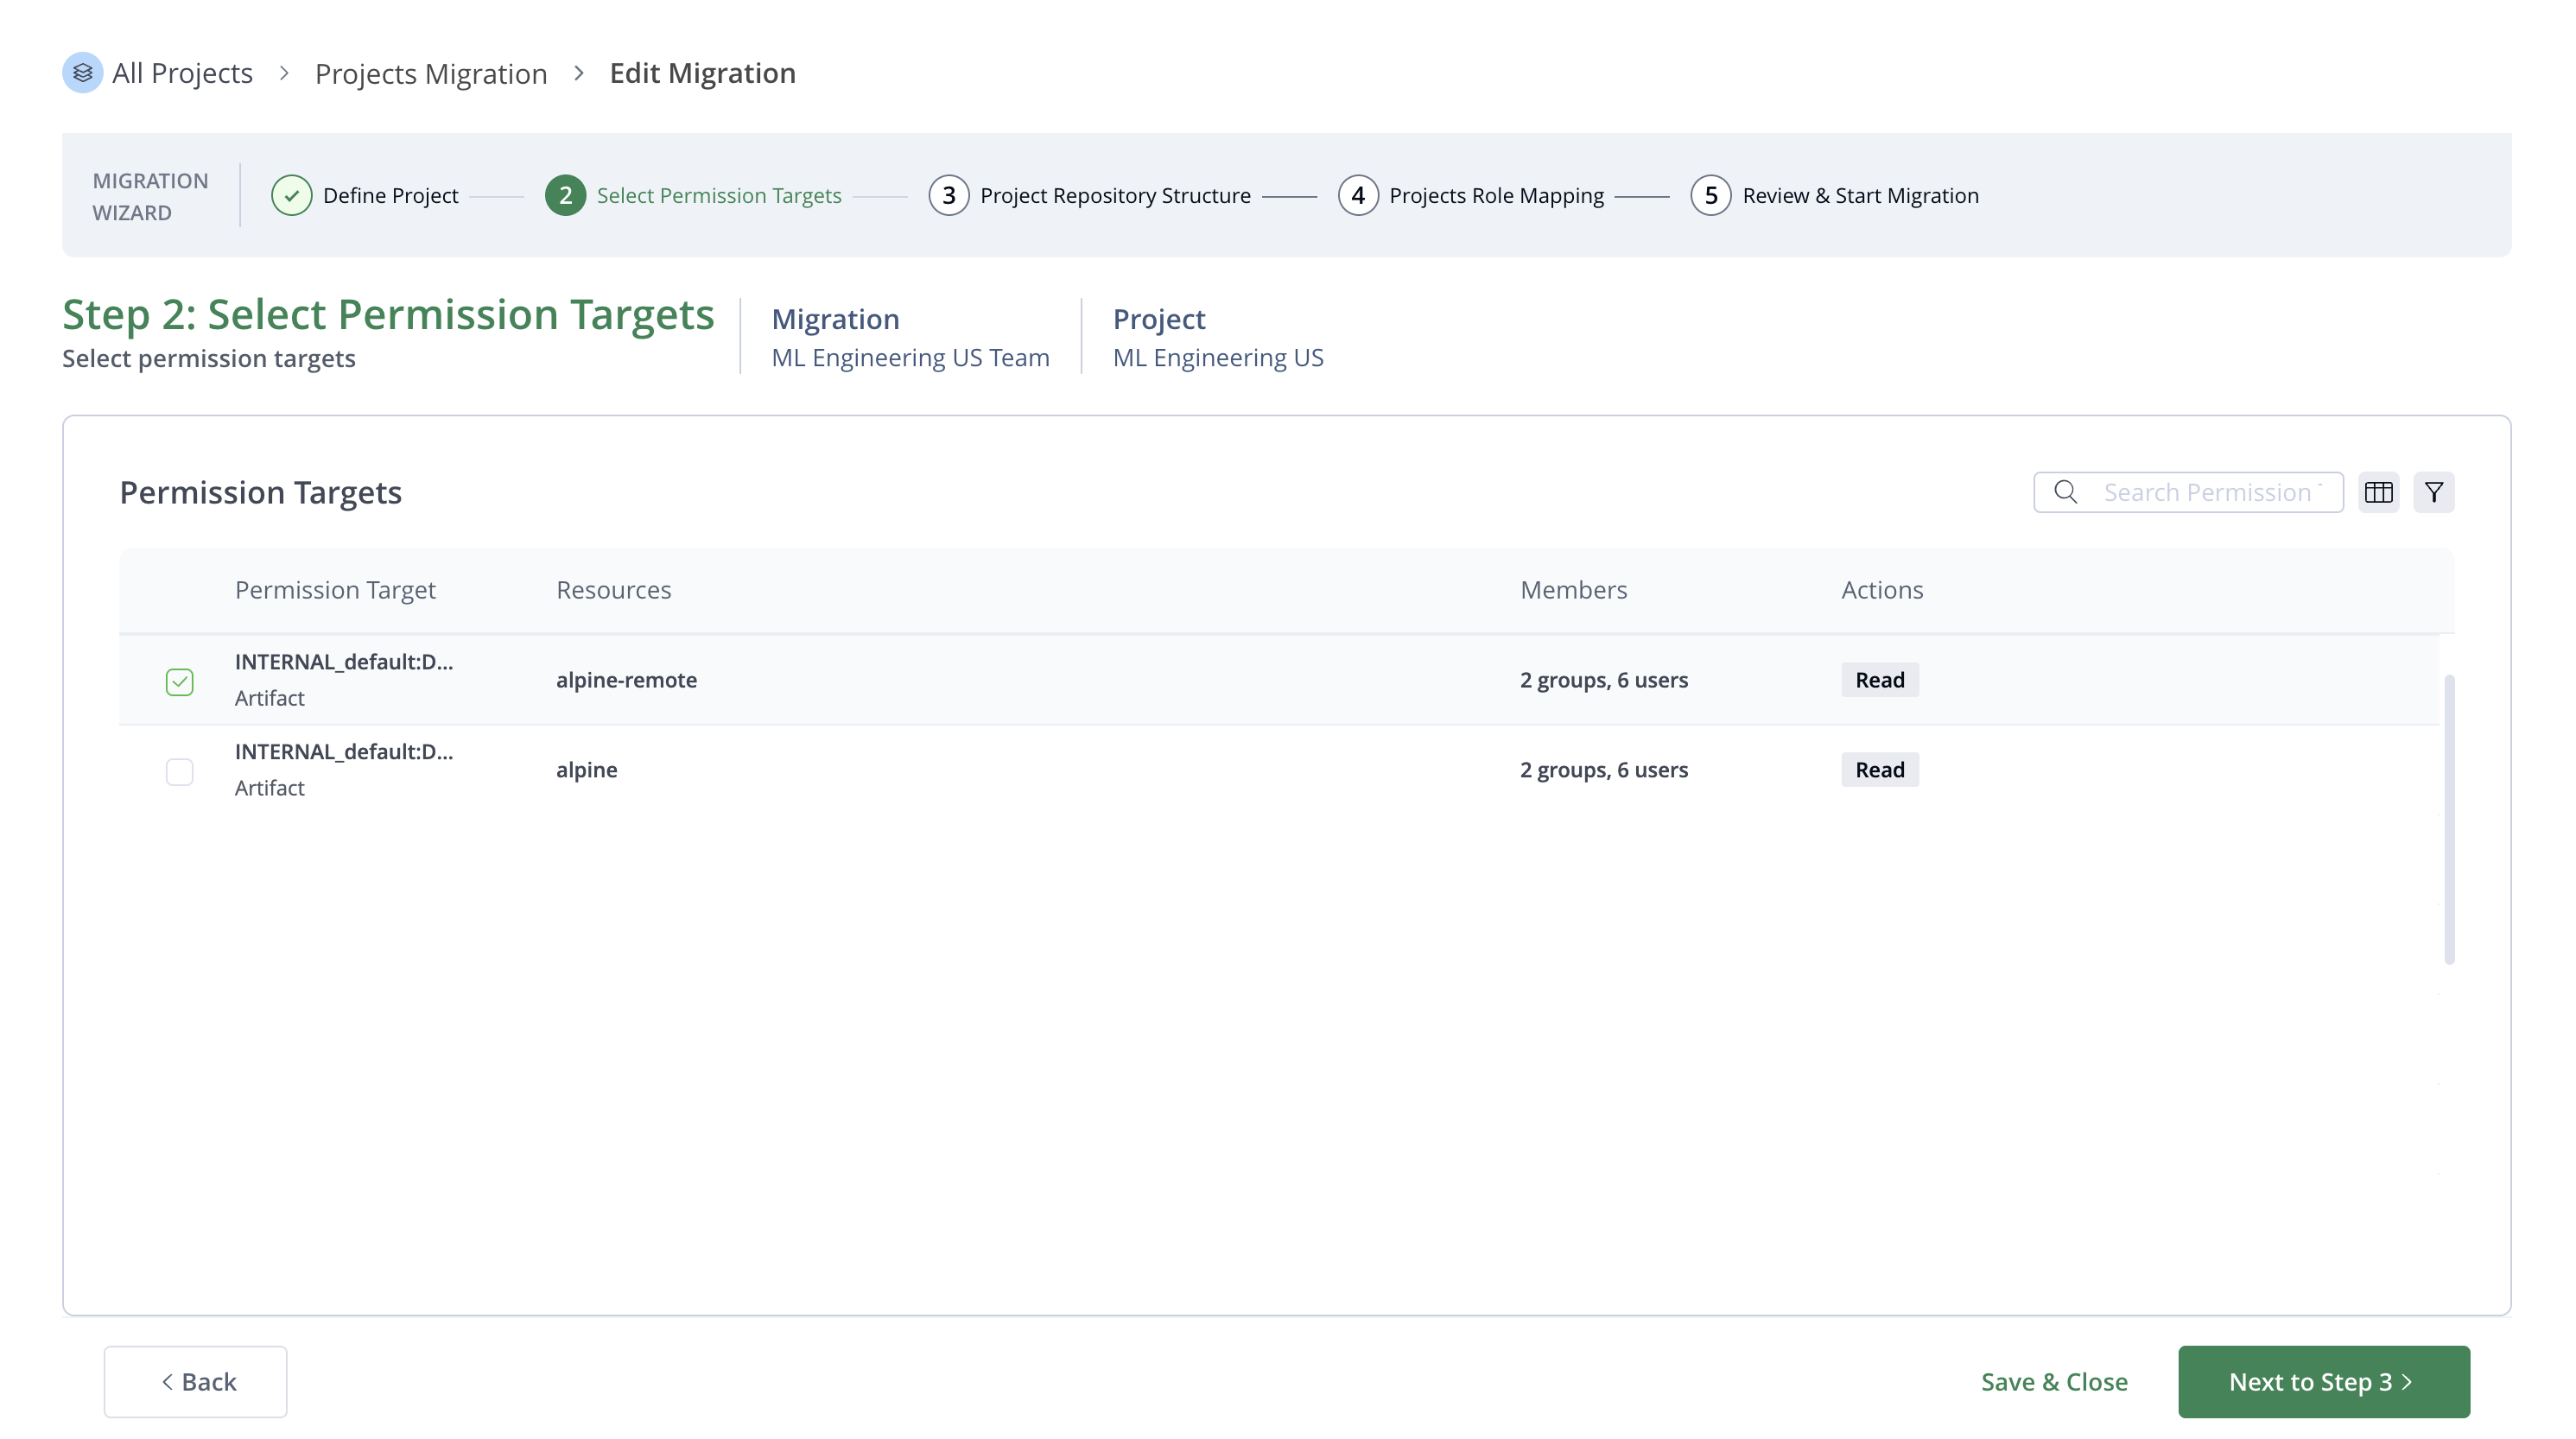
In Step 2: Select Permission Targets, select the checkbox for the existing permission targets from your environment that you want to use in your new project. The list shows the permission targets that the users and groups you selected in Step 1 are currently assigned to, so you can see which permission targets need to be mapped to the project. Use the search bar to find a specific permission target, or filter by the user or group that has that permission target applied. When you are done, click Next to Step 3 >.
Note
Any Local and Any Remote permission targets are not mapped to a project automatically, and must be handled manually. By definition, these permission targets do not provide the resource isolation that projects are designed to enforce, so they cannot be mapped to a specific project without potentially changing your existing access model.
-
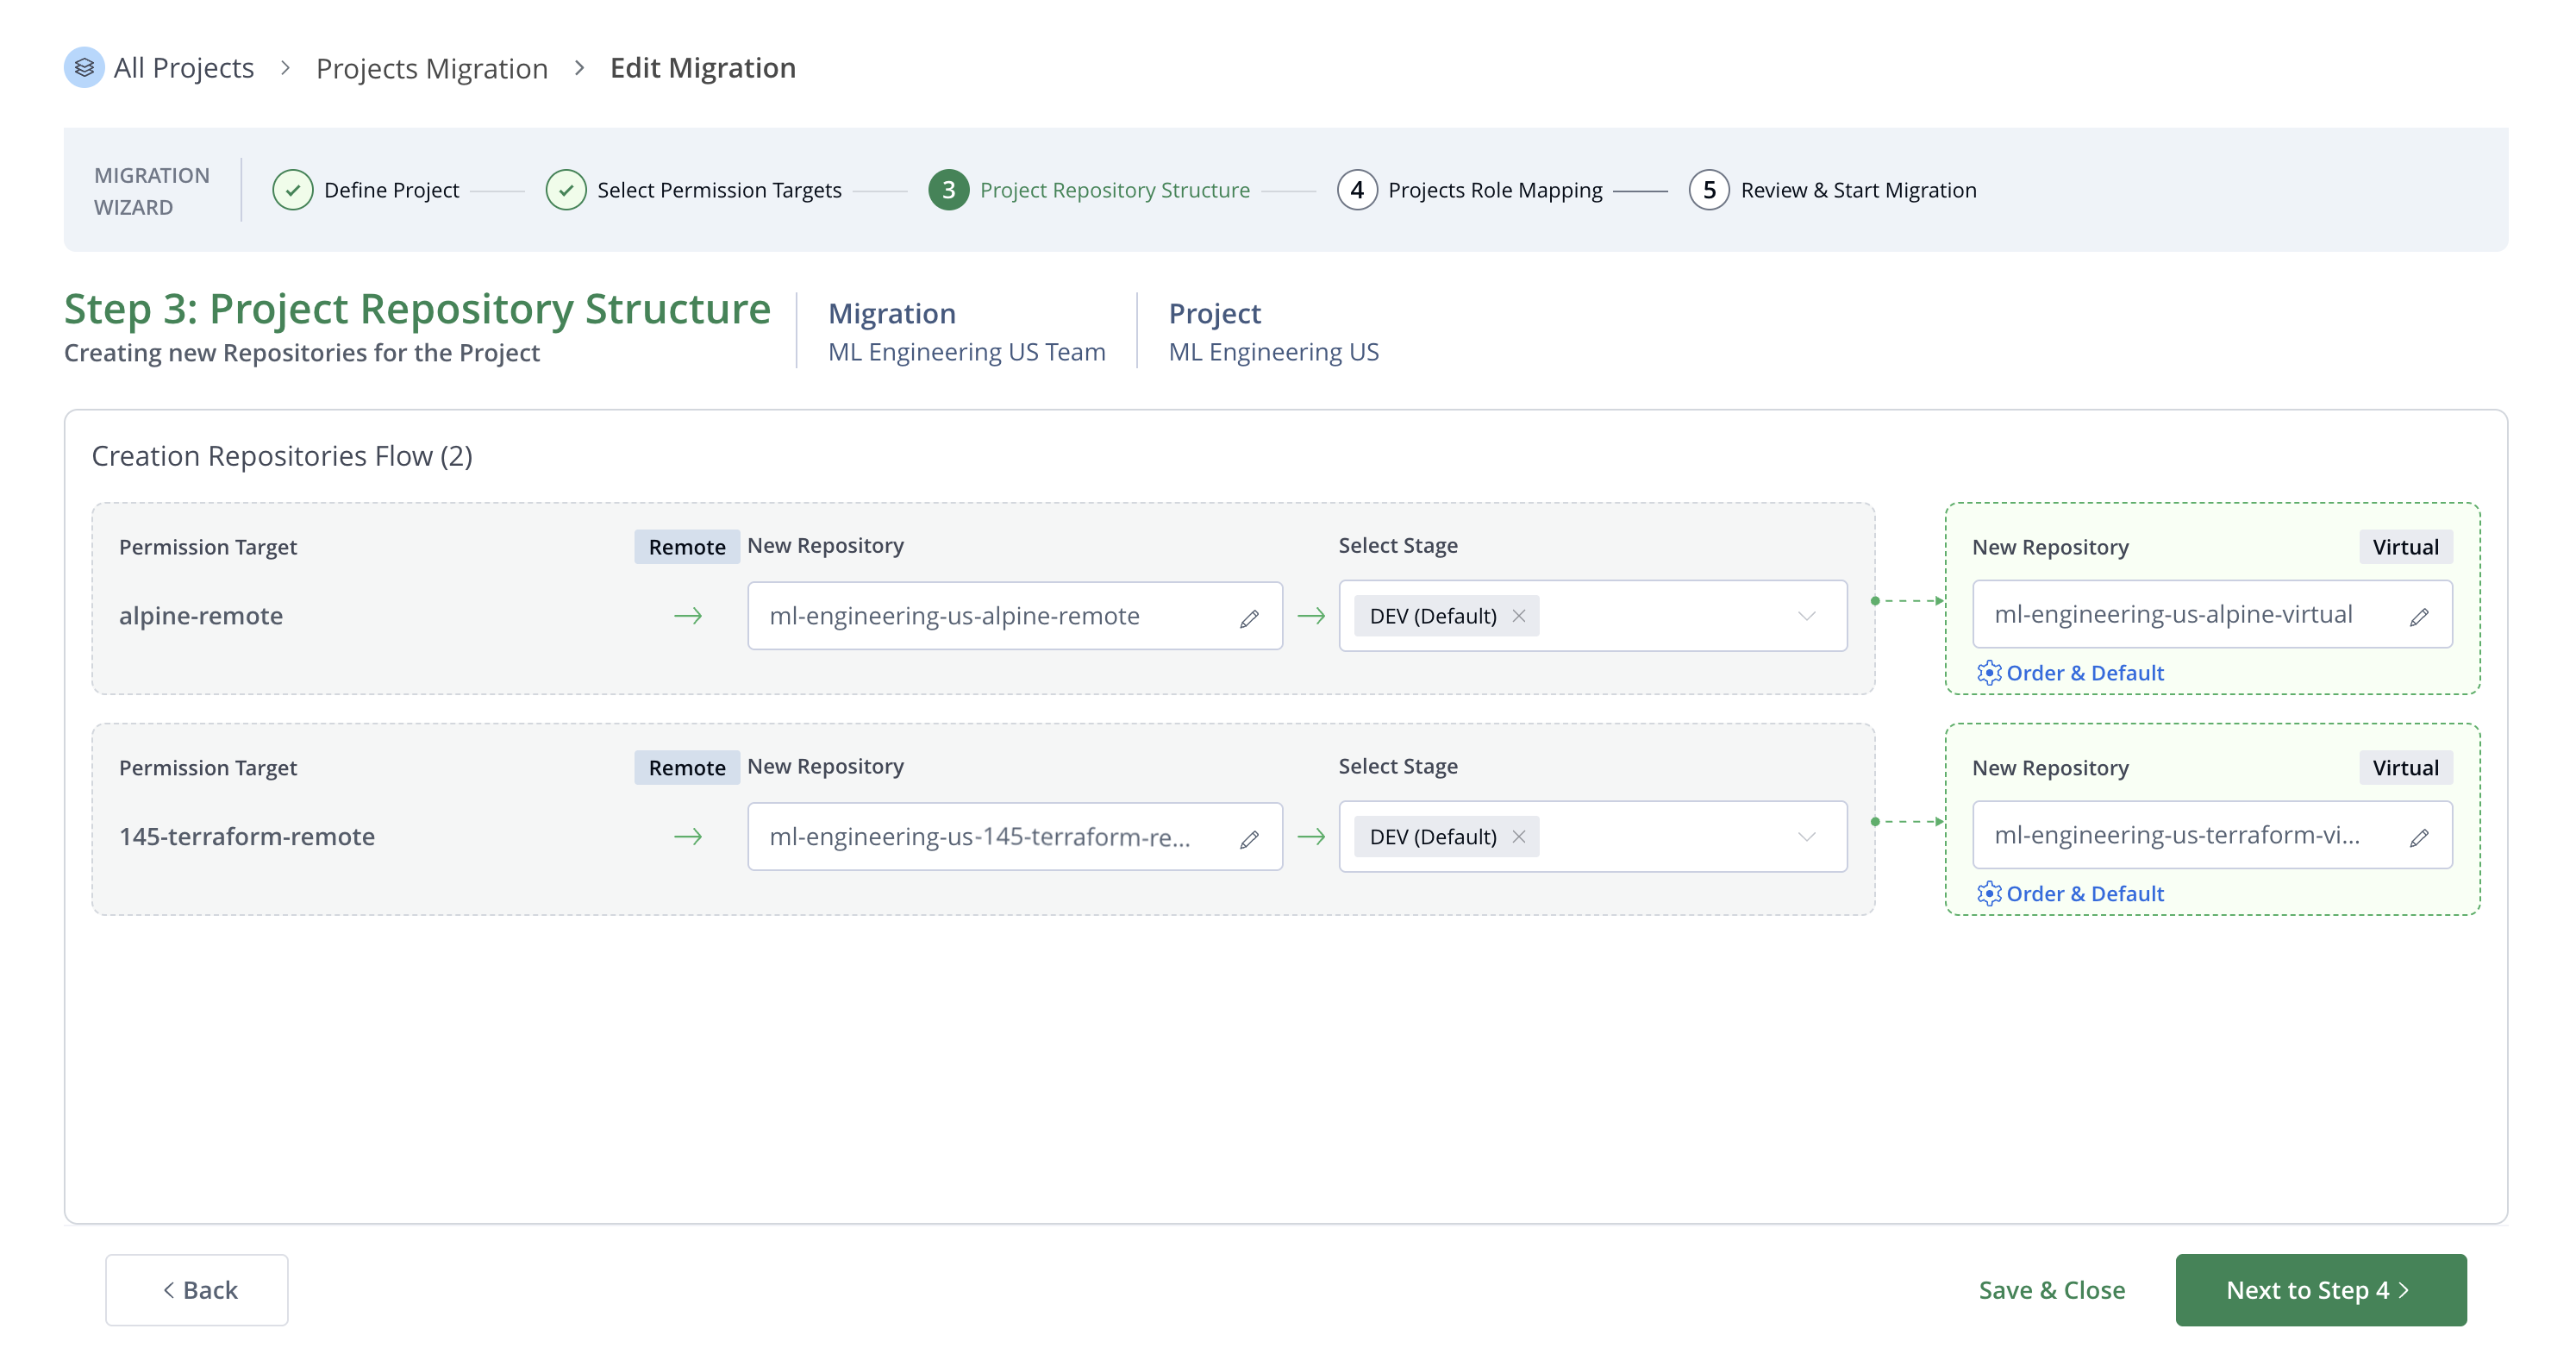
In Step 3: Project Repository Structure, review the Creation Repositories Flow panel: to translate your permission targets into a project structure, the Project Migration tool creates a new local or remote repository for each permission target, and a virtual repository wrapper to provide easy access.
Each new repository retains the same configuration as the source repository associated with the permission target. The virtual repository includes the source repository as well, so the source and target repositories coexist within the same aggregated virtual repository. Because no changes are made to the source configuration, your existing CI/CD pipelines continue to work without breaking changes.
To modify the suggested structure:-
The New Repository fields contain suggested names for the repositories: click the pencil icon to edit them if needed.
-
Click the Select stage dropdown menu to assign a stage to each of the repositories.
-
To resolve naming conflicts or alerts, address the items in the Conflicts & Alerts panel.
-
To configure the default virtual repository resolution order, click Order & Default.
When the repository structure is ready, click Next to Step 4 >.
-
-
In Step 4: Projects Role Mapping, review the suggested project role for each member.
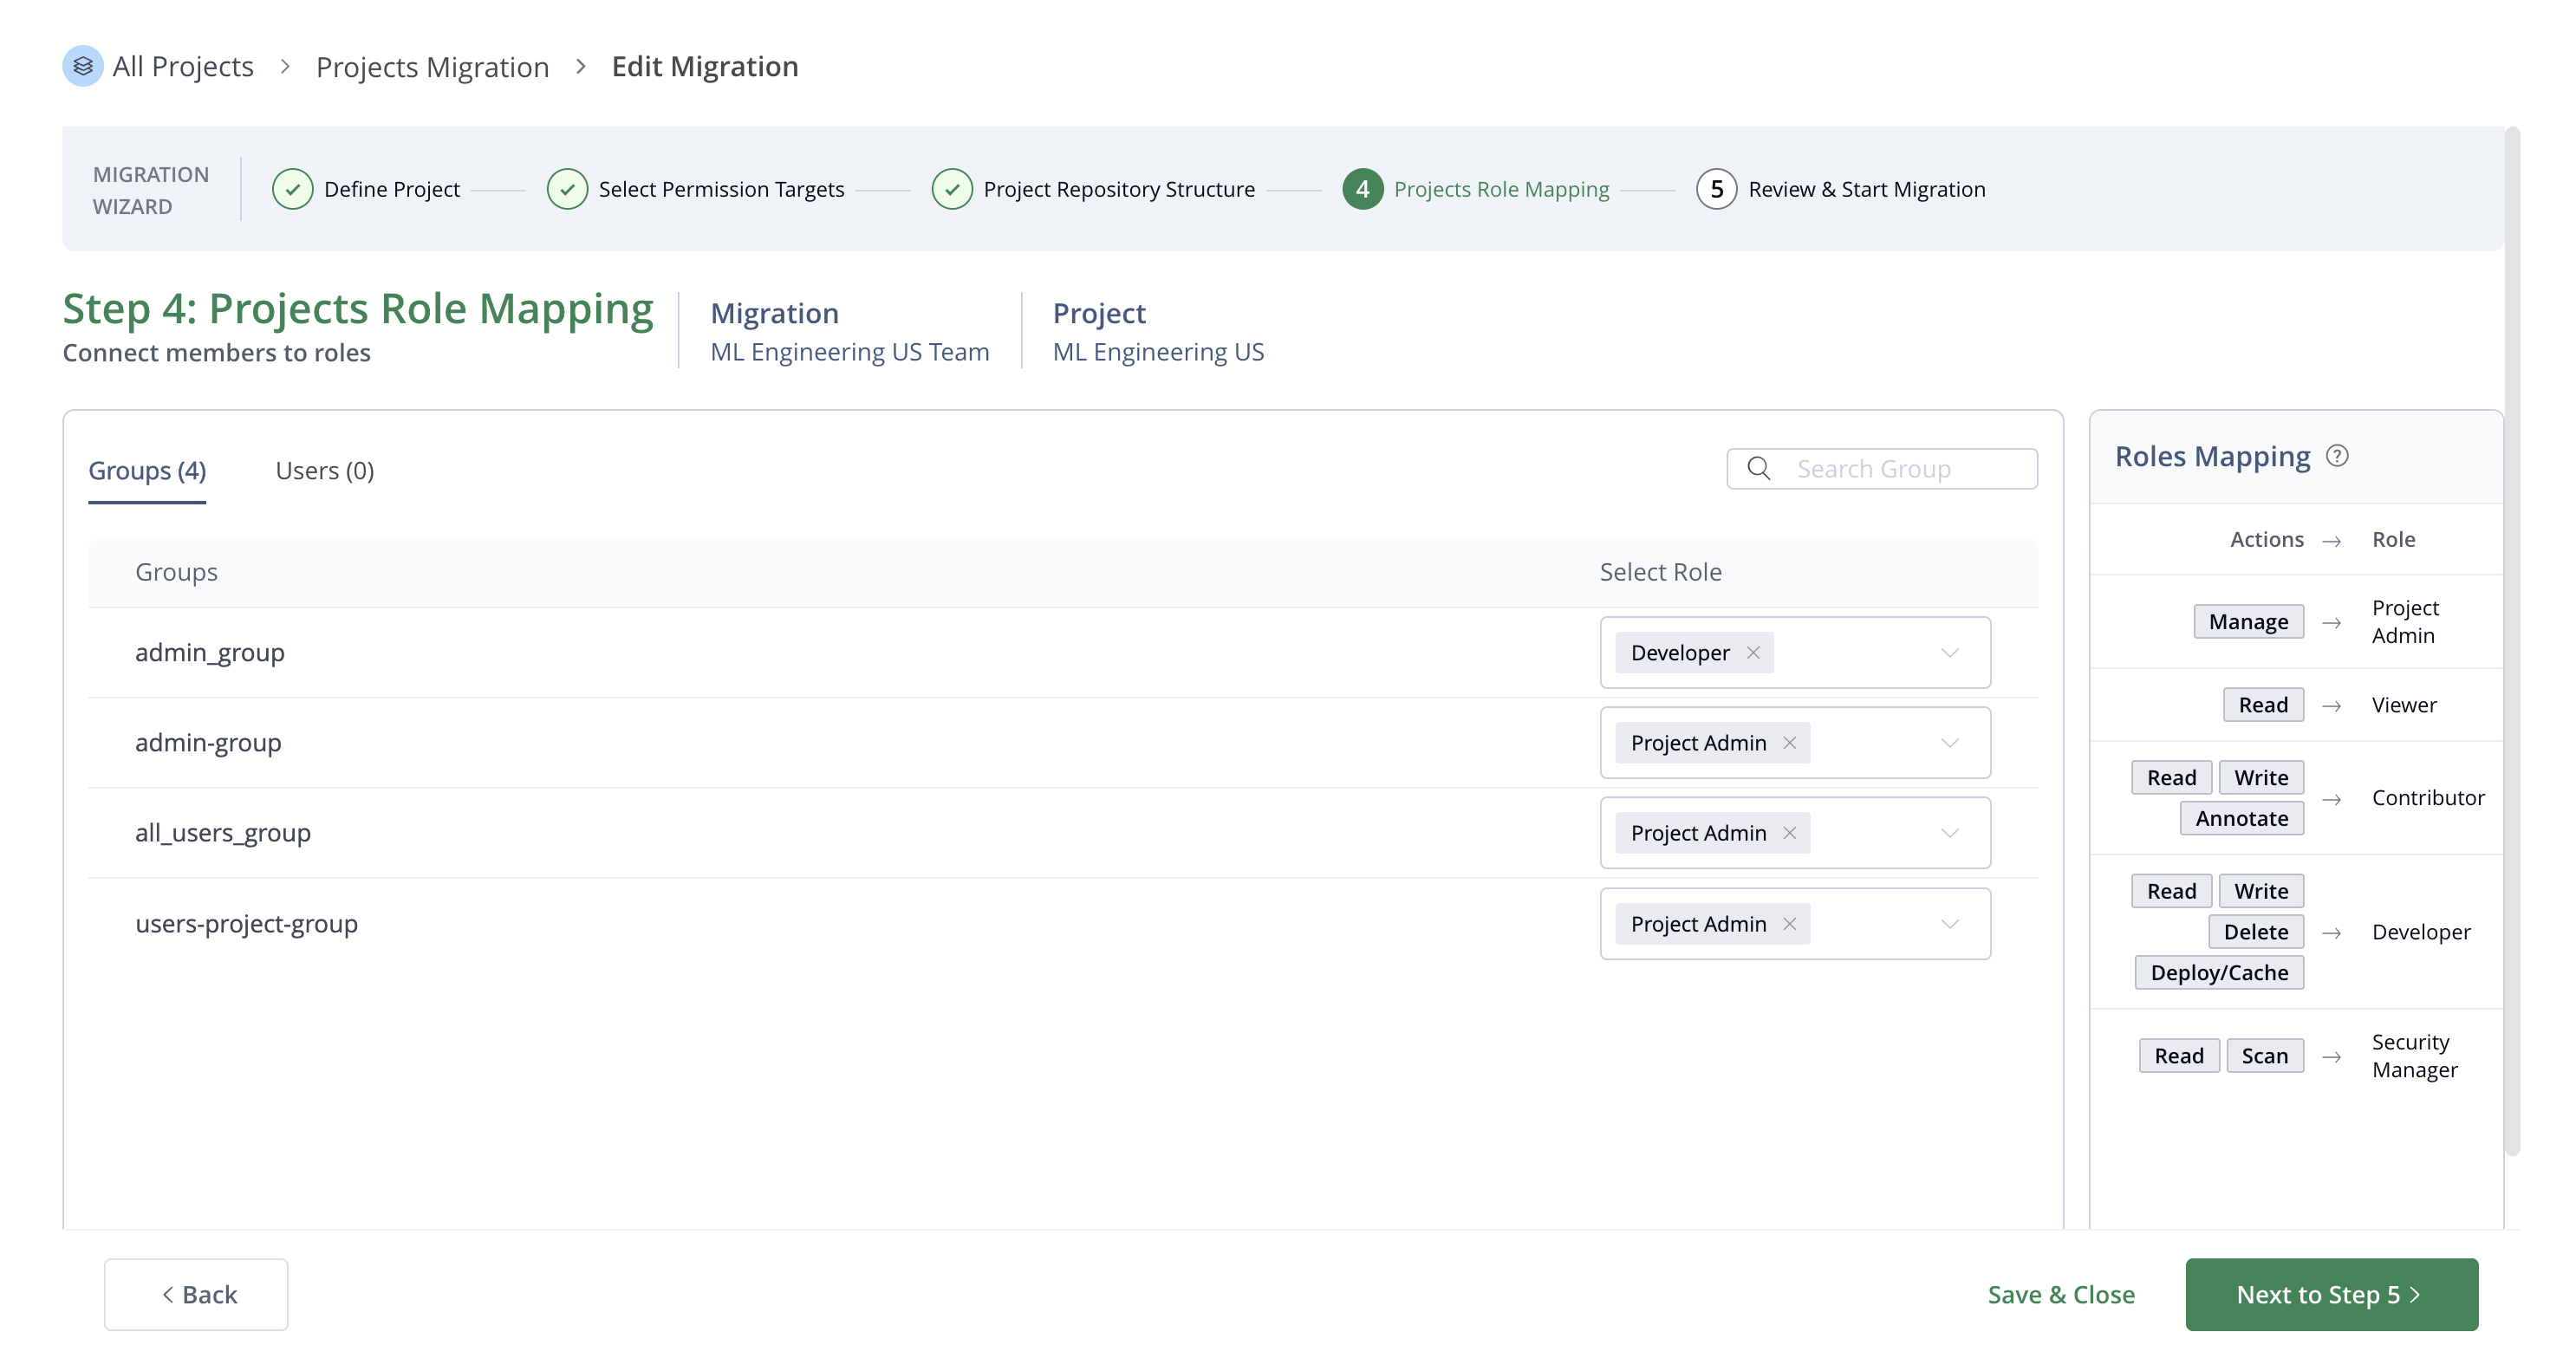
The wizard maps each member's existing permission-target actions to a project role, using the Roles Mapping legend in priority order (the first matching condition wins):
Priority Actions Suggested role 1 Contains MANAGEProject Admin 2 READViewer 3 READ+ANNOTATE+WRITE, noDELETEContributor 4 READ+WRITE+DELETE+ANNOTATE, noSCANDeveloper 5 READ+SCAN, not matched aboveSecurity Manager 6 Any other actions Empty (edit the role manually) For each member, confirm or change the role in the Select Role column, then click Next to Step 5 >.
-
In Step 5: Review & Start Migration, review the summary of all the repositories and roles that will be created as part of your project migration, and any conflicts in the Conflicts and Alerts widget.
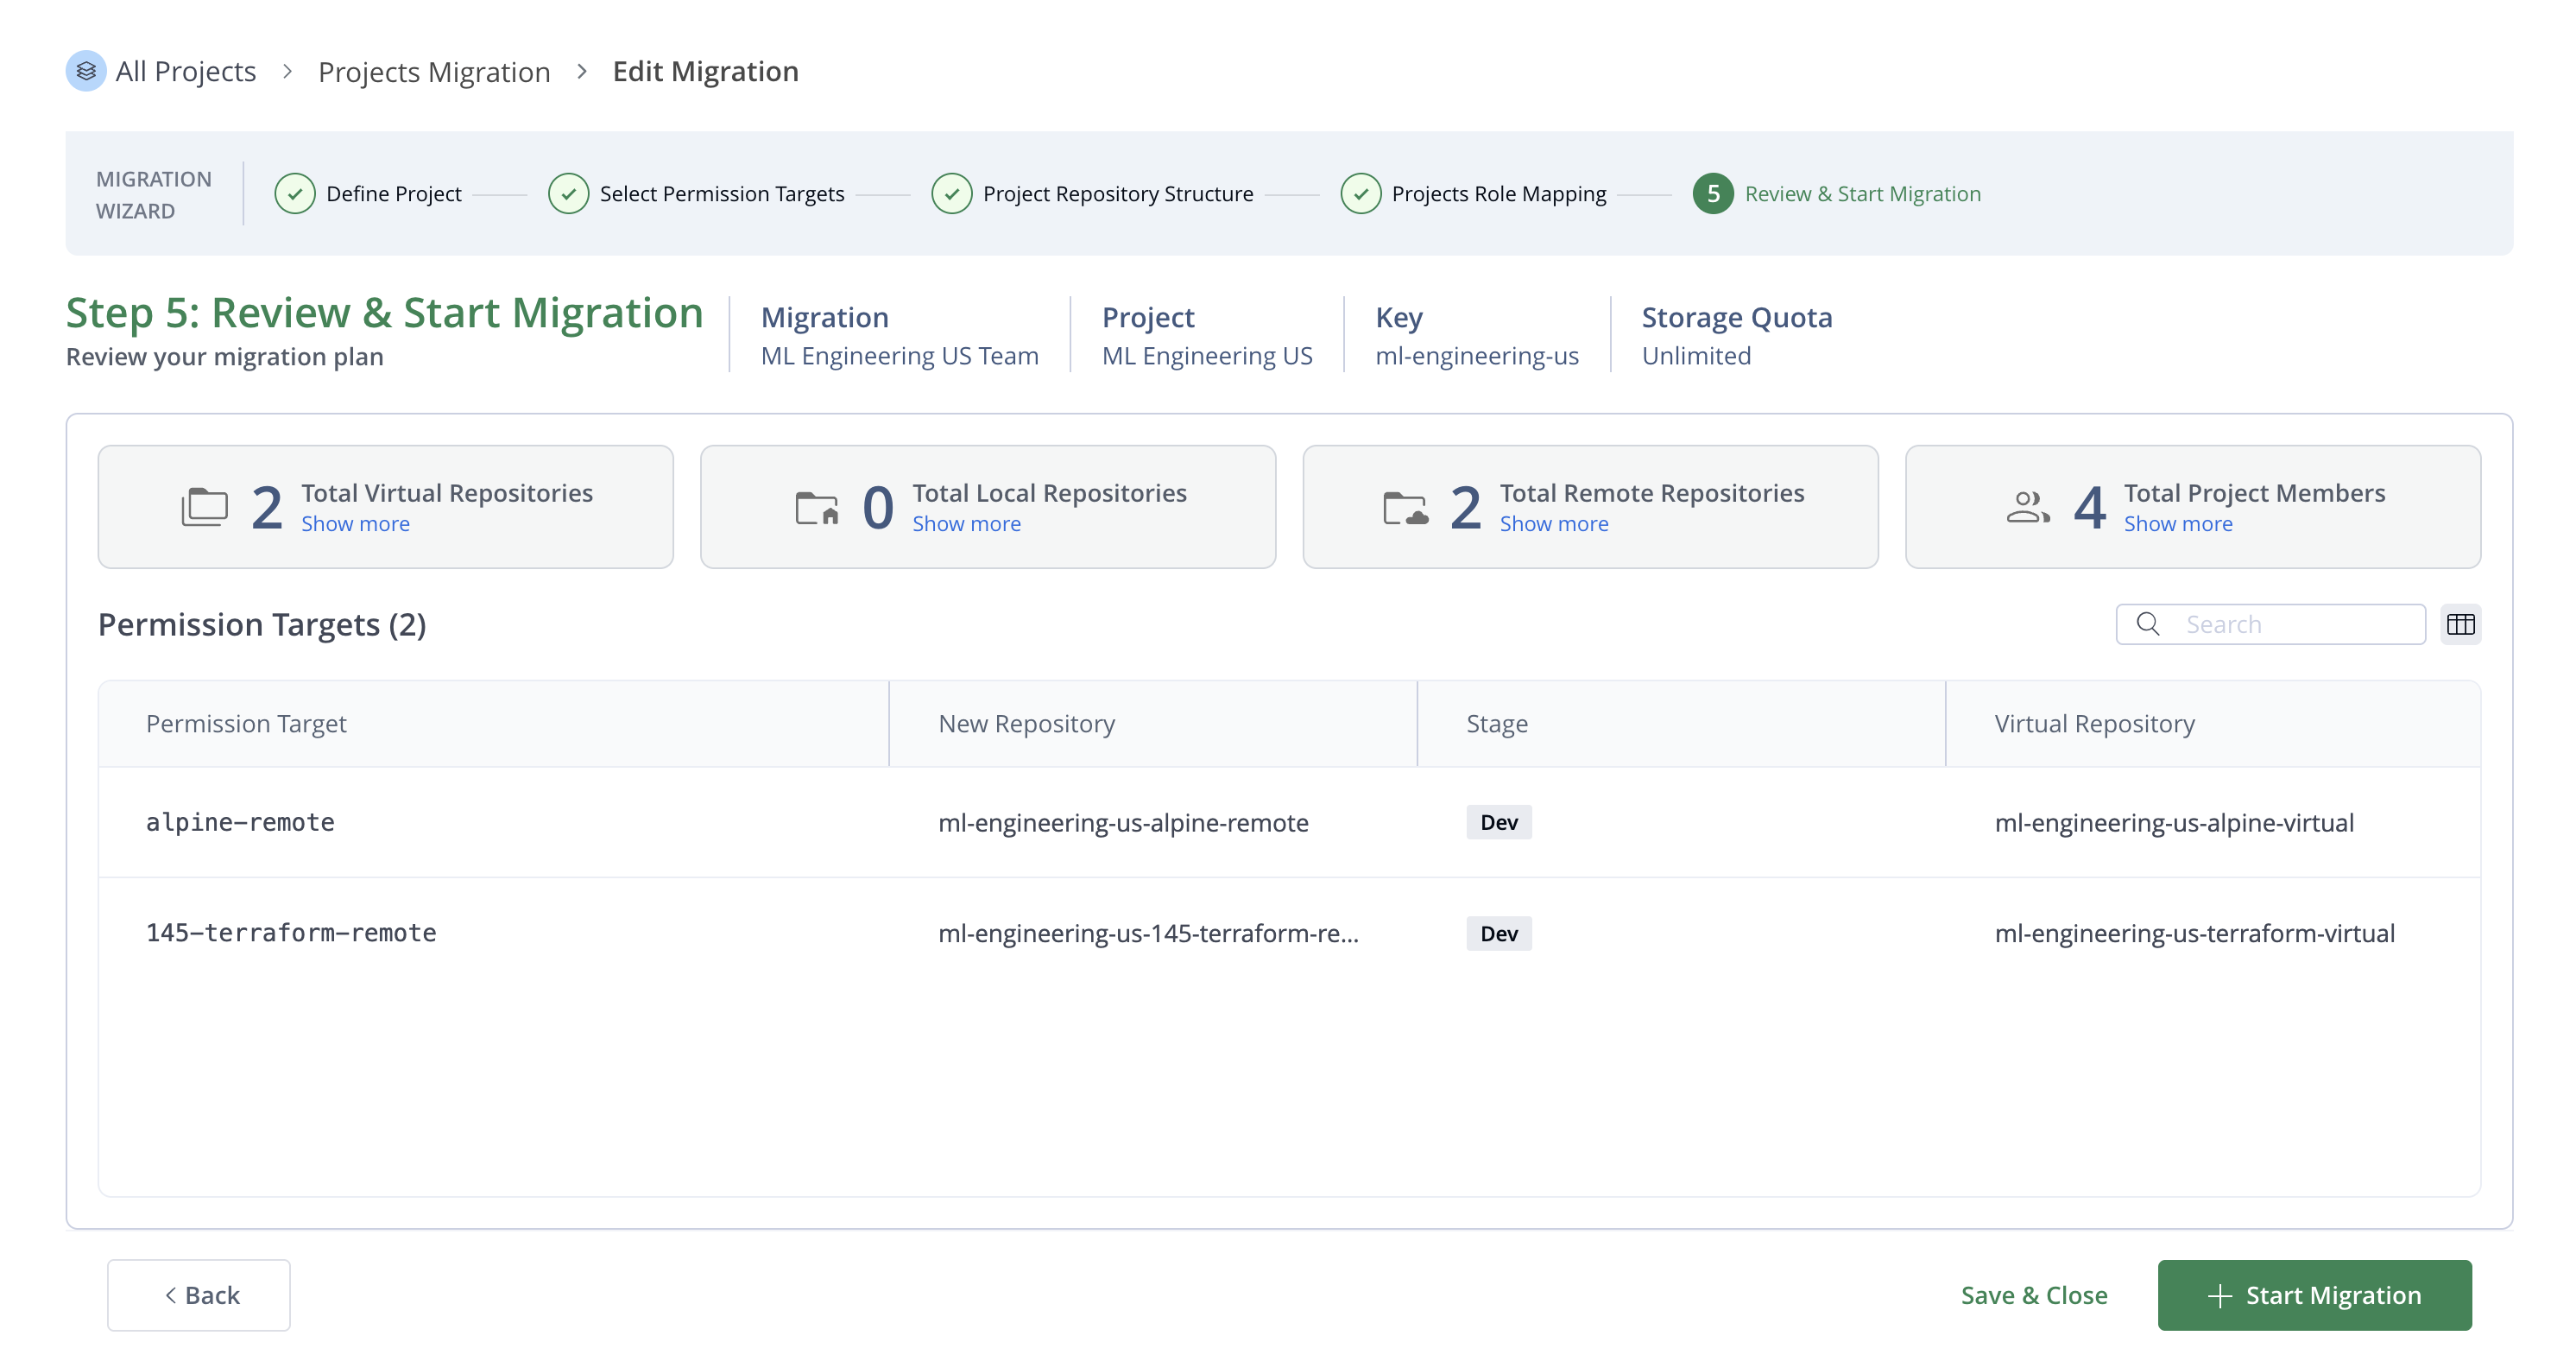
The summary is read-only: to fix any issues or make changes, click < Back to return to the step where you want to make the change.
When you are satisfied with the migration, click + Start Migration to execute the migration.
Manage Existing Migrations
To view your existing migrations:
-
Go to Administration > Projects > Projects Migration, and find the Projects Migration table that contains all your existing migrations. You can use the search bar to find a specific migration, or click the table icon on the top right hand side to customize columns.
-
The Status column indicates the current state of each migration and determines which actions are available in the options menu (three dots):
- Not started: The migration has been created but not yet run.
- In Progress: The migration is partially complete. You can select Resume step to continue the setup wizard, or Update Migration to edit the migration name or description.
- Migrated: The migration is complete. You can select View Migration to review the information and resources created during the process, or Update Migration to edit the migration details.
Frequently Asked Questions
This section answers common questions about how Projects Migration creates repositories.
FAQs
Q: Why does the JFrog Project Migration Tool create new repositories instead of reusing existing ones?
A: The JFrog Project Migration Tool creates new repositories for the following structural reasons:
- A repository can belong to only one project. Brownfield repositories are often shared across teams, so reassigning an existing repository could unintentionally affect other consumers.
- Project role-based access control is stage-based. Legacy repositories typically mix development, quality assurance, and production content. The project-scoped structure lets you apply access control for each stage.
- Existing permissions can be path-based. Project roles apply at the repository level, so some legacy permission boundaries need separate project-scoped repositories.
- Creating new repositories is the safer, non-destructive approach. The existing repository stays unchanged. The migration creates a new project-owned local repository and a project virtual repository that provides a single URL for the existing content and the new content.
Migration is a gradual process, not a forced cutover. Shadow mode is the recommended way to validate the new project structure and CI/CD flow without affecting existing pipelines. You can then move to parallel execution and gradually adopt the new project URL when you're ready.
Existing pipelines continue to work against their current URLs. You decommission the legacy repository only after you fully validate the new flow. The migration doesn't decommission it automatically.
This approach preserves existing workloads and lets you adopt project-scoped role-based access control on a gradual, low-risk path. For more information, see Projects Migration Best Practices.
Related Topics
Updated about 2 hours ago