Advanced Build Concepts
This section reviews the following topics:
Hyperparameter Optimization (HPO)
Build Configurations
Learn how to adjust and configure the build for some advanced use-cases.
Using a Custom AWS IAM Role ARN
Sometimes, a model needs to access external services during its build process.
If a build needs to access external AWS resources, a custom AWS IAM role can be passed to the FrogML build process.
The IAM role ARN can be passed directly to a build using the --iam-role-arn flag. For example:
frogml models build \
    --model-id <model-id> \
    --iam-role-arn arn:aws:iam::<account-id>:role/<role-name> \
    <uri>
The Supplied IAM role ARN role can be accessed from the model code using the following code example:
from boto3

session = boto3.Session(profile_name='user-provided-role')
# Example for an S3 client:
s3 = session.client('s3')
For additional information on how to configure an AWS IAM role to allow JFrog ML runtime to access your resources, please also visit the AWS Resources access dedicated page.
Note
In the provided code snippet, the profile name specified as
user-provided-roleis automatically associated by JFrog ML with your assumed IAM role. Therefore, there's no need to replace it in the code. This ensures seamless integration and access to AWS services within your model code.
Using GCP Service Account
In order to reach a GCP client resource make sure to create secret with you json service account. Once the secret key was created use the following flag to define it: --service-account-key-secret-name.
Generating Config Files
To generate a config file from a command that you already use, specify the --outconf flag, which will print to the console a ready config based on the options you specified. For example assume you run the following command:
frogml models build \
    --model-id test_model \
    -T tag_1 -T tag_2 \
    -E OS=WINDOWS \
    -E VERSION=3.11 \
    ~/model
Here is an example of the output:
YAML
build_env:
  docker:
    base_image: qwak-base:0.0.18-cpu
    build_args: {}
    env_vars: ["OS=WINDOWS", "VERSION=3.11"]
    no_cache: true
    params: []
  local:
    aws_profile: null
    no_push: true
  python_env:
    conda:
      conda_file: conda.yml
    git_credentials: null
    git_credentials_secret: null
    poetry: null
    qwak_sdk_extra_index_url: null
    virtualenv: null
  remote:
    is_remote: false
    resources:
      cpus: 2.0
      memory: 4Gi
build_properties:
  branch: main
  build_id: f139b71a-533a-11ec-a934-367dda8b746f
  model_id: test_model
  model_uri:
    git_branch: master
    git_credentials: null
    git_credentials_secret: null
    main_dir: main
    uri: ~/model
  tags:
  - tag1
  - tag2
To save the configuration into redirection , For example: frogml models build --model-id test_model ~/model --out-conf > config.yml.
Customizing Your Build
Custom Docker Image
You can use a custom Docker image for the build process. The custom base image will also be used for the serving image.
When executing a build, the image should be specified using the --base-image flag:
frogml models build \
    --model-id <model> \
    --base-image <image-id> \
<dest><model-id>- The model ID associated with this build.<image-id>- Docker image ID.<uri>- FrogML-based model URI.
The custom docker image should be based on:
public.ecr.aws/w8k8y6b6/qwak-base:0.0.37-cpu.public.ecr.aws/w8k8y6b6/qwak-base:0.0.19-gpu((in case of models requiring a GPU).
The Docker image entry point should not be changed.
Custom Build Instance Type
You can choose either ondemand or spot by using the flag --purchase-option. By default the remote build will run on spot . For example:
frogml models build \
    --model-id <model> \
    --purchase-option ondemand \
Environment Variables
Configuring environment variable in build and serving environment, The environment variables should specified with the flag -E when executing a build:
frogml models build \
    --model-id <model> \
    -E <key>=<value> -E <key>=<value> \
    <dest>
<model-id> - Model id which the build should be related to.
<key> - Environment variable key.
<value> - Environment variable value.
<uri> - FrogML based model URI.
Note
When you pass environment variables to the build process, their impact goes beyond just the build phase. These variables are not only propagated to the
testingphase but are also 'baked' into the resulting image. As a result, they remain available during deployment, providing flexibility to overwrite them as needed. This enables seamless configuration management throughout the entire lifecycle of your application.
Customizing Main Directory
Given the following FrogML-based model directory structure:
jfrogml_based_model/
├── main/
├── tests/
You can change the main/directory’s name. For example, changing its name to iris_classifier/:
jfrogml_based_model/
├── iris_classifier/
├── tests/
To configure the name in the main directory, use a build config as follows:
build_properties:
  model_uri:
    main_dir: iris-classifier
Installing Packages from PyPI
During the build process you can download and use packages from private repositories.
Create an environment variable PIP_EXTRA_INDEX_URL .
frogml models build --env-vars
PIP_EXTRA_INDEX_URL=https://USERNAME:PASSWORD@JFROG_ARTIFACTORY_URL
You can also send this data not in clear text, by creating local environment variables:
export JFROG_USERNAME=<USERNAME>
export JFROG_PASSWORD=<PASSWORD>

frogml models build --env-vars PIP_EXTRA_INDEX_URL=https://${JFROG_USERNAME}:${JFROG_PASSWORD}@JFROG_ARTIFACTORY_URL
Fetching Model Code from a Private Git Repository
You can fetch model code from a private Git repository using either the --git-credentials-secret or --git-secret-ssh flags.
Using Token Credentials
-
Generate a GitHub Access Token:
- Navigate to GitHub > Settings > Developer settings > Personal access tokens > Generate new token.
- Select the scopes you need for your project and generate the token.
-
Create a JFrog ML Secret:
-
Use the format
USERNAME:ACCESS_TOKENto create a new JFrog ML secret.frogml secrets set --name '<your-jfrogml-secret>' --value "<username>:<access_token>"
-
-
Build the Model:
- Use the
--git-credentials-secretflag to specify the name of this secret when building your model.
frogml models build \ [email protected]:<git_user>/model-test.git#models/model/churn \ --git-credentials-secret '<your-jfrogml-secret>' \ --git-branch '<your-branch>' - Use the
Note
The
#models/model/churnpart specifies the folder path where the model is located inside the repository.
Using SSH Authentication
-
Generate an SSH Key:
- If you don't have an SSH key, you can generate one using
ssh-keygen -t rsa -b 4096 -C "[email protected]".
- If you don't have an SSH key, you can generate one using
-
Add SSH Key to GitHub:
- Navigate to GitHub > Settings > SSH and GPG keys> New SSH key. Paste your public key and save.
-
Create a JFrog ML Secret:
-
Copy your private SSH key to your clipboard:
pbcopy < ~/.ssh/<your-private-key-file> -
Create a new JFrog ML secret with the content of the copied private key.
frogml secrets set --name '<your-jfrog-secret>' --value "$(pbpaste)"
-
-
Build the Model:
-
Use the
--git-secret-sshflag to specify the name of this secret when building your model.
frogml models build \
  [email protected]:<git_user>/model-test.git#models/model/churn \
  --git-secret-ssh '<your-jfrogml-secret>' \
  --git-branch '<your-branch'
-
Reusing Trained Artifacts
When training in the build stage of the Build pipeline, sometimes we'd like to iterate on different parts of the model logic, without going through a training iteration. For example we have a training iteration that takes a significant amount of time and instead of going through this again with each code iteration, we can just skip this phase and simply load the trained artifact from previous model Builds.
Key Concepts
- Build Types: Differentiating between build jobs created for training or deployment (or both).
- Model Registry: Using JFrog ML's Model Registry to log and retrieve trained artifacts.
- Build Tagging: Tagging builds for easy identification and retrieval.
- Model Initialization: Leveraging the
initialize_model()method to load pre-trained models.
Implementation Steps
-
Add a Job Type Parameter
First, we'll add a flag as an environment variable to distinguish between training and deployment builds.
model.py
class XGBoostModel(FrogMlModel): def __init__(self): self.model = XGBClassifier() self.job_type = os.environ.get('JOB_TYPE', 'deploy') -
Log the Trained Artifact to the Model Registry
In the
build()method, we'll save the trained model and log it to the JFrog ML Model Registry.model.py
# Global variables LOCAL_MODEL_FILEPATH = 'xgboost_model.pkl' MODEL_ARTIFACT_TAG = 'xgboost_model' TRAINED_MODEL_TAG = 'training' def build(self): # ... (training code) ... # Save the trained model with open(LOCAL_MODEL_FILEPATH, 'wb') as file: pickle.dump(self.model, file) # Log the trained artifact frogml.log_file(from_path=LOCAL_MODEL_FILEPATH, tag=MODEL_ARTIFACT_TAG) -
Tag the Training Job Build
After a successful training build, tag it in the JFrog ML UI:
- Navigate to the individual Build.
- Click on the three dots in the upper-right corner.
- Select "Add Tags".
- Add a tag called
training.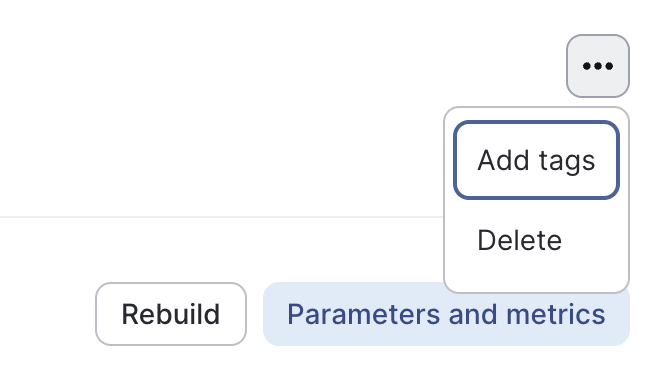
-
Retrieve and Load the Pre-trained Artifact
Use the
initialize_model()method to load the pre-trained model during deployment:model.py
def initialize_model(self):
    FrogML_Client = frogml.FrogMLClient()
    jfrogml_model_id = os.getenv('FROGML_MODEL_ID')

    # Fetch trained builds
    trained_builds = FrogML_Client.get_builds_by_tags(
        model_id=jfrogml_model_id,
        tags=[TRAINED_MODEL_TAG]
    )

    if not trained_builds:
        raise ValueError(f"No trained builds found for model ID: {jfrogml_model_id}")

    # Get the latest trained build ID
    latest_trained_build_id = trained_builds[0].build_id

    # Load the model file
    frogml.load_file(
        to_path=LOCAL_MODEL_FILEPATH,
        tag=MODEL_ARTIFACT_TAG,
        model_id=jfrogml_model_id,
        build_id=latest_trained_build_id
    )

    # Load the model into memory
    with open(LOCAL_MODEL_FILEPATH, 'rb') as file:
        self.model = pickle.load(file)
Complete FrogMlModel Class
FrogMlModel ClassHere's how the complete XGBoostModel class might look:
model.py
class XGBoostModel(FrogMLClient):
    def __init__(self):
        self.model = XGBClassifier()
        self.job_type = os.environ.get('JOB_TYPE', 'deploy')

    def build(self):
        if self.job_type == 'train':
            # ... (training code) ...

            with open(LOCAL_MODEL_FILEPATH, 'wb') as file:
                pickle.dump(self.model, file)
            frogml.log_file(from_path=LOCAL_MODEL_FILEPATH, tag=MODEL_ARTIFACT_TAG)

    def initialize_model(self):
        if self.job_type == 'deploy':
            # ... (model loading code from step 4) ...

    @frogml.api()
    def predict(self, df):
        # ... (prediction code) ...
        return pd.DataFrame(predictions, columns=['Score'])
Conclusion
By implementing these advanced patterns, you can significantly speed up your model iteration process. This approach allows you to load pre-trained models for deployment or quick testing, while still maintaining the ability to perform full training when necessary.
Hyperparameter Optimization (HPO)
This advanced build pattern enables you to specify parameters or parameter ranges for hyperparameter tuning jobs, helping you to enhance model performance by identifying the optimal settings.
Currently, JFrog ML supports training only on a single instance, whether CPU or GPU. As a result, all options described will apply to single-instance training.
For efficient model development, especially when training sessions are lengthy, consider using this guide in conjunction with Reusing Trained Artifacts. This approach allows for frequent iteration on model code without the need to retrain from scratch each time.
Key Concepts
- Hyperparameters: These are configuration variables that control the learning process of a model. In the JFrog ML context, these are the parameters you'll be adjusting and testing in your Build jobs.
- Hyperparameter Tuning: The process of finding the optimal set of hyperparameters for a model. In JFrog ML, this is done through Build jobs, where different combinations of hyperparameters are tested.
- Build Jobs: JFrog ML mechanism for training and building models. These jobs provide the environment where your hyperparameter tuning takes place.
Passing Hyperparameters to Build Jobs
In JFrog ML, there are two primary methods for passing hyperparameters to your Build jobs:
-
Via Configuration File
This method involves defining your hyperparameters in a JSON file within your project structure.
Project Structure. ├── README.md ├── main │ ├── __init__.py │ ├── conda.yml │ └── model.py └── tests └── it └── test_something.pyThe
hyperparameters.jsonfile is placed in themaindirectory, which ensures it will be automatically uploaded to the JFrog ML Build environment.Example JSON Configurationhyperparameters.json
{
    "n_estimators": [50, 100, 200],
    "max_depth": [10, 20, 30],
    "learning_rate": [0.01, 0.1, 0.2]
}
This JSON structure defines ranges for each hyperparameter, which JFrog ML will use to test different combinations.
Reading the Configuration in PythonIn your
model.pyfile, you can access these hyperparameters as follows:model.py
import json

class SampleModel(FrogMLClient):
    def __init__(self):
        with open('hyperparameters.json') as f:
            self.params = json.load(f)

        # Now self.params contains your hyperparameter ranges
This method allows you to keep your hyperparameters separate from your code, making it easier to version and modify them.
-
Via Environment Variables or Build Parameters
This method involves passing hyperparameters directly through the command line interface (CLI) when initiating a build job.
Using Environment Variablesfrogml models builds --model-id sample_model \ -E N_ESTIMATORS="50,100,200" \ -E MAX_DEPTH="10,20,30" \ -E LEARNING_RATE="0.01,0.1,0.2" .Here, the
-Eflag sets environment variables that will be available in your Build job.Using Build Parametersfrogml models builds --model-id sample_model \ -P N_ESTIMATORS="50,100,200" \ -P MAX_DEPTH="10,20,30" \ -P LEARNING_RATE="0.01,0.1,0.2" .The
-Pflag sets JFrog ML Build parameters. These are logged to the JFrog ML Platform and can be compared between Builds, offering better traceability.Reading Parameters in PythonIn your
model.py, you can access these parameters:model.py
import os

class SampleModel(FrogMLClient):

    def parse_param_list(self, list_as_str):
        return list(map(float, list_as_str.split(',')))

    def __init__(self):
        self.params = {
            'n_estimators': self.parse_param_list(os.getenv('N_ESTIMATORS')),
            'max_depth': self.parse_param_list(os.getenv('MAX_DEPTH')),
            'learning_rate': self.parse_param_list(os.getenv('LEARNING_RATE'))
        }
This method allows for more dynamic parameter setting and is useful for automated pipelines or when you need to change parameters frequently without modifying files.
Implementing Hyperparameter Optimization
Once you have your hyperparameters set up, you can implement various optimization techniques within your JFrog ML Build job. Here are examples of three common methods:
-
Grid Search Example
Grid Search exhaustively searches through a specified subset of the hyperparameter space.
model.py
import xgboost as xgb
from sklearn.model_selection import GridSearchCV
from frogml import FrogMlModel
import frogml


class XGBoostModel(FrogMlModel):

    def __init__(self):
        self.params = self.read_hyperparameters()
        self.model = xgb.XGBClassifier()

    def build(self):
        X_train, y_train = self.fetch_and_preprocess_data()

        grid_search = GridSearchCV(estimator=self.model,
                                   param_grid=self.params,
                                   cv=5,
                                   scoring='accuracy')

        grid_search.fit(X_train, y_train)

        frogml.log_param(grid_search.best_params_)
        frogml.log_metric(grid_search.best_score_)
In this example, GridSearchCV tries all possible combinations of the specified hyperparameters.
-
Random Search Example
Random Search samples random combinations of hyperparameters, which can be more efficient than Grid Search for high-dimensional spaces.
model.py
from sklearn.model_selection import RandomizedSearchCV from frogml import FrogMlModel import frogml import xgboost as xgb import os import numpy as np class XGBoostRandomModel(FrogMlModel): def __init__(self): self.model = xgb.XGBClassifier() self.param_distributions = self.read_hyperparameters() def build(self): X_train, y_train = self.fetch_and_preprocess_data() random_search = RandomizedSearchCV( estimator=self.model, param_distributions={ 'n_estimators': self.param_distributions['n_estimators'], 'max_depth': [int(x) for x in self.param_distributions['max_depth']], 'learning_rate': self.param_distributions['learning_rate'] }, n_iter=100, # number of parameter settings sampled cv=5, scoring='accuracy', random_state=42 ) random_search.fit(X_train, y_train) frogml.log_param(random_search.best_params_) frogml.log_metric('best_accuracy', random_search.best_score_)n_estimatorsandlearning_rateare used as-is, allowing RandomizedSearchCV to sample from the provided lists.max_depthvalues are converted to integers, as this parameter requires integer values.- We run the random search for 100 iterations (
n_iter=100), but this can be adjusted based on your specific needs and time constraints. - The best parameters and score are logged using JFrog ML logging functions.
-
Bayesian Optimization Example with Optuna
Optuna uses Bayesian optimization to efficiently search the hyperparameter space.
model.py
import optuna import xgboost as xgb from sklearn.model_selection import cross_val_score from frogml import FrogMlModel import frogml import os class XGBoostOptunaModel(FrogMlModel): def __init__(self): self.best_params = None self.best_score = None self.param_ranges = self.read_hyperparameters() def objective(self, trial): param = { 'n_estimators': trial.suggest_int('n_estimators', min(self.param_ranges['n_estimators']), max(self.param_ranges['n_estimators'])), 'max_depth': trial.suggest_int('max_depth', min(self.param_ranges['max_depth']), max(self.param_ranges['max_depth'])), 'learning_rate': trial.suggest_loguniform('learning_rate', min(self.param_ranges['learning_rate']), max(self.param_ranges['learning_rate'])) } model = xgb.XGBClassifier(**param) score = cross_val_score(model, self.X, self.y, cv=5, scoring='accuracy') return score.mean() def build(self): self.X, self.y = self.fetch_and_preprocess_data() study = optuna.create_study(direction='maximize') study.optimize(self.objective, n_trials=100) self.best_params = study.best_params self.best_score = study.best_value frogml.log_param(self.best_params) frogml.log_metric('best_accuracy', self.best_score)- We define an
objectivefunction that Optuna will optimize. This function creates an XGBoost model with hyperparameters suggested by Optuna, then evaluates it using cross-validation. - The hyperparameter ranges are read from environment variables.
- In the
buildmethod, we create an Optuna study and run the optimization for 100 trials. - The best parameters and score are logged using JFrog ML logging functions for easier comparisons later on.
- We define an
Considerations
- Single Instance Training: Currently, JFrog ML supports training only on a single instance and does not offer distributed training capabilities. When performing hyperparameter optimization (HPO), be aware of the potential length of the HPO task and resource consumption. This is especially important if you are exploring hyperparameters sequentially, as it may impact the overall training time and resource usage.
- Resource Management: Monitor memory requirements to avoid running out of memory (OOM) during later stages of hyperparameter optimization. Implement checkpointing where appropriate. Use the Resources tab in JFrog ML to track instance resource consumption.
- Logging: Use JFrog ML logging capabilities (
frogml.log_param()andfrogml.log_metric()) to track your optimization process and compare results between different builds.
Custom HTTP Status Codes
Custom HTTP statuses can be returned from the predict function. Note that only 4xx and 5xx statuses are supported.
To use this feature, you must raise a FrogmlHTTPException inside the predict function. The exception accepts two parameters:
- HTTP status code (as a number)
- The message to be returned (a string or a dictionary)
If the message is a string, it will be returned as a JSON object in this format: {"message": "YOUR_MESSAGE"}. If it's a dictionary, the JFrog ML platform will return the entire dictionary as a JSON object.
If an unsupported HTTP status is used, it will be replaced with the status 500 and a jfrogml_backend_message will be added to the response body with a message: "Invalid status code. Given value: {status\_code}. Supported: 4xx, 5xx".
An example of the server-side code:
@frogml.api()
def predict(self, df):
    ...
    if cant_handle_the_request:
        raise FrogmlHTTPException(500, "Not implemented")
In the case that a 4xx or 5xx response is received from the deployed model, the RealTimeClient will raise a FrogmlHTTPException with the status code and the returned message.
An example of the client code:
client = RealTimeClient(model_id="YOUR_MODEL")
try:
    client.predict(feature_vector)
except FrogmlHTTPException as e:
    print(e)
    print(e.status_code)
JFrog ML Analytics and Custom HTTP Statuses
If the model raises a FrogmlHTTPException (and the API analytics feature is enabled), the exception details will be logged in JFrog ML Analytics as columns: interence_exception_status_code and inference_exception_message.
Updated 4 months ago