Testing Models
This section reviews the following topics:
Adding Integration Tests to a Model Build
Local Testing
Local testing before triggering remote builds is essential for optimizing the model development process. This approach enhances efficiency by identifying and resolving errors early in the development cycle, minimizing the time and resources spent on remote builds.
Debugging is more interactive and streamlined locally, allowing quick iteration and error resolution. Additionally, local testing helps validate the entire workflow, ensuring correct configurations and dependencies before incurring potential costs associated with remote builds.
Ultimately, incorporating local testing into the development workflow promotes a more efficient, cost-effective, and error-resistant model building process.
Local Debugging and Inference
It is possible to easily run and debug your JFrog ML models locally.
The example below contains a simple FLAN-T5 model loaded from HuggingFace. To test inference locally, and can simple run the code below.
Note
For testing, we require the frogml package (the SDK). The CLI includes the SDK so make sure to install the frogml-cli or just
frogmlin your local environment.
Running Models Locally
We import from frogml.sdk.model.tools import run_local and call our local model via run_local(m, input_vector), which invokes all the relevant model methods.
Warning - Production Models
Please do not leave
from frogml.sdk.model.tools import run_localimports in production models, as it may affect model behavior. One option would be to create a separate file outside of yourmaindirectory where you have all the local testing code, including therun_localimport.
This example will load a model FLANT5Model and run inference with a data frame vector of your choice:
import frogml
import pandas as pd
from pandas import DataFrame
from frogml.sdk.model.base import BaseModel as FrogMlModel
from frogml.sdk.model.schema import ModelSchema,ExplicitFeature
from transformers import T5Tokenizer, T5ForConditionalGeneration


class FLANT5Model(FrogMlModel):

    def __init__(self):
        self.model_id = "google/flan-t5-small"
        self.model = None
        self.tokenizer = None

    def build(self):
        pass

    def schema(self):
        model_schema = ModelSchema(
            inputs=[
                ExplicitFeature(name="prompt", type=str),
            ])
        return model_schema

    def initialize_model(self):
        self.tokenizer = T5Tokenizer.from_pretrained(self.model_id)
        self.model = T5ForConditionalGeneration.from_pretrained(self.model_id)

    @frogml.api()
    def predict(self, df):
        input_text = df['prompt'].to_list()
        input_ids = self.tokenizer(input_text, return_tensors="pt")
        outputs = self.model.generate(**input_ids, max_new_tokens=100)
        decoded_outputs = self.tokenizer.batch_decode(outputs, skip_special_tokens=True)
return pd.DataFrame([{"generated_text": decoded_outputs}])Important
Call
run_localdirectly instead of themodel_object.predict(), as it will not work locally.
To run local inference, add the following code to your model code file:
test_model_locally.py
from frogml.sdk.model.tools import run_local
from main.model import FLANT5Model
from pandas import DataFrame

if __name__ == '__main__':
    # Create a new instance of the model
    m = FLANT5Model()

    # Create an input vector and convert it to JSON
    input_vector = DataFrame(
        [{
            "prompt": "Why does it matter if a Central Bank has a negative rather than 0% interest rate?"
        }]
    ).to_json()

    # Run local inference using the model
    prediction = run_local(m, input_vector)
print(prediction)Important
For local testing, remember to import
run_localat the start of your test file, before importing yourFrogMlModelbased class.
Debugging the Model Life Cycle
Running the run_local method calls the following methods in a single command:
build()initialize_model()predict()
Note: The build and initialize_model functions are called during the first run_local run only.
Important - Debugging Input and Output Adapters
Calling the
predictmethod locally doesn't trigger the input and output adapters. Please userun_localinstead.
Using Proto Adapter
Let's assume that you have the following model class, created an instance and executed the build method.
# This example model uses ProtoBuf input and output adapters
class MyFrogMlModel(FrogMlModel):

    def build(self):
                        ...

    @frogml.api(
        input_adapter=ProtoInputAdapter(ModelInput),
              output_adapter=ProtoOutputAdapter()
    )
    def predict(self, input_: ModelInput) -> ModelOutput:
                        return ...
In this example, we import a ProtoAdapter and use it to perform inference.
from frogml.sdk.model.tools import run_local

# Create a local instance of your model
model = MyForgMlModel()

# ModelInput is the model proto
input_ = ModelInput(f1=0, f2=0).SerializeToString()

# The run_local() method calls build(), initialize_model() and predict()
result = run_local(model, input_)

# ModelOutput is the model proto
output_ = ModelOutput()
output_.ParseFromString(result)
Running Local Inference
You can test the entire inference code, including input and output adapters, by calling the execute function:
# ModelInput is the model proto
input_ = ModelInput(f1=0, f2=0).SerializeToString()

# The execute() calls the predict method with the input and output adapters
result = model.execute(input_)

# ModelOutput is the model proto
output_ = ModelOutput()
output_.ParseFromString(result)
Adding Integration Tests to a Model Build
Validating Serving Artifact
After executing the build() function in the model-building process, JFrog ML initiates a critical step - Validating Serving Artifact. This involves starting a Docker container encapsulating the newly built model. This container serves two primary purposes:
- Initialization: The
initialize_model()function is executed to ensure the model serving is correctly set up and started within the container. - Dummy Request Handling: The container, with its embedded webserver, is tested with a dummy request. This step confirms the container's operational status and its ability to handle incoming requests successfully.
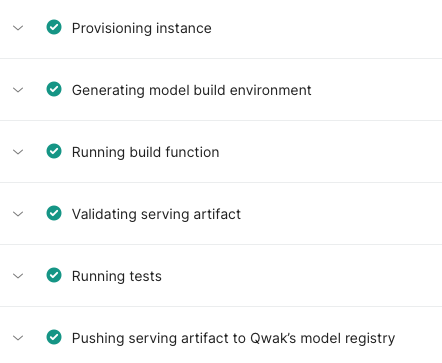
JFrog ML Models Build Page
Running Integration Tests
The Running Tests phase keeps the exact container from the Validation Phase operational. This step is critical: by treating the container as a live model, it enables local endpoint predictions to guarantee the model is fully functional and deploy-ready before entering shadow or production.
Execute test predictions using:integration_tests.py
from frogml.core.testing.fixtures import real_time_client
from frogml_inference.realtime_client.client import InferenceOutputFormat

def test(real_time_client):
    result = real_time_client.predict(feature_vector, InferenceOutputFormat.PANDAS)
The real_time_client is configured with the local endpoint to enable efficient, practical test predictions. This approach enhances your testing practices by ensuring early issue detection and confirming deployment readiness. It is a proactive strategy that aligns with Continuous Integration (CI) workflows to maintain high-quality standards.
Structuring the Tests Directory
Please place your integration tests under an
itdirectory in thetestsfolder, adhering to the model build directory structure.
Naming Test Files
Please ensure that all test files are named with a
test_prefix followed by the rest of the file name.Files not adhering to this naming convention will not be detected by JFrog ML during the testing phase.
Resource Requirements
You must ensure your environment meets the model's resource needs during validation and testing. For example, if you build on a small instance using the --gpu-compatible flag for a GPU target, you may face constraints; the small instance might lack the resources to initialize the model locally. Therefore, this testing step is most beneficial when your build resources mirror your deployment hardware requirements.
Additional Directories in Tests
To access files added with the --dependency-required_folders parameter in tests, use the frogml_tests_additional_dependencies fixture. For example:
def test_print_content_from_variable(frogml_tests_additional_dependencies):
    print(frogml_tests_additional_dependencies)
    directories = os.listdir(frogml_tests_additional_dependencies)
    print(directories)
All --dependency-required-folders are inside the directory which path is passed as the frogml_tests_additional_dependencies parameter.
Updated 5 months ago