Get Started
Govern and connect approved MCP servers to your coding agent.
This guide covers the full lifecycle of an MCP server in the JFrog MCP Registry — from discovering and approving servers as an admin, to connecting them to your coding agent as a developer.
Prerequisites
- Access to the JFrog Platform with the AI Catalog enabled.
- A project with the appropriate admin or developer role.
- Cursor or VS Code installed.
Workflow Summary
An admin approves MCP servers for a project and defines tool policies.
Install the JFrog plugin for the coding assistant to connect to the MCP Registry.
Confirm the connection and start using approved MCP servers in your agent.
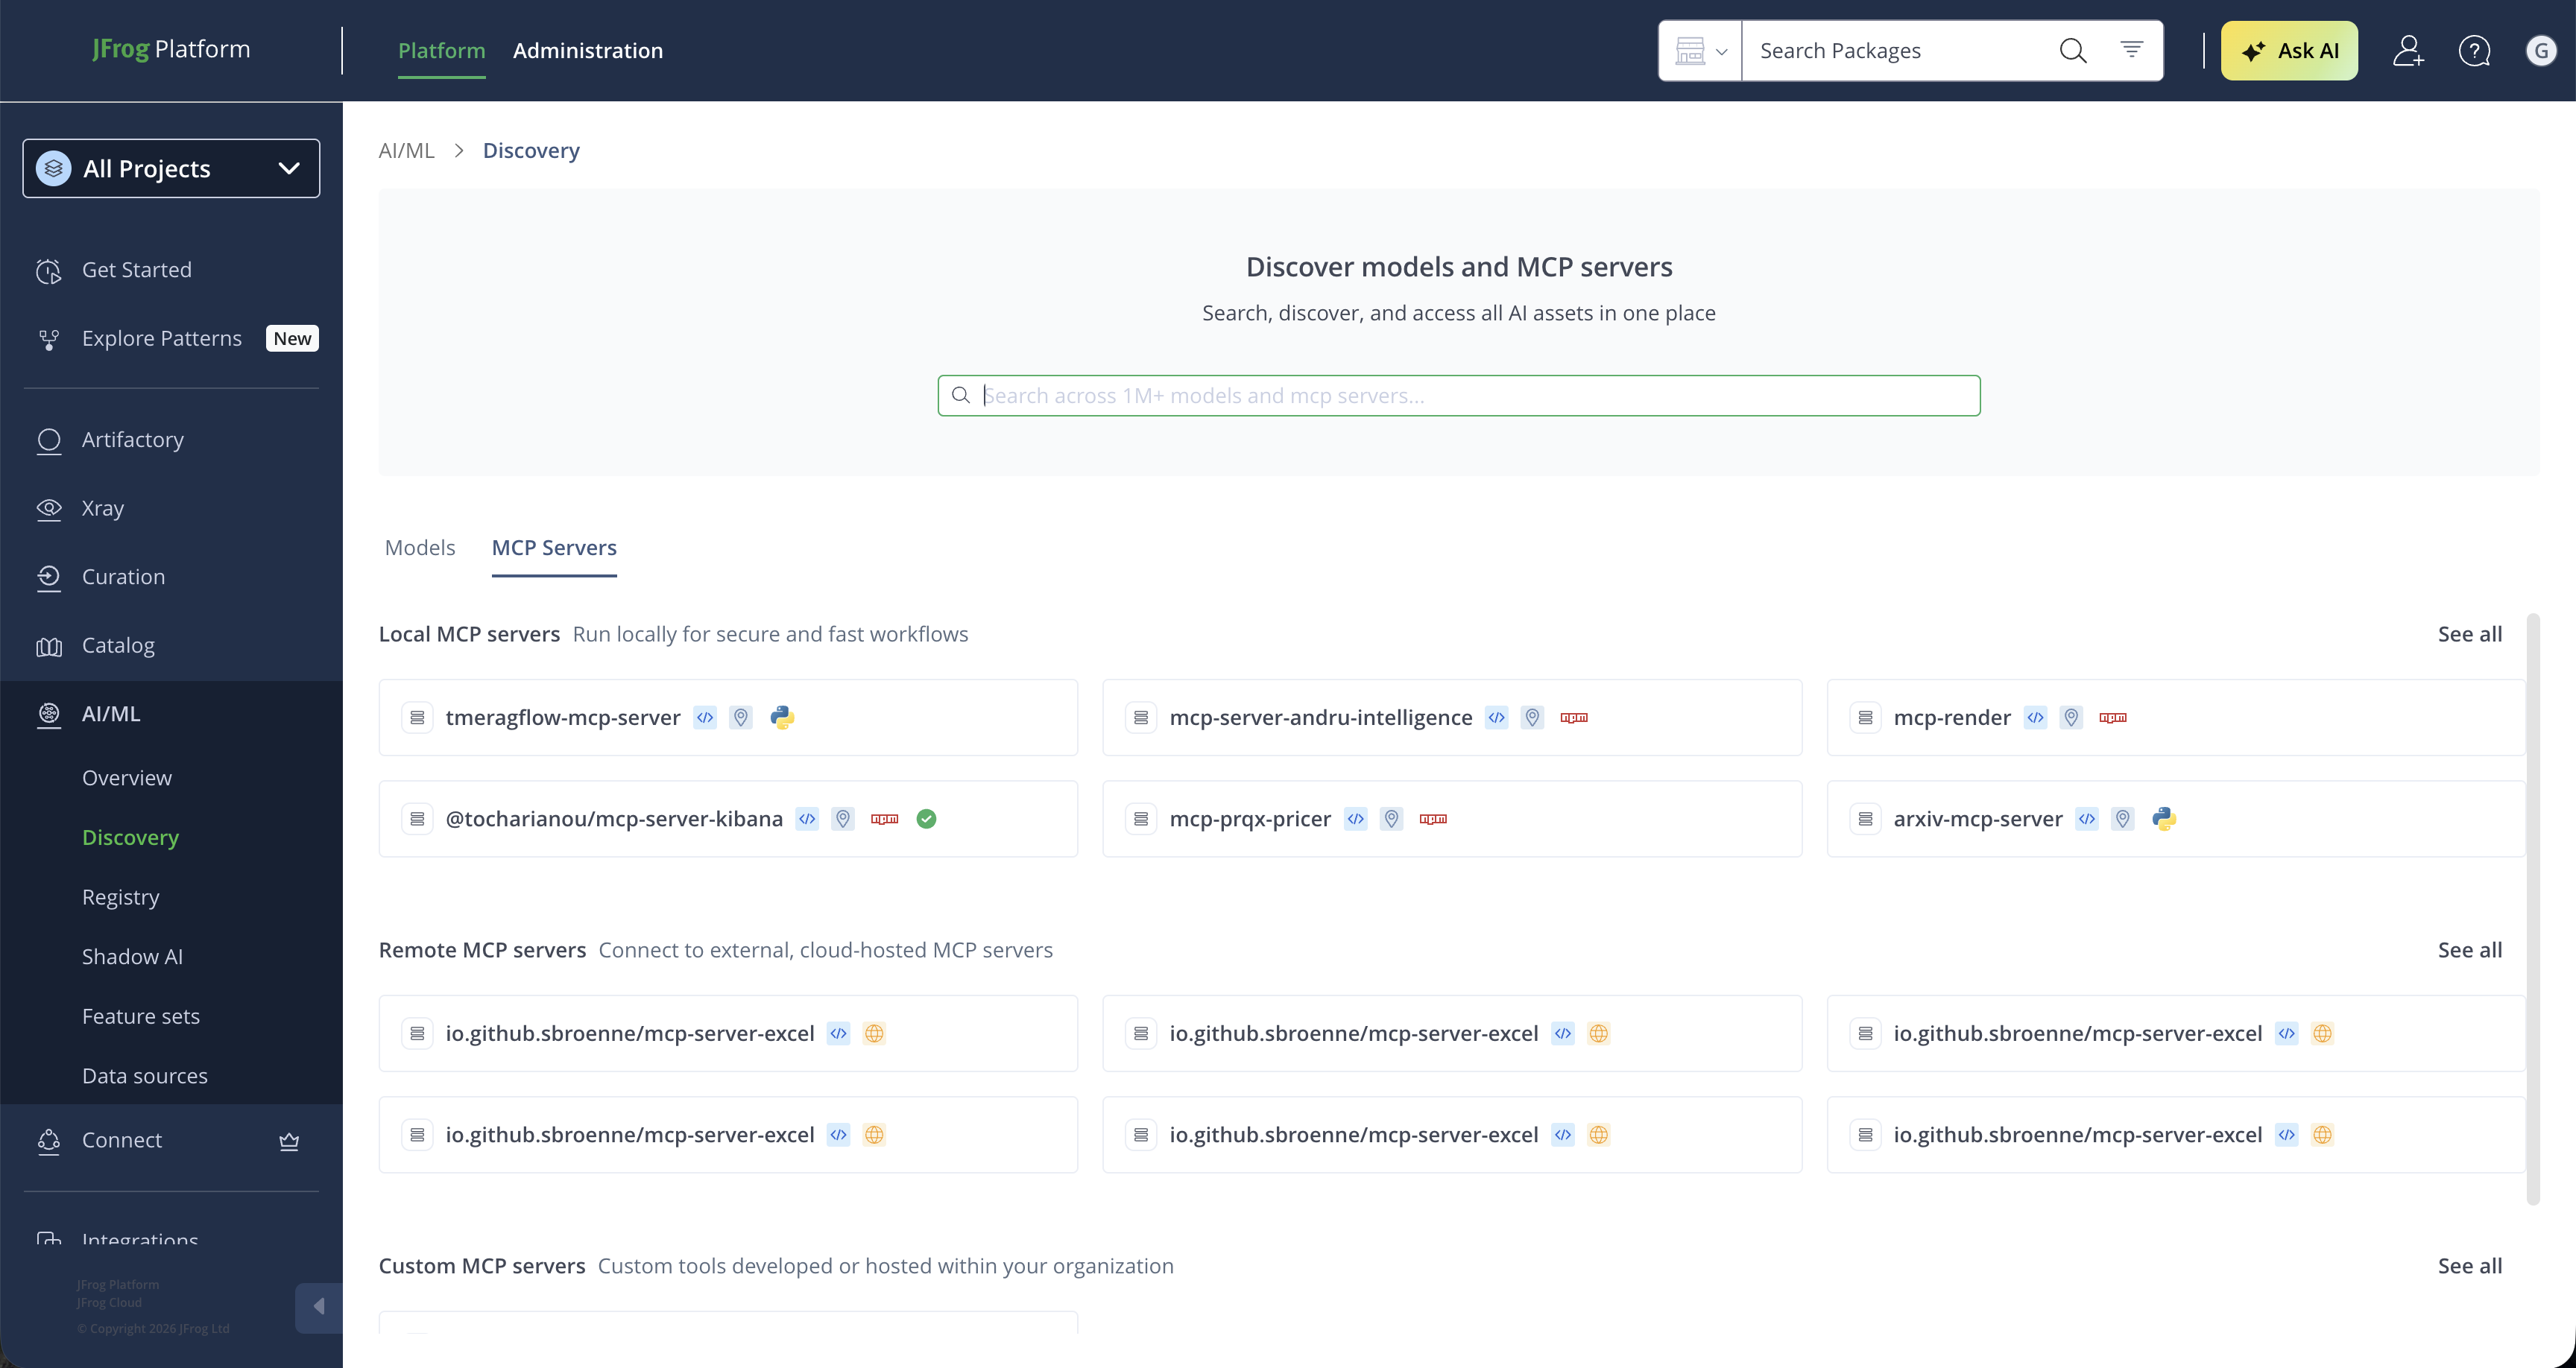
1. Discover and Allow MCP Servers
Required role: Project Admin with Allow in Project permission.
The JFrog MCP Registry enforces a zero-trust model — all MCP servers are blocked by default. Before developers can use an MCP server, an admin must explicitly allow it for one or more projects and define which tools it can expose.
To allow an MCP server for a project:
-
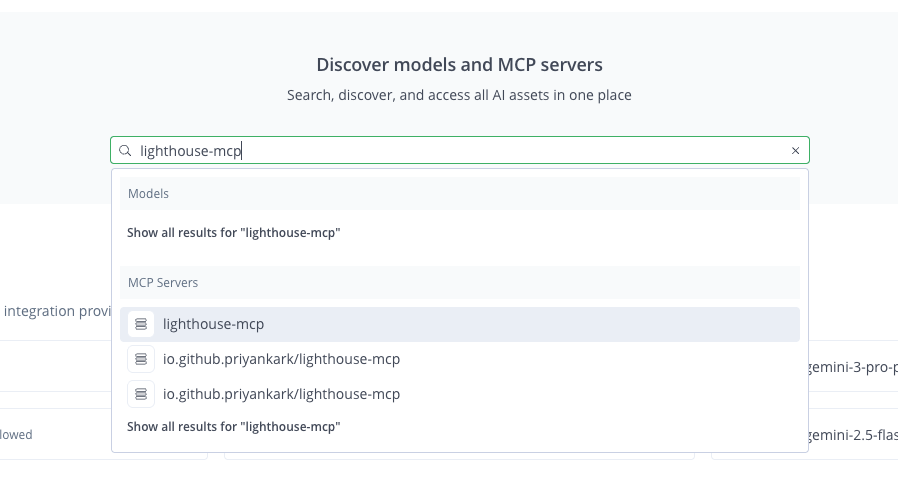
In the JFrog Platform, navigate to AI/ML > Discovery > MCP Servers.
-
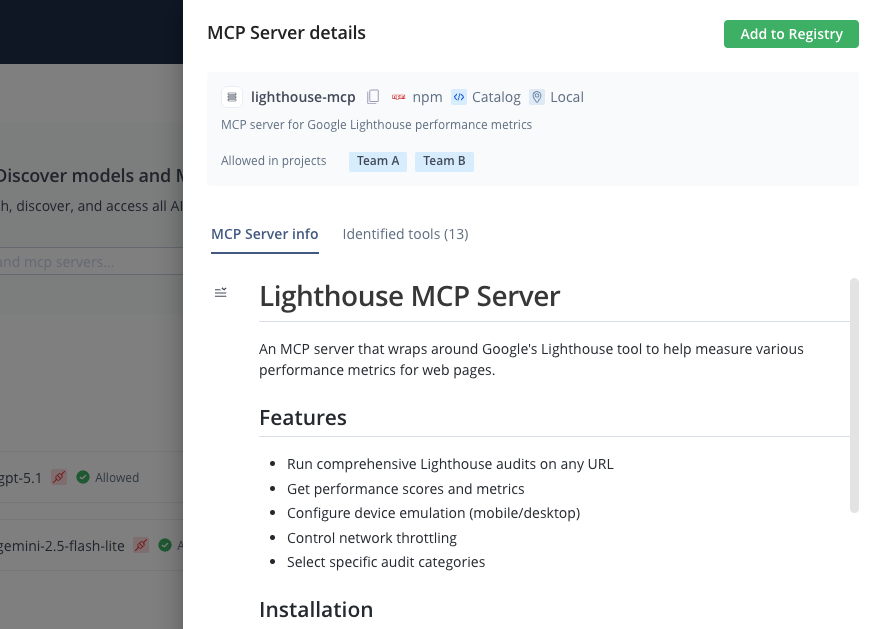
Search for an MCP server and select it.
-
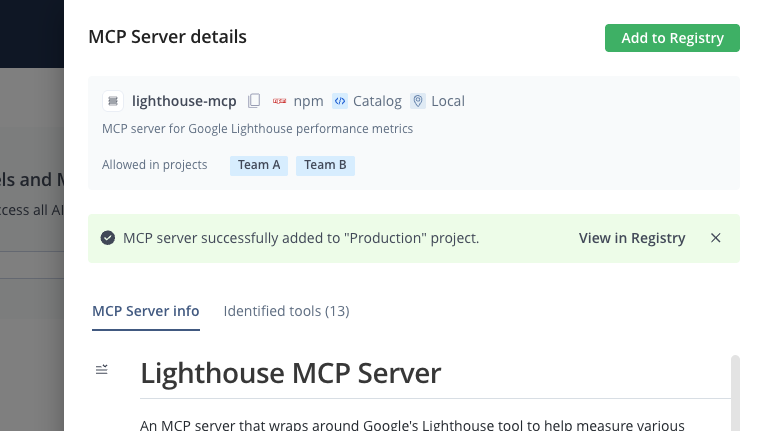
Click Add to Registry in the MCP details pane.
-
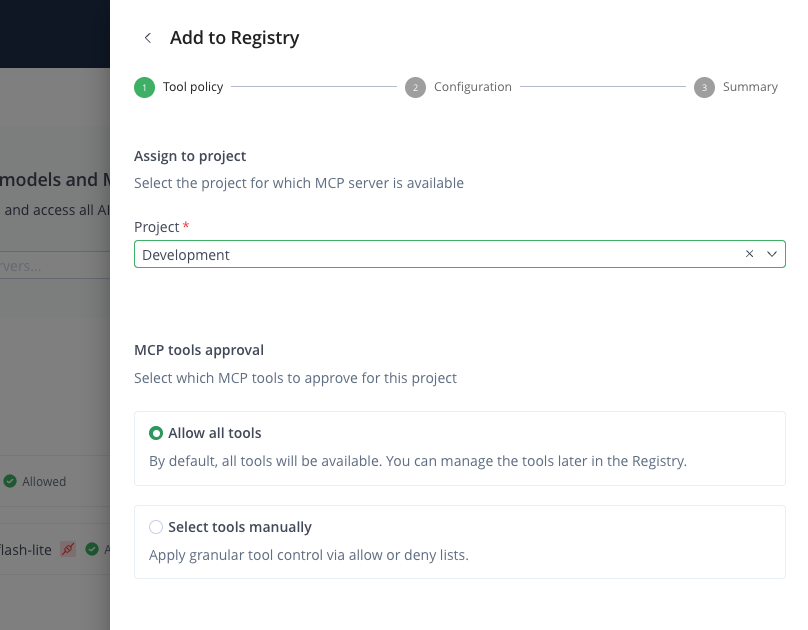
In the Add to Registry pane, select the project to allow this MCP server for.
-
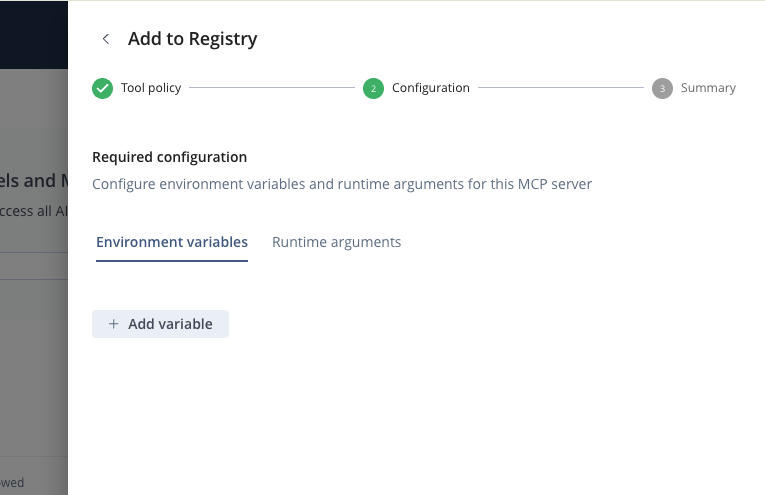
Define a tool policy — select Allow all tools or configure Manual Policies using regex-based filtering. For more information, see Configure Tool Policies.
-
Configure any required environment variables and runtime arguments for the MCP server.
-
Click Save. The MCP server is now authorized and available in the registry for the selected project. Click View in Registry to see it there.
2. Install the JFrog Plugin
Target: Developer workstation.
Install the JFrog plugin for your IDE. The plugin installs and configures the JFrog Agent Guard automatically — no CLI setup required. The Agent Guard is a local proxy that wraps each approved MCP server individually and enforces your organization's tool policies on every agent call.
To install the JFrog plugin:
-
In the JFrog Platform, navigate to AI/ML > Registry > [Your Project] > MCP Servers.
-
Click Install MCP.
-
Select your coding assistant. and follow the installation instructions for that coding assistant:
- For Cursor, see Cursor.
- For Claude Code, see Claude Code
- For VS Code, see VS Code.
After installation, verify that the the JFrog Agent Guard is enabled so that it can start automatically when you open your IDE. Once enabled, your allowed MCP servers are available to your agent.
3. Verify and Use
Confirm that your agent is connected to the JFrog Agent Guard and can access allowed MCP servers.
To verify the connection:
-
Open your coding assistant and start a chat with your agent.
-
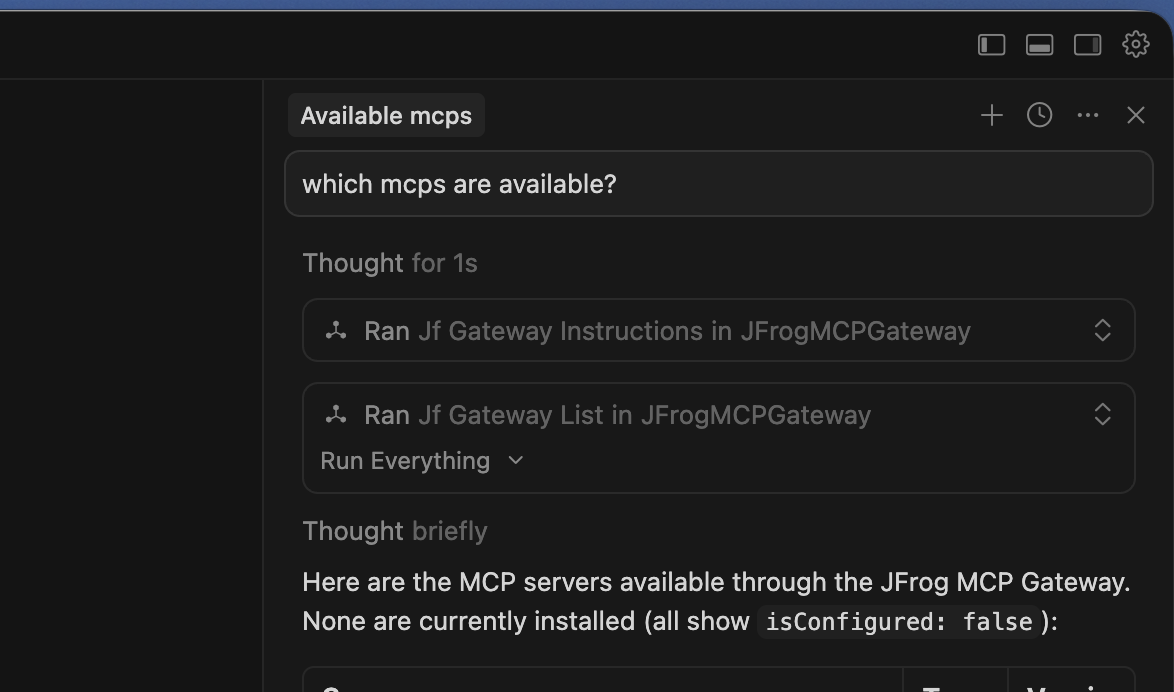
Ask your agent: "Which MCP servers are available?" Your agent responds with two sections — Active servers currently configured, and Available from JFrog servers you can add.
If you do not get the expected results, see MCP Registry Troubleshooting for how to verify that JFrog's Agent Guard is connected to your coding assistant.
-
Ask your agent to add an MCP server — for example, "Add the lighthouse-mcp server."
-
Use the server in your agent chat — for example, "Get the performance report for jfrog.com."
Your agent now has governed access to the MCP servers approved for your project. For a full list of agentic operations, see Manage MCPs via Agents.
Related Topics
- Configure Tool Policies
- Manage MCPs via Agents
- Use the MCP Registry with Agent Guard
- Install JFrog Plugins