Configure VS Code
Install the JFrog VS Code plugin to connect GitHub Copilot to the JFrog MCP Gateway for policy-governed MCP access.
Installing the JFrog VS Code plugin connects GitHub Copilot to the JFrog MCP Gateway — a local proxy that wraps each MCP server individually and enforces your organization's tool policies on every agent call. After setup, your Copilot agent can discover and use MCP servers from the JFrog MCP Registry without any manual configuration.
Prerequisites
- Access to the JFrog Platform with the AI Catalog enabled.
- A project with at least one allowed MCP server.
- Your JFrog host domain and authentication token.
- VS Code with GitHub Copilot Chat enabled.
- GitHub org setting: Settings > Copilot > Policies > Editor preview features: Set to Enabled.
To configure VS Code:
-
In the JFrog Platform, navigate to AI/ML > Registry > [Your Project] > MCP Servers.
-
Click Install MCP. The Install MCP Server pane opens.
-
Select VS Code as your IDE.
-
Install the plugin - you have three options:
Option 1: Use the Magic Link
Use the magic link by clicking the
 button in the Install MCP Server pane or use the link vscode://chat-plugin/install?source=jfrog/vscode-plugin.
Option 2: Use the VS Code Command Palette
-
Open the Quick Open palette (Cmd+Shift+P on macOS or Ctrl+Shift+P on Windows/Linux) and run the following command to install the JFrog plugin:
-
Select/enter:
Chat: Install Plugin from Source -
Enter the plugin source. When prompted, enter:
https://github.com/jfrog/vscode-plugin/ -
Click Trust.
Option 3: Use the Marketplace
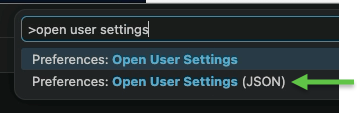
- Add the marketplace source to the VS Code settings file: open settings.json (Cmd+Shift+P and select "Open User Settings (JSON)").
-
Enter:
"chat.plugins.marketplaces": [ "https://github.com/jfrog/vscode-plugin/" ] -
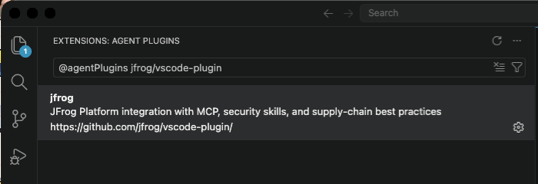
Install the plugin by opening the extensions panel (Cmd+Shift+X), and search for:
@agentPlugins jfrog/vscode-plugin -
Select the plugin.
-
Click Install.
-
If required, click Trust.
-
-
Authenticate using one of the following methods:
-
Authentication via JFrog CLI:
If you already have the JFrog CLI installed and configured, the plugin uses your existing authentication. To configure it:
-
Open your terminal.
-
Run the following command:
jf config add -
Follow the interactive prompts to configure your JFrog Platform URL and Access Token.
-
Restart your IDE/terminal to apply the changes.
-
-
Authentication by Setting Persistent Environment Variables
If you are not using the JFrog CLI, you can permanently save the required environment variables to your machine's operating system, For instructions, see Set Persistent Environment Variables below.
-
-
After you have authenticated, open a workspace in VS Code. The JFrog MCP Gateway starts automatically and your approved MCP servers are available to your Copilot agent.
Set Persistent Environment Variables
Follow the instructions below according to your machine's operating system.
Set env vars for macOS / Linux (Zsh or Bash):
Add the variables to your shell profile so they load automatically every time a terminal (or VS Code) starts.
-
Open your terminal and edit your profile (usually
~/.zshrcfor Mac or~/.bashrcfor Linux):nano ~/.zshrc -
Add the following lines at the bottom of the file:
export JFROG_PLATFORM_URL="<your-platform-url>" export JF_PROJECT="<your-project-key>" export JFROG_ACCESS_TOKEN="<your-access-token>" -
Save and exit: Press
Ctrl+O,Enter, thenCtrl+X. -
Apply the changes:
source ~/.zshrc
Set env vars for Windows (PowerShell):
Use the setx command to save variables permanently to your user account settings.
-
Open PowerShell and run the following commands:
setx JFROG_PLATFORM_URL "<your-platform-url>" setx JF_PROJECT "<your-project-key>" setx JFROG_ACCESS_TOKEN "<your-access-token>" -
Restart your IDE/terminal: You must completely close and reopen VS Code for it to recognize the new system variables.
Note:
For security reasons, if you are using a
.envfile for local development, always ensure it is added to your.gitignoreto prevent leaking your Access Token.
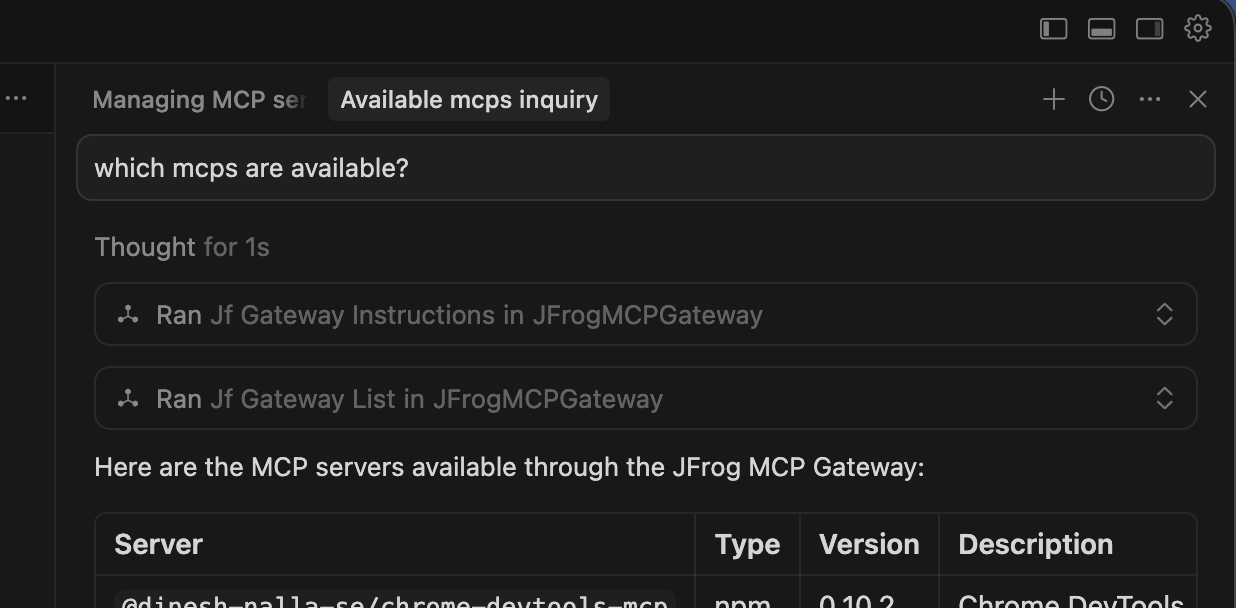
Manage MCP Servers via Agents
The JFrog MCP Gateway various capabilities through MCP tools to your coding agent. You can interact with the JFrog MCP Registry directly through your Agent's chat interface.
For details, see Manage MCPs via Agents.
Updated 13 days ago