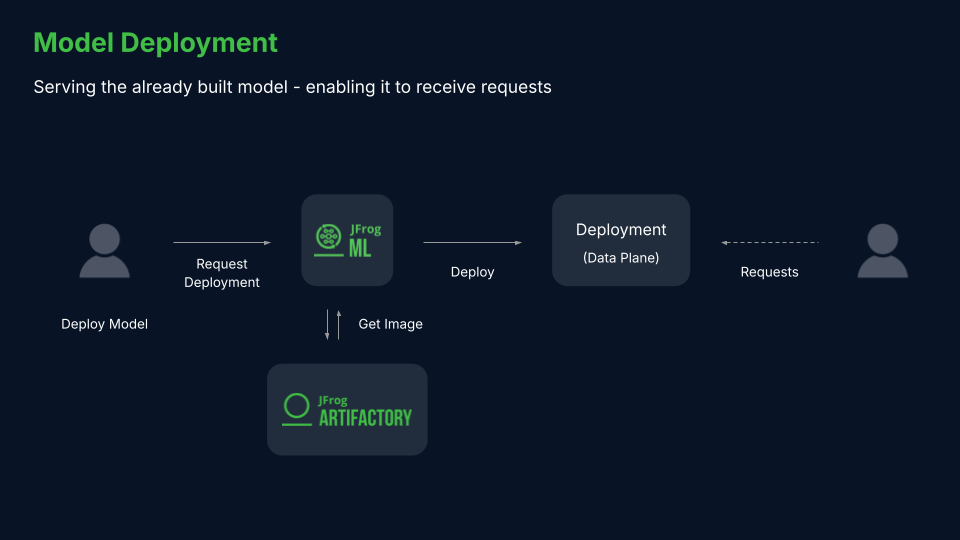
Real-Time Deployments
JFrog ML real time models deploy your ML models with a lightweight, simple and scalable REST API wrapper.
JFrog sets up the network requirements and deploys your model on a managed Kubernetes cluster, enabling you to leverage auto-scaling and security. JFrog ML also adds a suite of monitoring tools, simplifying the process of managing your model performance.
How to Deploy Real-time Models from the CLI
To deploy a model in real-time mode from the CLI, populate the following command template:
frogml models deploy realtime \
    --model-id <model-id> \
    --build-id <build-id> \
    --pods <pods-count> \
    --instance <instance-type> \
    --timeout <timeout-ms> \
    --server-workers <workers> \
    --variation-name <variation-name> \
    --daemon-mode <bool>
For example, for the model built in the JFrog ML Quick Start section, the deployment command is:
frogml models deploy realtime \
    --model-id churn_model \
    --build-id 7121b796-5027-11ec-b97c-367dda8b746f \
    --pods 2 \
    --instance small \
    --timeout 3000 \
    --server-workers 4 \
    --variation-name default \
--daemon-mode falseNote
The deployment command is executed asynchronously by default and does not wait for the deployment to complete. To execute the command synchronously use the
--syncflag.
How to Deploy a Real-time Model Using GPUs
Realtime models can be deployed on GPU instances, simply by selecting a GPU Instance from the available options.
frogl models deploy realtime \
    --model-id churn_model \
    --build-id 7121b796-5027-11ec-b97c-367dda8b746f \
    --pods 4 \
    --instance gpu.a10.xl \
    --timeout 3000 \
    --server-workers 4 \
    --variation-name default \
    --daemon-mode false
How to Configure Real-time Models
The following table contains the possible parameters and variables for deploying real-time models.
| Parameter | Description | Default |
|---|---|---|
| Model ID [Required] | The Model ID as displayed on the model header. | |
| Build ID [Required] | The JFrog ML-assigned build ID. | |
| Variation name | The name of the variation to deploy the build on. | default |
| Initial number of replicas | The number of k8s pods to be used by the deployment. Each pod contains an HTTPS server, where a load balancer splits the traffic between them. | 1 |
| Instance | The required instance to deploy the model, either a CPU based instance or a GPU based instance. | Small |
| Timeout | The number of milliseconds required for an API server request to time out. | 1000(ms) |
| Concurrent workers | The number of Gunicorn workers handling requests. A positive integer is generally in the 2-4 x $(NUM_CORES) range. You may want to vary this a bit to find the optimal value for your particular application’s workload. | 2 |
| Daemon mode | Whether or not to Daemonize the Gunicorn process. Detaches the server from the controlling terminal and enters the background. | Enabled |
| IAM role ARN | The user-provided AWS custom IAM role. | |
| Max batch size | The maximal allowed batch size. | 1 |
| Timeout | The prediction request timeout. | 5000(ms) |
| Service Account Key Secret Name | The service account key secret name to connect with Google cloud provider. | None |
| Purchase option | Rather to use spot/ondemand. | spot |
Warning - Worker Memory Allocation
When deploying workers through an HTTP web server, it's essential to understand that each worker operates in its isolated memory space. Consequently, every worker independently loads a model instance into memory. This characteristic should be carefully considered when determining the required memory capacity for your chosen instance type, ensuring sufficient resources are available for all worker models to load and function optimally.
Using Custom AWS IAM Role
In some cases, a model needs to access external services during the runtime. If your model requires access to AWS resources, a custom AWS IAM role can be passed during the deployment process.
The IAM role should be created with the following trust policy:
{
  "Version": "2012-10-17",
  "Statement": [
    {
      "Effect": "Allow",
      "Principal": {
        "AWS": "arn:aws:iam::<account-id>:root"
      },
      "Action": "sts:AssumeRole",
      "Condition": {
        "ArnLike": {
          "aws:PrincipalArn": "arn:aws:iam::<account-id>:role/qwak-eks-base*"
        }
      }
    }
  ]
}
The IAM role ARN can be passed directly to a deployment using the --iam-role-arn flag. For example:
frogml models deploy realtime \
    --model-id churn_model \
    --build-id 7121b796-5027-11ec-b97c-367dda8b746f \
    --pods 4 \
    --instance small \
    --timeout 3000 \
    --server-workers 4 \
    --variation-name default \
    --daemon-mode false \
    --iam-role-arn arn:aws:iam::<account-id>:role/<role-name>
How to Deploy Real-time Models Locally
To run the deployment locally using a local Docker engine, use the --local flag. For example:
frogml models deploy realtime \
    --model-id churn_model \
    --build-id 7121b796-5027-11ec-b97c-367dda8b746f \
--localNote
Deploying models locally is only available for locally generated builds using the
--no-remoteflag.
Real-time Model Inference
Once you have successfully deployed a real-time model, you can use the JFrog ML Inference SDK to make predictions with it.
This example shows to invoke a model using the Python SDK. You can install the SDK with the following command:
pip install frogml-inferenceNote that the model inference parameters are specific to the model you are using.
In the following example, we assume that the model has already been built and deployed successfully as a real-time endpoint, and its model ID isiris_classifier:
from frogml import api, FrogMlModel
from sklearn import svm, datasets
import pandas as pd

class IrisClassifier(FrogMlModel):

    def __init__(self):
        self._gamma = 'scale'
        self._model = None

    def build(self):
        # load training data
        iris = datasets.load_iris()
        X, y = iris.data, iris.target

        # Model Training
        clf = svm.SVC(gamma=self._gamma)
        self._model = clf.fit(X, y)

    @api()
    def predict(self, df: pd.DataFrame) -> pd.DataFrame:
        return pd.DataFrame(data=self._model.predict(df), columns=['species'])
Summary of code components:
- Model Class:
IrisClassifieris created by inheriting fromFrogMlModel. - Initialization: The init method sets the
gammaparameter for the SVM and initializes the model variable toNone. - Build Method: The
buildmethod loads the iris dataset, trains the SVM model using the data, and stores the trained model. - Predict Method: The
predictmethod takes a DataFrame as input and uses the trained model to generate predictions, returning these in a new DataFrame format.
A prediction call from the JFrog ML Python SDK is:
from frogml_inference import RealTimeClient

model_id = "iris_classifier"
feature_vector = [
   {
      "sepal_width": 3,
      "sepal_length": 3.5,
      "petal_width": 4,
      "petal_length": 5
   }]

client = RealTimeClient(model_id=model_id)
response = client.predict(feature_vector)
Monitoring Real-time Endpoints
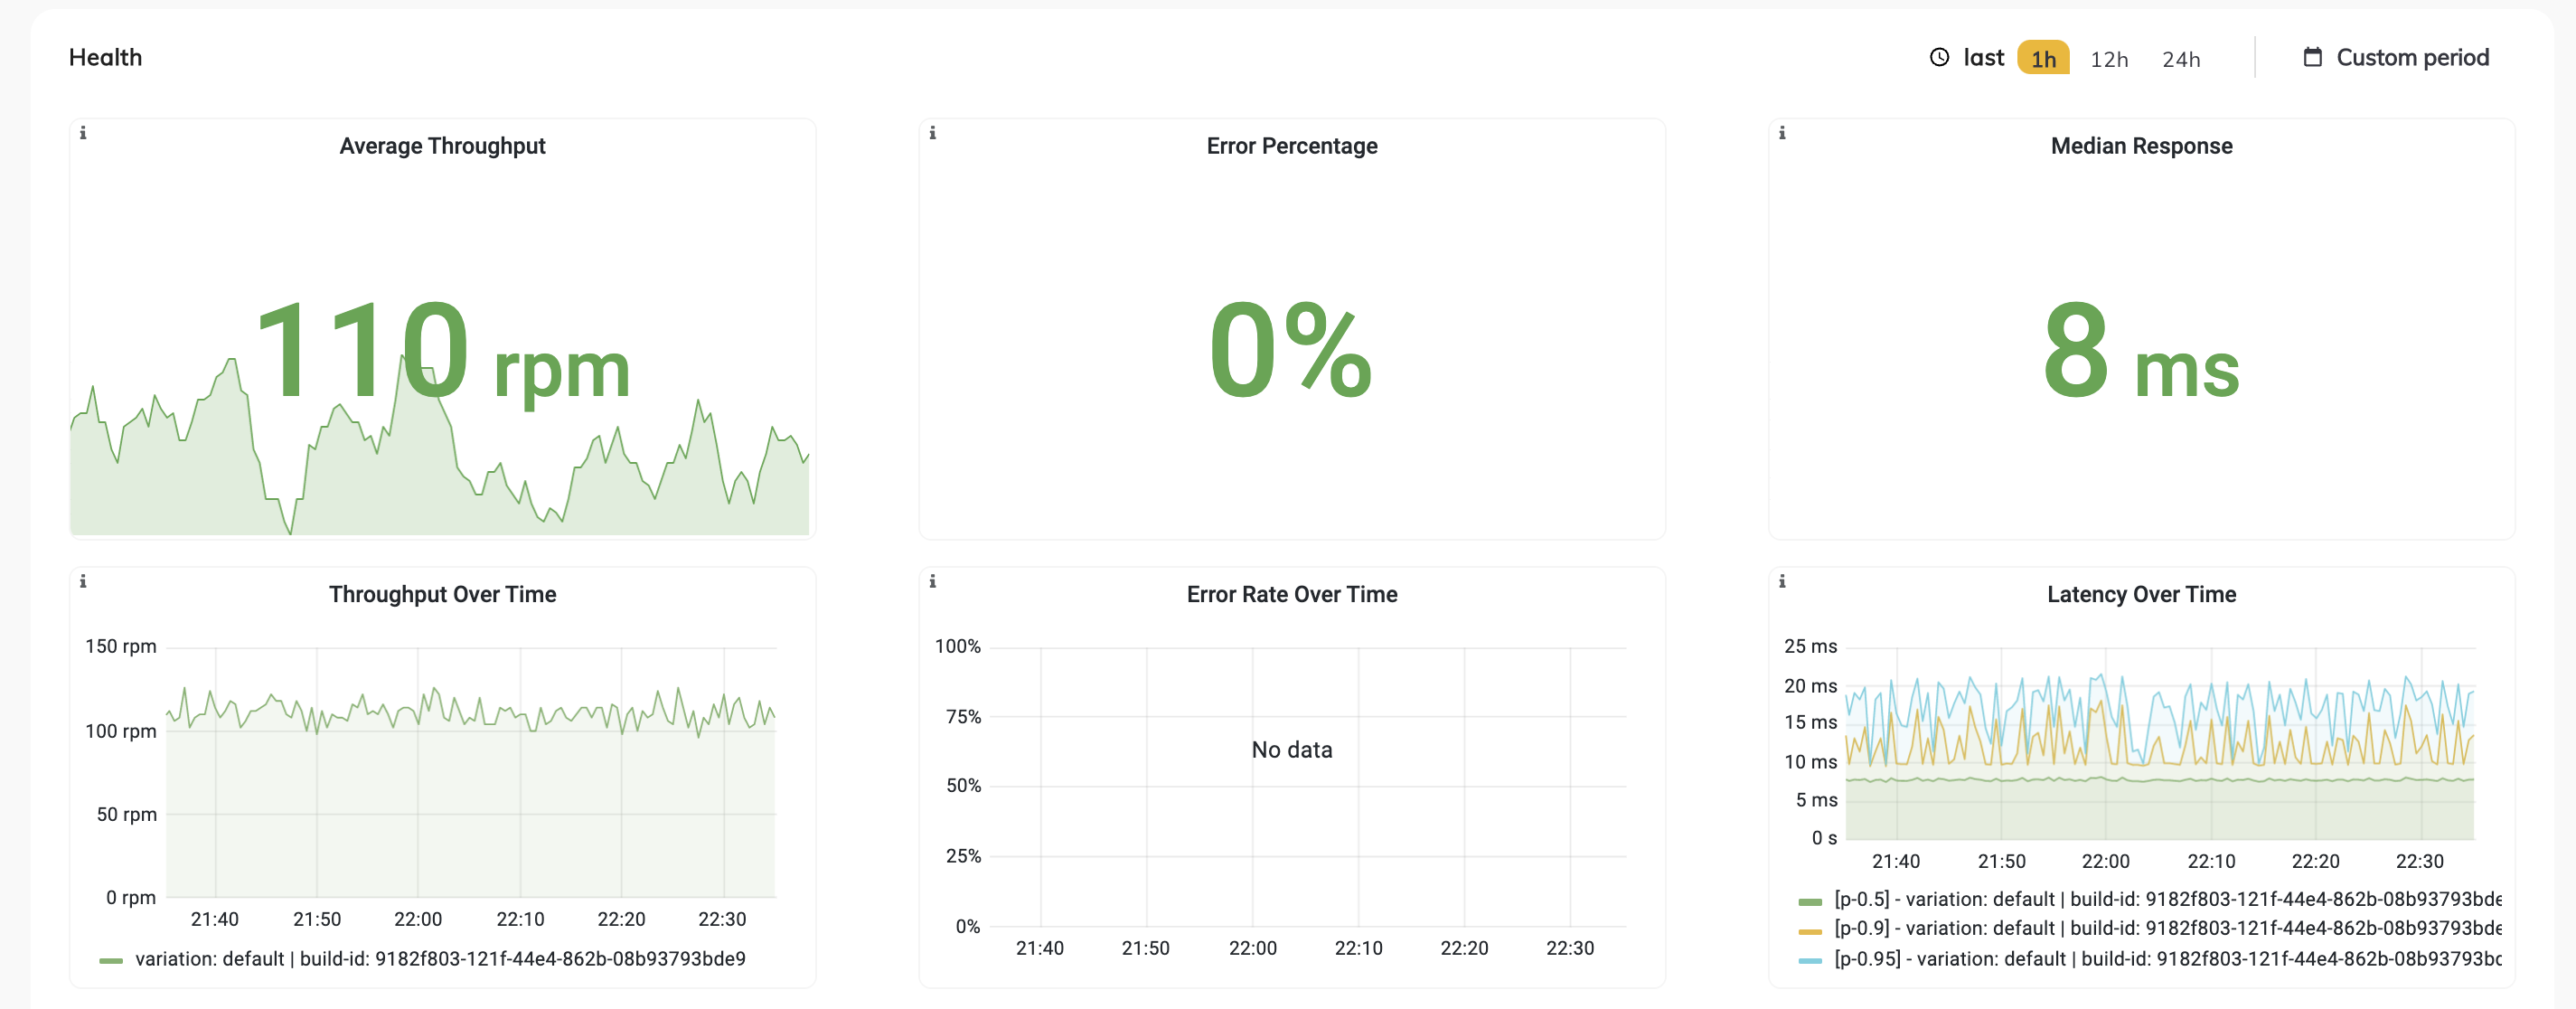
JFrog ML endpoints are deployed on Kubernetes, coupled with advanced monitoring tools for production-grade readiness.
JFrog ML comes bundled with Grafana and Prometheus to provide monitoring dashboards, and ElasticSearch for log collection, amongst other tools.
The following health metrics appear in the model Overview tab:
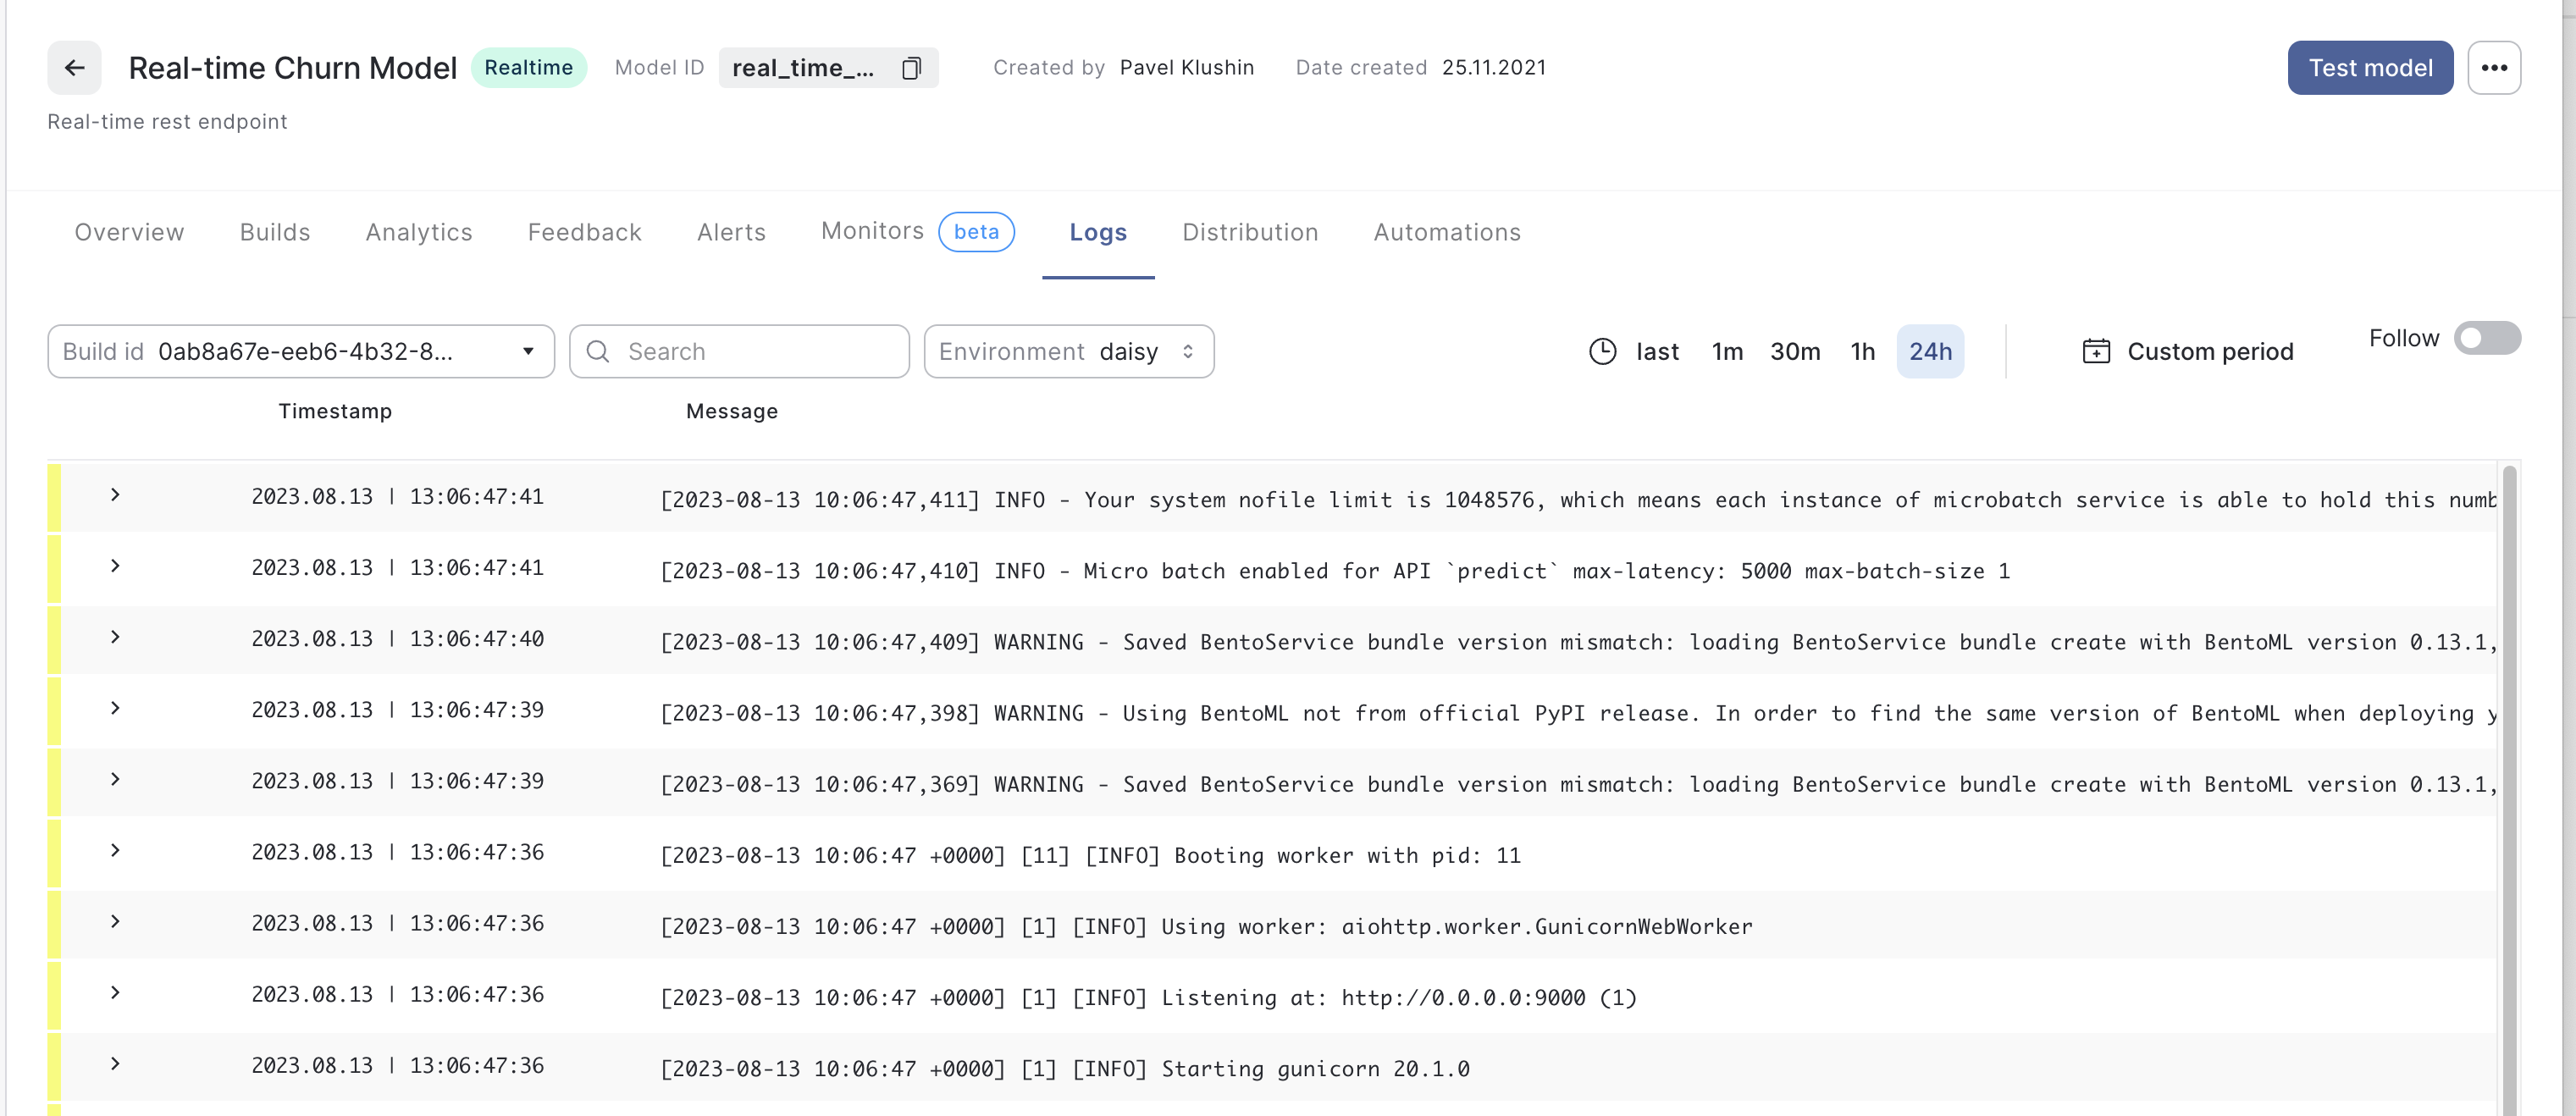
In addition, you can follow and search the applicable logs produced by your model in the Logs tab:
How to Auto-scale Real-time Models
Auto-scaling of a real-time model is done as part of the deployment process. See the following example of the configuration file, and the deployment command:
Create a config file:
model_id: [model_id}
build_id: db2fb18a-20b1-4cd6-9463-33d32c72d322
realtime:
    variation_name: default
    timeout: 6000
    workers: 2
auto_scaling:
    min_replica_count: 1
    max_replica_count: 10
    polling_interval: 30
    cool_down_period: 300
    triggers:
        prometheus_trigger:
            - query_spec:
                metric_type: throughput
                aggregation_type: max
                time_period: 30
              threshold: 3
resources:
    pods: 1
    cpus: 2
memory: 512- Run the following command:
frogml models deploy realtime --model-id [model_id] --build-id db2fb18a-20b1-4cd6-9463-33d32c72d322 --variation-name default --from-file deployment_config_autoscaling.yamlConfiguration
| Parameter | Description | Default Value |
|---|---|---|
| min_replica_count (integer) | The minimum number of replicas will scale the resource down to | |
| max_replica_count (integer) | The maximum number of replicas of the target resource | |
| polling_interval (integer) | This is the interval to check each trigger on | 30 sec |
| cool_down_period (integer) | The period to wait after the last trigger reported active before scaling the resource back to 0 | 300 sec |
| metric_type (prometheus_trigger) | The type of the metric | cpu/gpu/memory/latency/error_rate/throughput |
| aggregation_type (prometheus_trigger) | The type of the aggregation | min/max/avg/sum |
| time_period (integer) (prometheus_trigger) | The period to run the query - value in minutes | |
| threshold (integer) (prometheus_trigger) | Value to start scaling for. cpu - usage in percentages, gpu - usage in percentages, memory - value in bytes, Latency - value in ms, Error Rate - usage in percentages, Throughput - usage in RPM |
Updated 3 months ago