Upload Custom Models
To use your own custom models, you just need to upload the models to JFrog ML. After uploading, custom models are automatically allowed for use.
Before uploading custom models:
JFrog recommends that you scan your custom models using jf malicious-scan . It performs an on-demand local check for model binaries before loading them into memory. See Scan You ML Models for more information
Run the scan in a developer workstation or CI runner when you want immediate feedback before execution. On-demand CLI scan results are local and are not currently persisted in the JFrog Platform UI.
To upload a custom model:
-
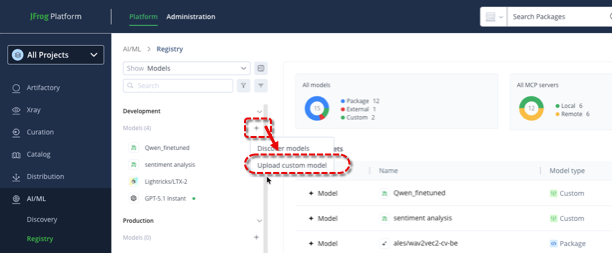
From the JFrog platform menu, select AI/ML > Registry.
-
Click the + adjacent to the project on the left for which you want to upload and allow the custom model.
-
Click Upload custom model.
-
If you have not Installed it yet, install the
frogml-cli(use Python versions 3.10 to 3.14).pip install frogml-cli -
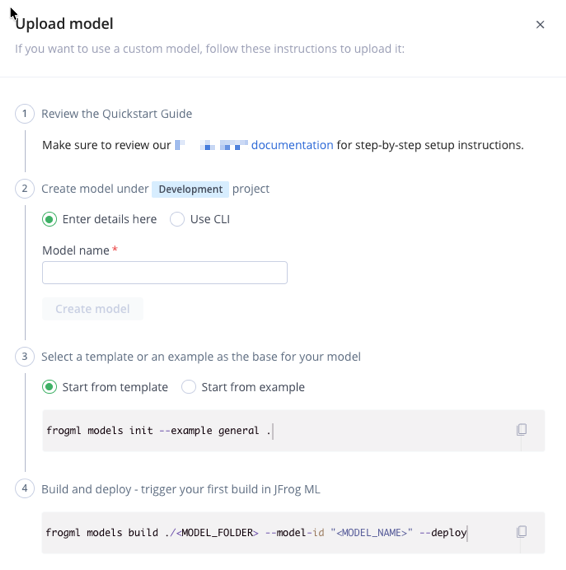
Create the model either by entering the details here, or using the CLI.
Enter details in
Upload Model pane:Using CLI: a. Enter: - Model Name
- Project
frogml models create "<MODEL_NAME>" --project "<PROJECT_NAME>"
-
Select a template or an example as the base for your model.
Start from Template Start from Example frogml models init --example general .frogml models init --example credit_risk .
-
Build and deploy - trigger your first build in JFrog ML.
frogml models build ./<MODEL_FOLDER> --model-id "<MODEL_NAME>" --deploy
Updated 3 months ago