Use Models in Your Code
Integrate allowed models within your code.
These procedure explains how to utilize the allowed models within your organization's code.
Note:
The integration process varies depending on the model type. Follow the procedure according to the model that you are invoking.
External API Models
▶ To use an allowed external API model:
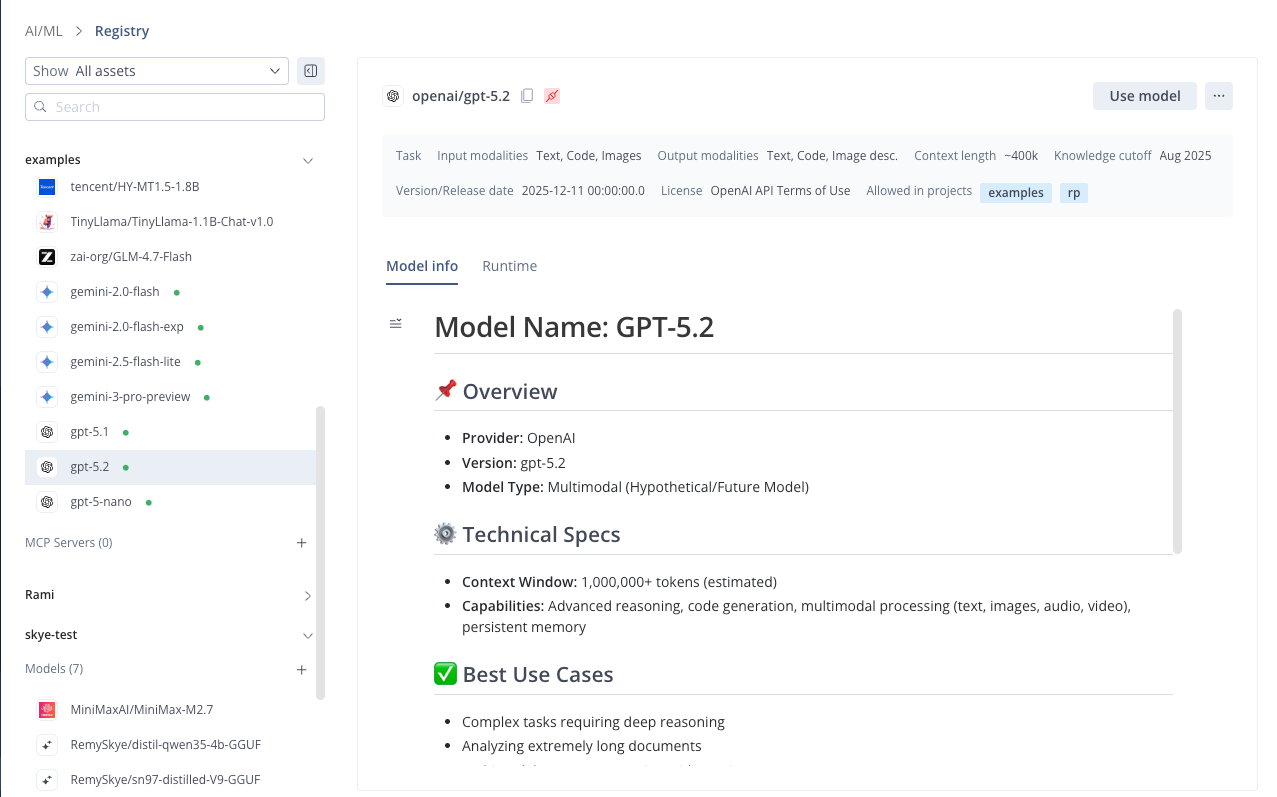
When a model is allowed, the Use Model button appears in the Model information window with the relevant code snippets.
-
Navigate to AI/ML > Registry.
-
Click the project for which the model is allowed in the projects list on the left, and then select (double-click) the model from project's allowed models' list. For example:
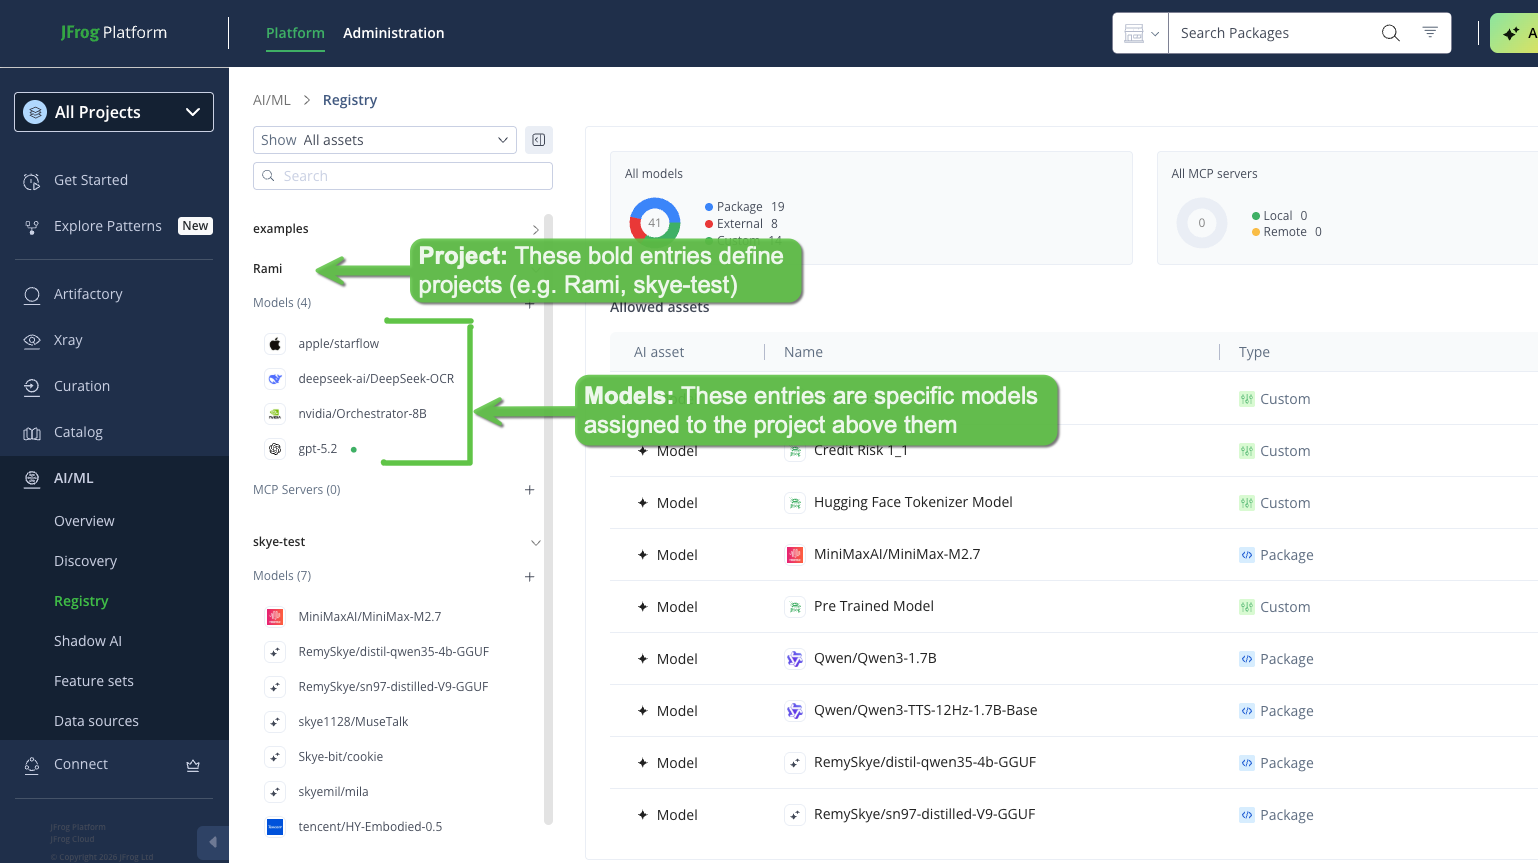
The model information is shown.
Note:
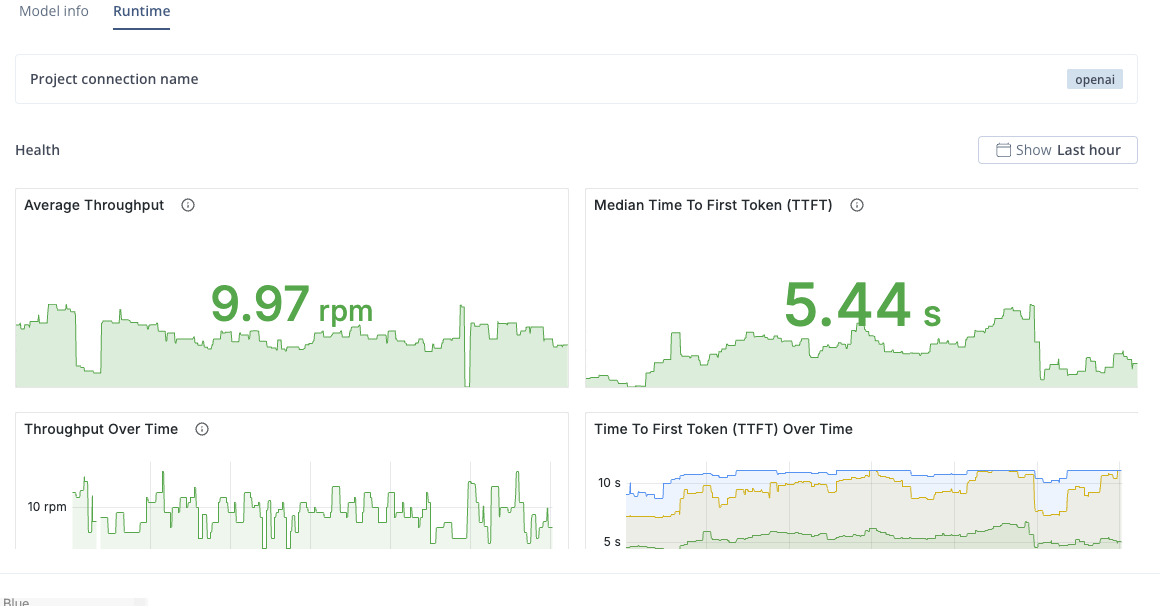
You can view the model dashboard by selecting the Runtime tab. For details on how to read the dashboard to monitor and interpret the model's performance, refer to Inference Metrics.
The dashboard only shows data when there is traffic.
-
Click Use Model. The Use Model pane is displayed. Here you are able to generate a token and insert it into the code snippet for the framework of your choice.
-
Browse through the example code snippets for different libraries and frameworks (Python, Javascript, cURL).
from openai import OpenAI client = OpenAI( api_key="your_jfrog_api_key", base_url="https://a0dwyav8icgft.ml.jfrog.io/v1" ) response = client.chat.completions.create( model="openai/gpt-5.2", messages=[ {"role": "system", "content": "You are a helpful assistant."}, { "role": "user", "content": "Explain to me how AI works in one sentence" } ] ) print(response.choices[0].message)import OpenAI from "openai"; const openai = new OpenAI({ apiKey: "your_jfrog_api_key", baseURL: "https://a0dwyav8icgft.ml.jfrog.io/v1" }); const response = await openai.chat.completions.create({ model: "openai/gpt-5.2", messages: [ { role: "system", content: "You are a helpful assistant." }, { role: "user", content: "Explain to me how AI works in one sentence", }, ], }); console.log(response.choices[0].message);curl --location "https://a0dwyav8icgft.ml.jfrog.io/v1/chat/completions" -H "Content-Type: application/json" -H "Authorization: Bearer your_jfrog_api_key" -d '{ "model": "openai/gpt-5.2", "messages": [ { "role": "system", "content": "You are a helpful assistant." }, { "role": "user", "content": "Explain to me how AI works in one sentence" } ] }'Note that this code snippet shown includes a placeholder for the
api_keyfor the token you are about to generate, and themodelname, which includes the name of the connection. -
Click Generate token. The Set Up A Generic Client pane is displayed.
Note:
Keep the default repository.
-
Click Copy.
-
Paste the code snippet into your code editor. You can now use this model in your applications.
Model Packages


Hugging Face Model Packages
After a Hugging Face model package has been allowed, the Use Model and Deploy buttons appear in the Model information window, allowing you to either use the model with the transformers library or to use it in all your applications. Using a Hugging Face Model with Your Transformers Library vs. Deploying:
-
Use Model: Enables you to integrate the model with the transformers library, you use the model locally within your development environment. This approach is ideal for experimenting, testing, and small-scale applications. For instructions, see below.
-
Deployment: Deploying the model through this platform involves configuring it to run within a managed infrastructure. Once deployed, the model can be accessed and used across all your applications, facilitating consistent performance and scalability. For instructions, see Deploy Model Packages.
Note:
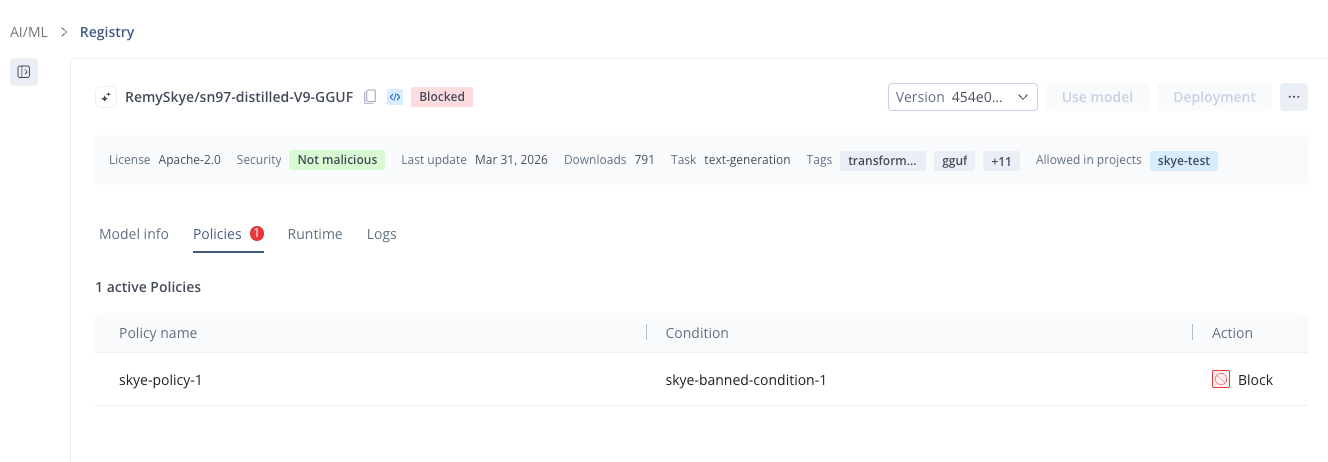
For model packages, note that there is a Policies tab on the model information pane. Here you can see any blocking policies for the selected model. If the model is blocked, the Use Model and Deployment buttons are disabled.
Example:
▶ To use the allowed Hugging Face model only with the transformers library:
-
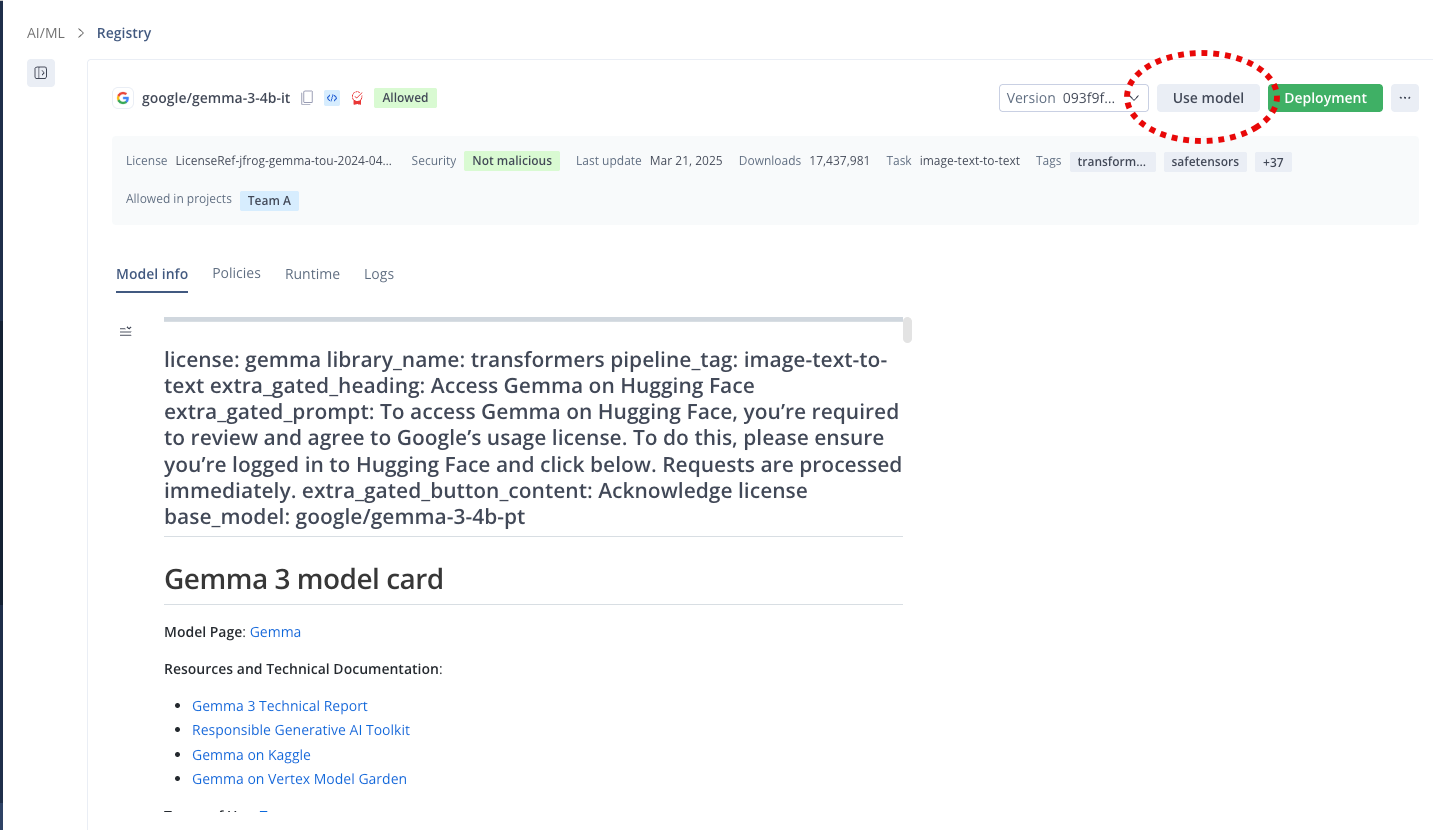
On the Registry page, either click the allowed model in the list or select the model from under the relevant project on the left.
-
-
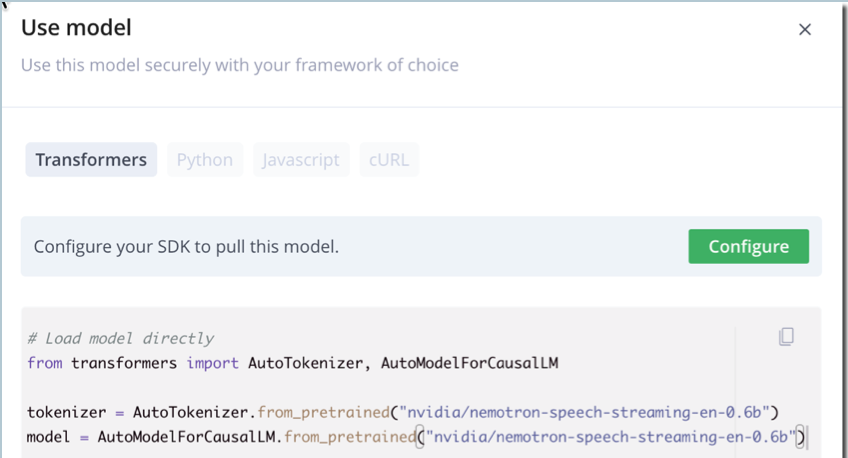
Click Use Model. The Use model pane is displayed. Here you define how to use this model securely with your framework of choice.
Note:
Keep the default repository.
-
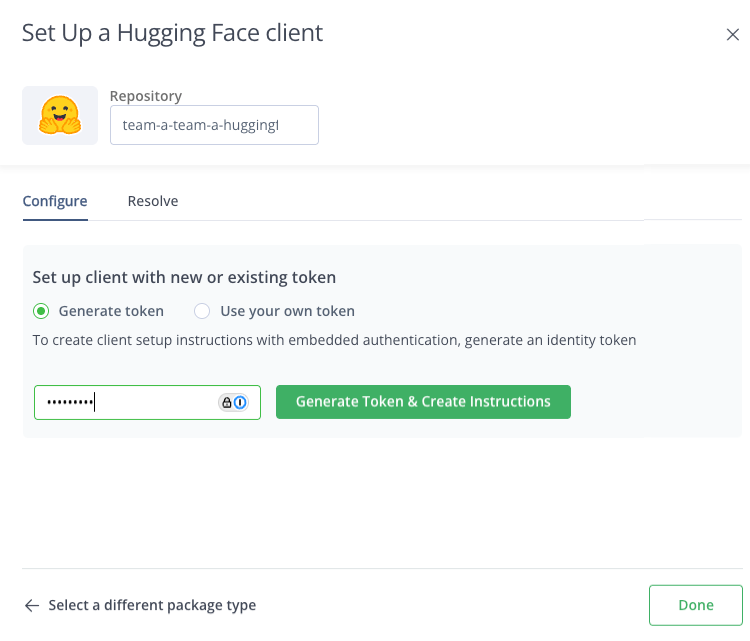
Click Configure to configure your SDK to pull this model. The Set Up A HuggingFaceML Client pane is displayed. These steps tell the system where to take the model from.
-
Enter your JFrog account password and click Generate Token & Create Instructions.
-
Follow the instructions on the Configure tab:
-
Copy the code snippet with the
exportcommands into your code interface. This configures the Hugging Face client to work with Artifactory, and adds your repository.export HF_HUB_ETAG_TIMEOUT=86400 export HF_HUB_DOWNLOAD_TIMEOUT=86400 export HF_ENDPOINT=https://jmlsoleng.jfrog.io/artifactory/api/huggingfaceml/research-research-huggingface-remote -
Copy and run the code snippet with the export token (to authenticate the Hugging Face client with Artifactory).
export HF_TOKEN=tokenexample -
Click Done.
-
-
- Copy the Transformers code snippet into your Python environment:
# Load model directly
from transformers import AutoTokenizer, AutoModelForCausalLM
tokenizer = AutoTokenizer.from_pretrained("model_name")
model = AutoModelForCausalLM.from_pretrained("model_name")
Now you are ready to use the model directly within your development environment using the Transformers library.
To use the model with all your applications (Deploy):
- See Deploy Model Packages for instructions. These instructions include how to deploy the model and also how to configure the model for use in your developments. After you have deployed and configured the model, you can see the model's usage metrics in the model Overview page.
NVIDIA NIM Model Packages
After a NVIDIA model package has been allowed, the Use Model button appears in the Model information window, enabling you to use the allowed model in your organization.
Prerequisites for using NVIDIA NIM models:
-
JFrog Platform Admin Permissions: Required to allow models and provision them to projects.
-
NVIDIA NGC API Key: Admins must have a valid NVIDIA NGC API key to authenticate upstream repositories (docker and NIM repos).
-
Docker Environment: Developers must have Docker installed locally or on their execution environment, along with supported NVIDIA GPUs and the NVIDIA Container Toolkit.
-
First time a NVIDIA NIM is being allowed/used: follow the instructions in Artifactory Set Me Up instructions for Package Manager Clients.
-
Xray Version: A minimum version of 3.143.6 is required in order to allow a NIM model. (if you don't have the minimum version required, you'll get the
Failed to allow model usage in projecterror.Click here for instructions how to verify your Xray version.
Note:
For instructions on how to deploy and run NVIDIA NIM model packages in your infrastructure, see the NVIDIA NIM Deployment Guide. link to https://developer.nvidia.com/blog/a-simple-guide-to-deploying-generative-ai-with-nvidia-nim/.
To use allowed NVIDIA NIM models:
-
Navigate to AI/ML > Registry.
-
Select the model required (under the project it is allowed for).
-
Click Use Model. The Use Model Details pane is displayed.
-
If you already have allowed (and used) any NIM model, select the Pull and Run tab, and follow the instructions below.
Note:
If this is your first NVIDIA NIM, and you did not already configure NVIDIA NIM package management in JFrog, first follow the Artifactory Set Me Up instructions for Package Manager Clients and/or the instructions on the First-time setup tab in the Use model pane.
- Copy the provided docker run snippet example.
docker run -it --rm --gpus all \ -e NGC_API_KEY="<NGC_API_KEY>" \ -e NGC_API_ENDPOINT="<NGC_API_ENDPOINT>" \ -e NGC_API_SCHEME="<NGC_API_SCHEME>" \ -e NGC_AUTH_ENDPOINT="<NGC_AUTH_ENDPOINT>" \ -v "<CACHE_DIR>:/opt/nim/.cache" \ <DOCKER_REPOSITORY>/<IMAGE_PATH> - Paste and run the command in your terminal , where:
<NGC_API_KEY>= Your personal NVIDIA GPU Cloud API key.<NGC_API_ENDPOINT>= The API endpoint (defaults to the standard NGC endpoint).<NGC_API_SCHEME>= The connection protocol (usually https).<NGC_AUTH_ENDPOINT>= The authentication service endpoint.<CACHE_DIR>= A local directory path on your host machine used to store model weights.<DOCKER_REPOSITORY>/<IMAGE_PATH>= The full registry path for the specific NIM Docker image you are deploying.
- Copy the provided docker run snippet example.
Updated about 1 month ago