Advanced Security Readiness Checking
Run JFrog Advanced Security health checks (Xray 3.107+) to validate JFConnect, entitlements, K3s/K8s config, and database sync.
Tip
You are in Step 4, the final step of the JFrog Advanced Security installation. If you have not done the previous steps, refer to Installing JFrog Advanced Security
The following steps help you validate whether your self-hosted JFrog Platform is correctly configured and ready with the JFrog Advanced Security service.
Starting with Xray version 3.107.x for self-hosted, JFrog has added a specialized Advanced Security health check monitoring feature. This feature helps you determine which components are operational or absent, ensuring your Advanced Security service runs effectively.
Enabling Health Check Cron Job
-
For Helm Installation: Add the following setting in your helm upgrade command
--set jas.healthcheck.enabled=true -
For RPM/DEB/Docker Compose Installation: Configure this in the JFrog Advanced Security installation script.
You can see the feature was enabled in the platform in Administration > Xray Settings.

Once activated, you can check the status in the upper banner Administration > Xray Settings > Monitoring
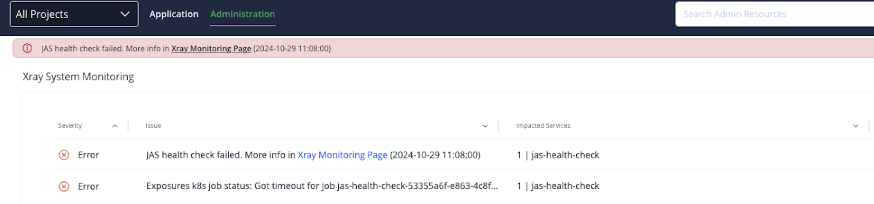
Health Check Indicators
- **JFConnect Service Health:**For troubleshooting, refer to Troubleshooting the JFConnect Microservice
- Advanced Security Entitlements Health: For troubleshooting, refer to Ensure your JFrog Platform instance has the necessary entitlements for Advanced Security.
- Advanced Security K3S/K8S Configuration: For troubleshooting, refer to Configuring Advanced Security for K3S/K8S correctly.
- Advanced Security - Container Accessibility: For troubleshooting, refer to Ensuring Accessibility for Advanced Security Containers
- Advanced Security - Database Synchronization: For troubleshooting, refer to Ensure proper synchronization of your Advanced Security Database.
Troubleshoot the JFConnect Microservice
JFConnect microservice acts as the JPD (JFrog Deployment) entitlements service and enables dynamic entitlement allocation for the connected products, based on account/subscription changes in JFrog’s main entitlements server. For more information on the service, see JFConnect Microservice.
-
Verify that JFConnect is enabled in your JFrog Platform system.yaml file. Configure JFConnect at the global level and confirm it is enabled:
Jfconnect: enabled: true -
If you run behind a proxy, add the JFConnect proxy settings. Verify the following additional settings are in place:
jfconnect: enabled: true env: http_proxy: "http://yourproxyaddress/" https_proxy: "http://yourproxyaddress" no_proxy: "localhost,127.0.0.1" -
Restart your JFrog system and check whether JFConnect is functioning as expected. To verify that the JFConnect microservice is operating correctly, follow these steps:
- Call the following URL:
https://your.domain//ui/api/v1/jfconnect/entitlements - You should receive an array containing entitlement information (it should not be empty).
- Call the following URL:
If you do not see the expected results, consult the JFConnect help center for further assistance. An empty array indicates that JFConnect is not functioning properly. If the service continues to have issues, contact your JFrog technical support representative.
Ensure your JFrog Platform instance has the necessary entitlements for JFrog Advanced Security
Follow these steps to verify that JFrog Advanced Security is enabled in your JFrog Platform environment:
- Access the following URL:
https://your.domain/ui/api/v1/jfconnect/entitlements - The expected output is an array of entitlements, that includes the JFrog Advanced Security entitlement.
- To find the JFrog Advanced Security entitlements, search for ‘secrets_detection’ in the returned response.
Example:
{
      "name": "secrets_detection",
      "value": 1,
      "expiryDate": "2026-07-20T00:00:00.000Z",
      "productExpiryDate": "2026-07-20T00:00:00.000Z",
      "isTrial": true,
      "customerId": "",
      "blockingQuantity": 1,
      "dependentOnAction": xray_advanced_actions
 }
If you got an empty result please refer to the troubleshooting jfconnect micro service section.
If you have entitlement information but the JFrog Advanced Security details are missing from the returned data, JFrog has likely not assigned the necessary entitlement. Contact your JFrog sales representative or JFrog support for assistance.
Ensure your Advanced Security K3S/K8S is configured correctly
The Advanced Security feature utilizes K8S for Helm and OpenShift installations, and K3S for DEB, RPM, or Docker Compose installations. Our health check procedure ensures that all nodes are operational and that communication between services is functioning properly.
Error Example
kubernetes_job_status_contextual_analysis": "Got timeout for job jas-health-check-72ab496c-fe70-4a7b-960b-1b0b52899b48, events: [\n\t{\n\t\t\"type\": \"Warning\",\n\t\t\"reason\": \"FailedScheduling\",\n\t\t\"firstTimestamp\": \"0001-01-01T00:00:00Z\",\n\t\t\"message\": \"0/1 nodes are available: 1 Insufficient cpu, 1 Insufficient memory. preemption: 0/1 nodes are available: 1 No preemption victims found for incoming pod..\"\n\t}\n]",If this check fails, please verify the following:
-
Ensure you have sufficient processor and memory resources.
-
For Helm/OpenShift installations, confirm that you have configured the Service Account and RBAC authorization properly. Refer to the instructions here: JFrog Advanced Security Installation Guide
-
For DEB/RPM/Docker Compose installations, ensure your K3S setup is correct.
sudo systemctl status k3s
sudo k3s kubectl get nodes
Ensure Your Advanced Security Containers Accessibility
The Advanced Security feature utilizes containers to perform scans. Our health check process ensures the accessibility and operational status of JFrog Advanced Security containers, identifying any access restrictions or network issues impacting container communication.
Error example
\"releases-docker.jfrog.io/jfrog/xray-jas-contextual-analysis:3.999.99-feature-XRAY-80150-3-24\": failed to pull and unpack imageIf this check fails, please verify the following:
- Network limitations: Ensure that the following URL is whitelisted:
https://releases-docker.jfrog.io - Air-gapped environment: Refer to the procedure here: Install JAS with Helm in an air-gapped environment
Ensure Proper Synchronization of your Advanced Security Database.
The Advanced Security feature requires two additional database packages, along with the Xray database package: Contextual Analysis and Exposures. In the case of online database synchronization, both packages are automatically incorporated into the broader Xray database synchronization process.
For offline synchronization, please refer to the instructions available on the administration Xray DB sync screen. (Administration > Xray Settings > Database Sync).
If this check fails, please do the following:
- Manually initiate the DBSYNC process to maintain data consistency and address errors.
- Verify that adequate disk space is available.
- Ensure that the disks utilized for Xray and its database are SSDs that meet the required IOPS specifications.
Related Topics
Updated 2 months ago