Xray installation using installv2.sh
This guide explain how to install xray (rpm, deb , linux archive and docker compose) using the new interactive script
Available form Xray Version >= 3.131.x:
Starting Xray version 3.131.x, the installer V2 script will allow you to install RabbitMQ 4 and/or Quorum queues optionally.
-
Download the Xray Compressed Archive. Visit the Download page to get the Xray compressed archive
-
Extract the contents of the compressed archive and go to the extracted folder.
tar -xvf jfrog-xray-\<version>-\<compose|rpm|deb>.tar.gz cd jfrog-xray-\<version>-\<compose|rpm|deb> -
OS user permissions for Linux archive
When running Xray, the installation script creates a user called xray by default, which must have run and execute permissions on the installation directory.We recommend that you extract the Xray download file into a directory that gives run and execute permissions to all users, such as /opt.
mv jfrog-xray-\<version>-linux.tar.gz /opt/
cd /opt
tar -xf jfrog-xray-\<version>-linux.tar.gz
mv jfrog-xray-\<version>-linux xray
cd xray
.env file included within the Docker-Compose archive.
The .env file is used by Docker Compose and is updated during installations and upgrades.Some operating systems do not display dot files by default. If you make any changes to the file, remember to back up before an upgrade.
-
Run the installer script.
The script prompts you with a series of mandatory inputs, including the jfrogURL (custom base URL)and joinKey, Database and Rabbitmq details.NOTE: If you are installing Xray HA cluster please use the same password for Rabbitmq across all nodes to successfully form the cluster.
RPM or Debian
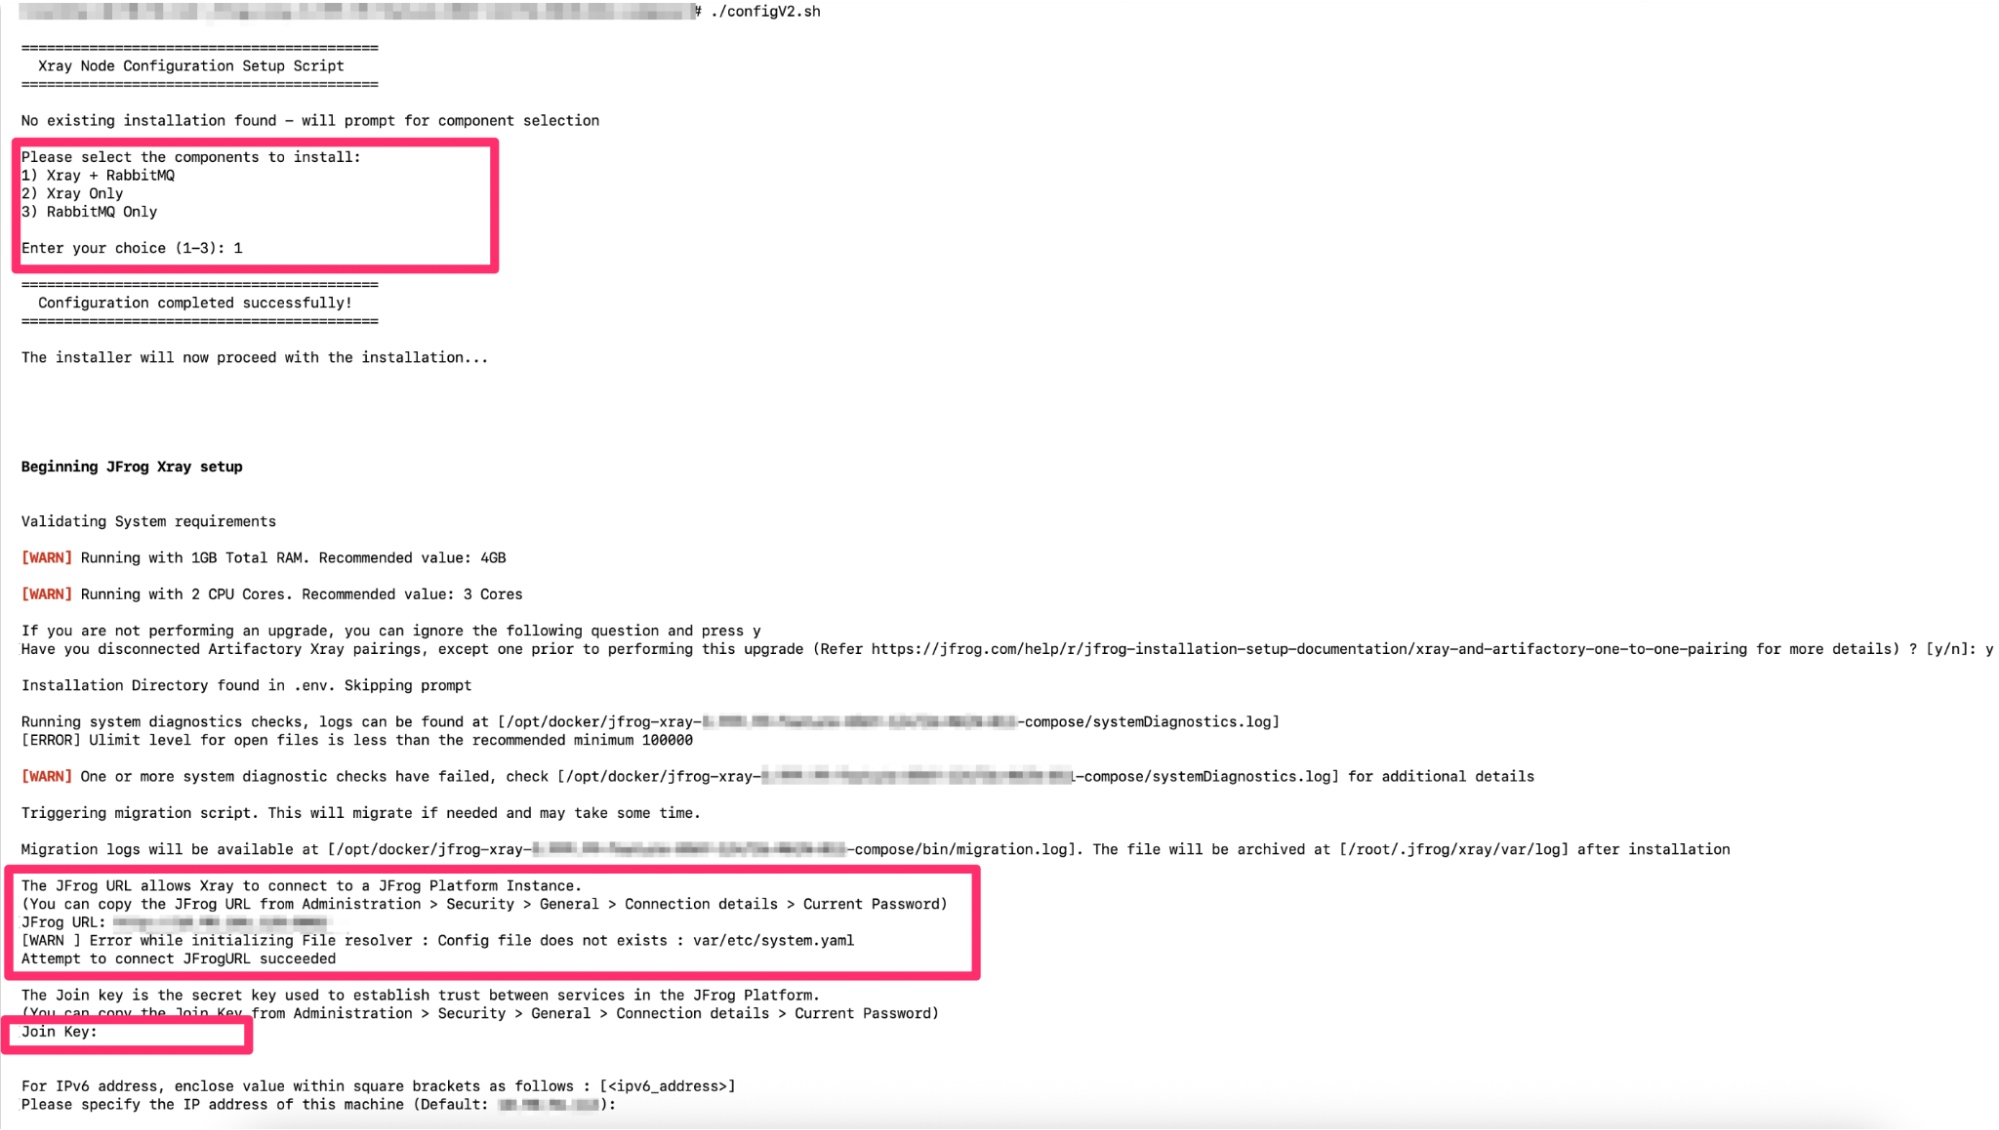
./installV2.shDocker Compose
./configV2.shLinux Archive
Navigate to $JFROG_HOME/xray/app/bin
./installV2.sh --user <user name> --group <group name>
-h | --help   : [optional] display usage
-u | --user   : [optional] (default: xray) user which will be used to run the product, it will be created if its unavailable
-g | --group    : [optional] (default: xray) group which will be used to run the product, it will be created if its unavailable
Example:


-
Validate and customise the product configuration (optional), including the third-party dependencies connection details and ports.
Warning
Verify that a large file handle limit is specified before you start Xray. -
Start and manage the Xray service.
Important
If you want the script to perform stop and restart action on RabbitMQ, set shared.rabbitMq.autoStop as true in the system.yaml. This flag is not consumed in docker-compose installation.
systemd OS
systemctl start|stop xray.servicesystemv
service xray start|stopDocker Compose
cd jfrog-xray-\<version>-compose
docker-compose -p xray-rabbitmq -f docker-compose-rabbitmq.yaml up -d
docker-compose -p xray-postgres -f docker-compose-postgres.yaml up -d
docker-compose -p xray up -d
Linux archive
xray/app/bin/xray.sh start|stop

or

systemctl start xray.service
You can install and manage Xray as a service in a Linux archive installation. For more information, see the start Xray section under Linux Archive Manual Installation.
-
Check the Xray log.
tail -f $JFROG_HOME/xray/var/log/console.logConfigure log rotation of the console log
The console.log file can grow quickly since all services write to it. For more information, see Configure the log rotation.
-
Access Xray from your browser at: http://<jfrogUrl>/ui/:port
Go to the Xray Security & Compliance tab in the Administration module in the UI.
Note:
- The installV2.sh script will prompt you to select the installation combination between RabbitMQ and Xray. For the split architecture of RabbitMQ and Xray, please refer to this section.
- The script will prompt you for the selection of RabbitMQ version and the Quorum Queue selection.
- You will be prompted to enter a custom RabbitMQ username and password
- The installer script will prompt for the JFrog URL and the JoinKey of the Artifactory to join the JFrog Platform cluster. Find the join key in the JPD UI under the Administration module | Security | General | Connection Details. Enter your login password in the Current Password field and click Unlock.
- For production instances, JFrog recommends using an external database, so please create a database before the Xray installation.
- Xray uses Erlang and DB-Util third-party applications. These packages are included with all installers. If you encounter issues, install Erlang and DB-Util manually before re-running the script.