Manage Integrations
JFrog Platform integrations allow you to work with third-party tools and environments, and integrate JFrog with partner solutions that are certified to run in proprietary environments.
Integration releases are independent of major JFrog platform or component releases, and are keyed to the release cycle of the integrated third-party application/ platform. Upgrade of an integration may include re-certification or re-registration with the third party.
To view integrations defined in your subscription, select All Projects in the Projects drop-down, and select the Administration module. Then, go to General Management > Manage Integrations.
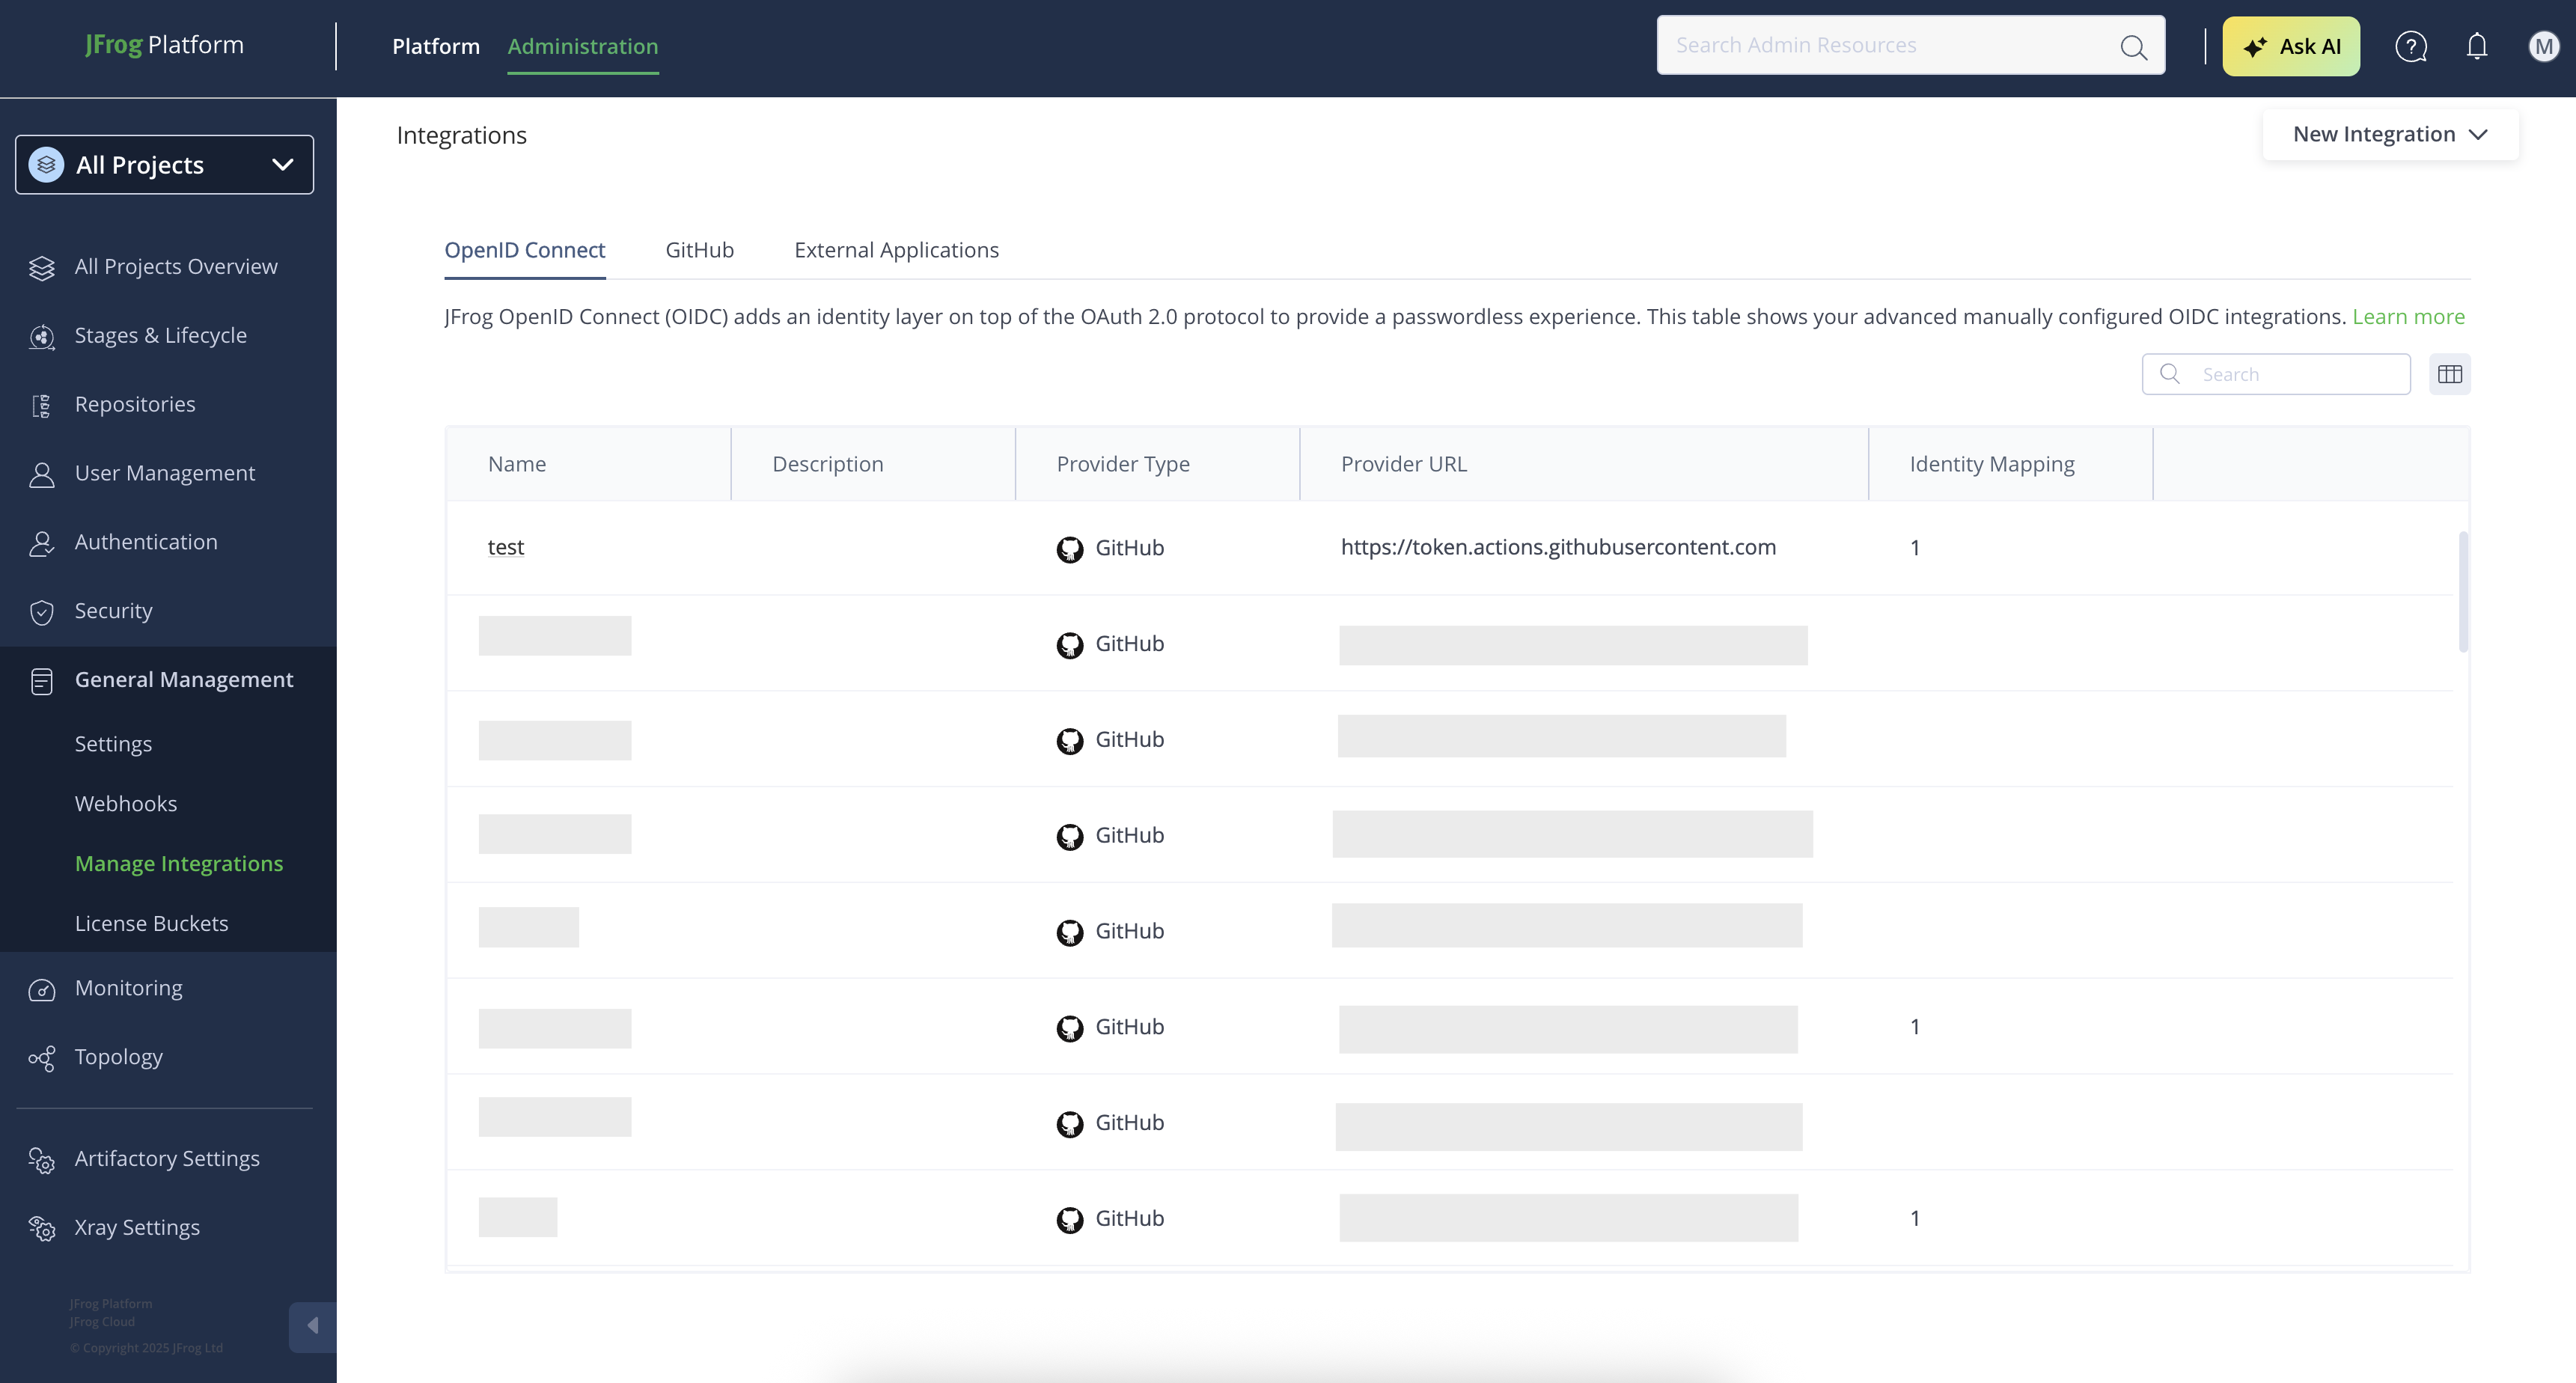
The Integrations page has the following tabs:
- OpenID Connect: integrations that use the OIDC protocol for Single-Sign-On (SSO) access.
- GitHub: integrations that use the JFrog GitHub app.
- External Applications: Other supported integrations or custom integrations.
Create an Integration
To create a new integration within the JFrog Platform UI, you first need to enable creating a new integration.
When you create an integration, you can use the JFrog Collaboration Integration option to integrate a range of Supported External Applications.
-
From the Projects list, select All Projects.
-
Navigate to the Administration module, then select General Management | Manage Integrations.
-
Click New Integration and then select Application. The New Application Integration dialog appears.
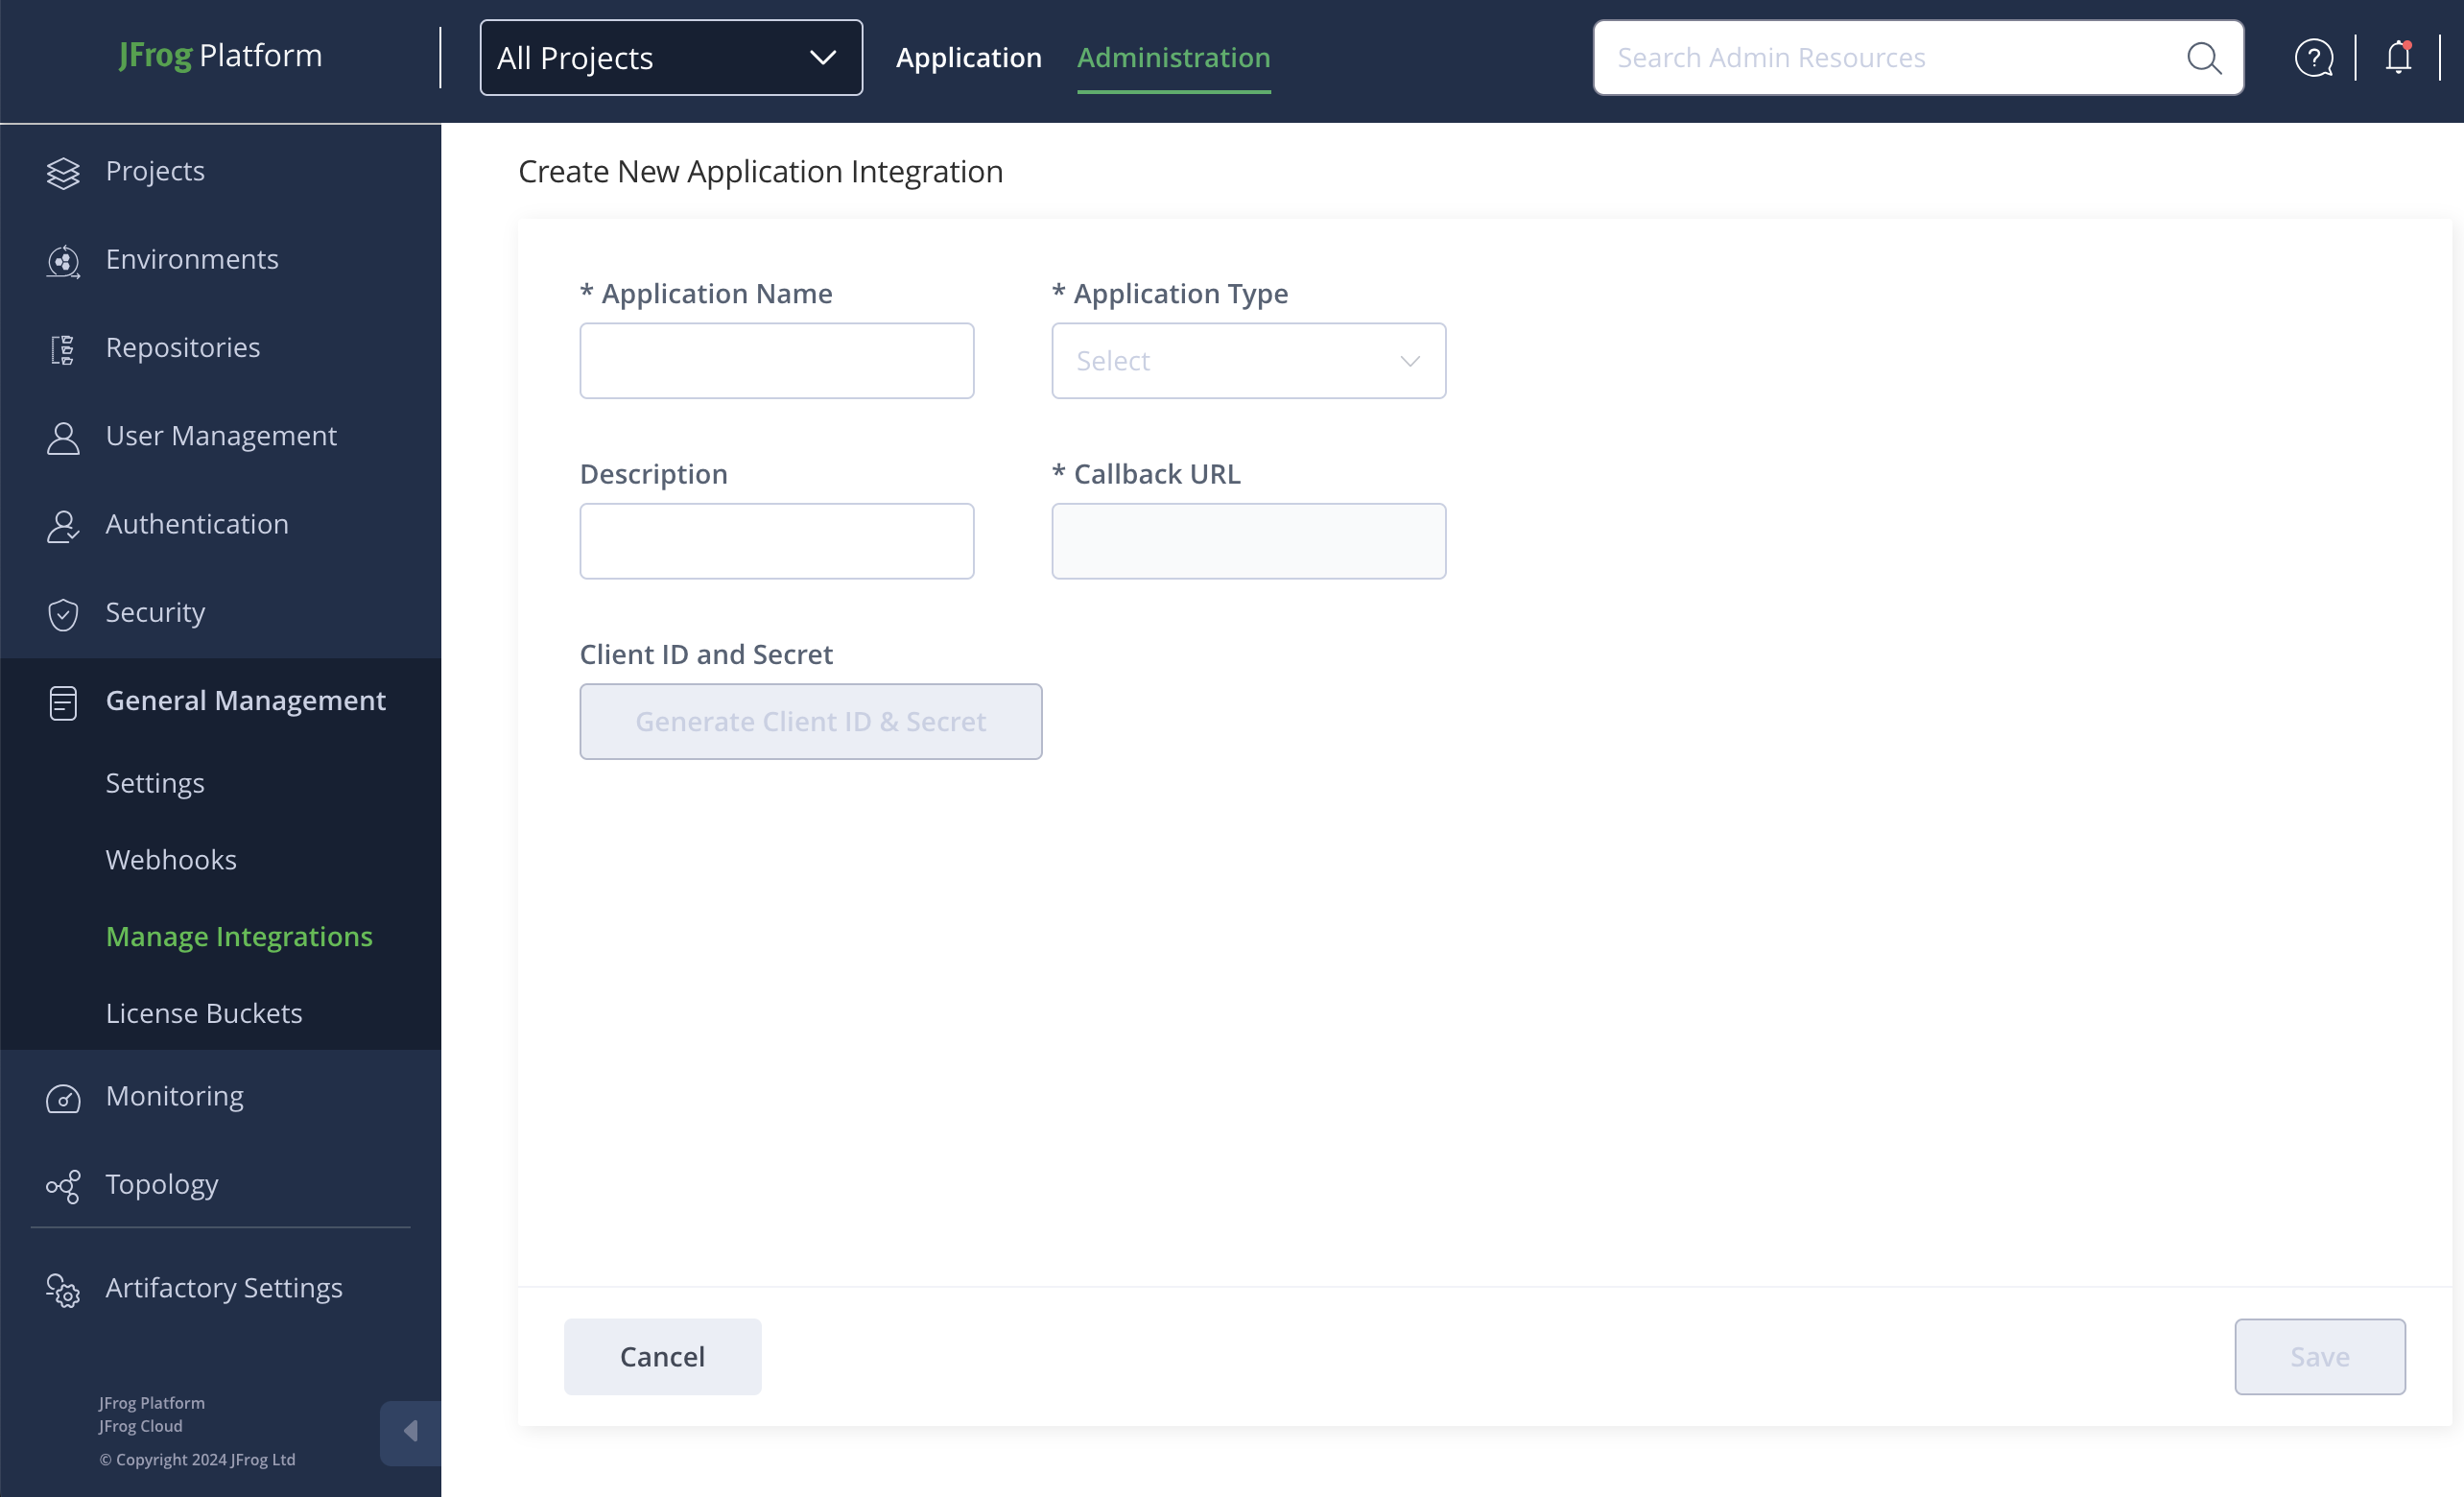
-
Provide a unique Application Name.
-
Select the Application Type:
- To integrate a Supported Platform Integrations application, select JFrog Collaboration Integration .
- To integrate your own application, select Custom Integration.
-
Provide an Application Description with which to identify the application.
-
If you selected to create a JFrog Collaboration integration, the Callback URL is predefined. If you selected to create a custom integration, enter a Callback URL for your application.
-
Click Generate Client ID & Secret and use the Client ID and Secret with your application.
-
To save the integration, click Save.
Updated about 2 months ago