AppTrust Quickstart
Do these procedures to get to know the basic workflow and features of JFrog AppTrust.
The JFrog AppTrust Quickstart is intended to provide the basic steps for you to get up and running on day one. For a more in-depth introduction to JFrog AppTrust, which includes several optional procedures and capabilities, see the AppTrust Onboarding Checklist.
The Quickstart consists of two main parts, a one-time setup to be completed by a project or application administrator, and a set of day-to-day tasks that will typically be performed by a developer or a release manager.
Prerequisites
- Software requirements:
- Artifactory Enterprise+ v7.125.x or higher
- Xray v3.130.5 or higher
- AppTrust enabled in JFrog Platform
- JFrog CLI v2.81.0 or higher
- Familiarity with JFrog Artifactory and JFrog CLI
- At least one Project defined in JFrog Platform
Part 1: AppTrust Setup
Step 1: Create Project Stages
Stages, such as DEV, QA, and PROD, are logical entities that enable you to track the maturity level of an application version in the Software Development Lifecycle (SDLC). You can define stages that apply to a specific project, or you can create global stages that can be applied in all projects.
You can associate stages with specific repositories and permissions, but this is not required. AppTrust comes with two default stages, DEV and PROD. For the Quickstart, you will create a new stage called QA.
To create a stage:
- In the JFrog Platform, choose a project. (This stage will be a project-level stage.)
- Go to Administration > Stages & Lifecycle > Create Project Lifecycle Stage.

- Enter a Stage Name. For the purpose of the Quickstart, enter QA as the stage name. (If QA already exists, then click Cancel, and continue with Step 2: Define Your Project Lifecycle)
- For Lifecycle Category, choose Promote. Click Create Lifecycle Stage. The stage is added to the list of available lifecycle stages.
Step 2: Define Your Project Lifecycle
A lifecycle is a sequence of defined stages (i.e., maturity levels) in the SDLC that culminate with the release of your application version. Ordering your lifecycle ensures a logical promotion path for your application versions. PROD will always be the last stage. For the Quickstart, you will define a lifecycle that includes: DEV, QA, and PROD.
To define a lifecycle:
- Go to Administration > Stages & Lifecycle > Edit Lifecycle.
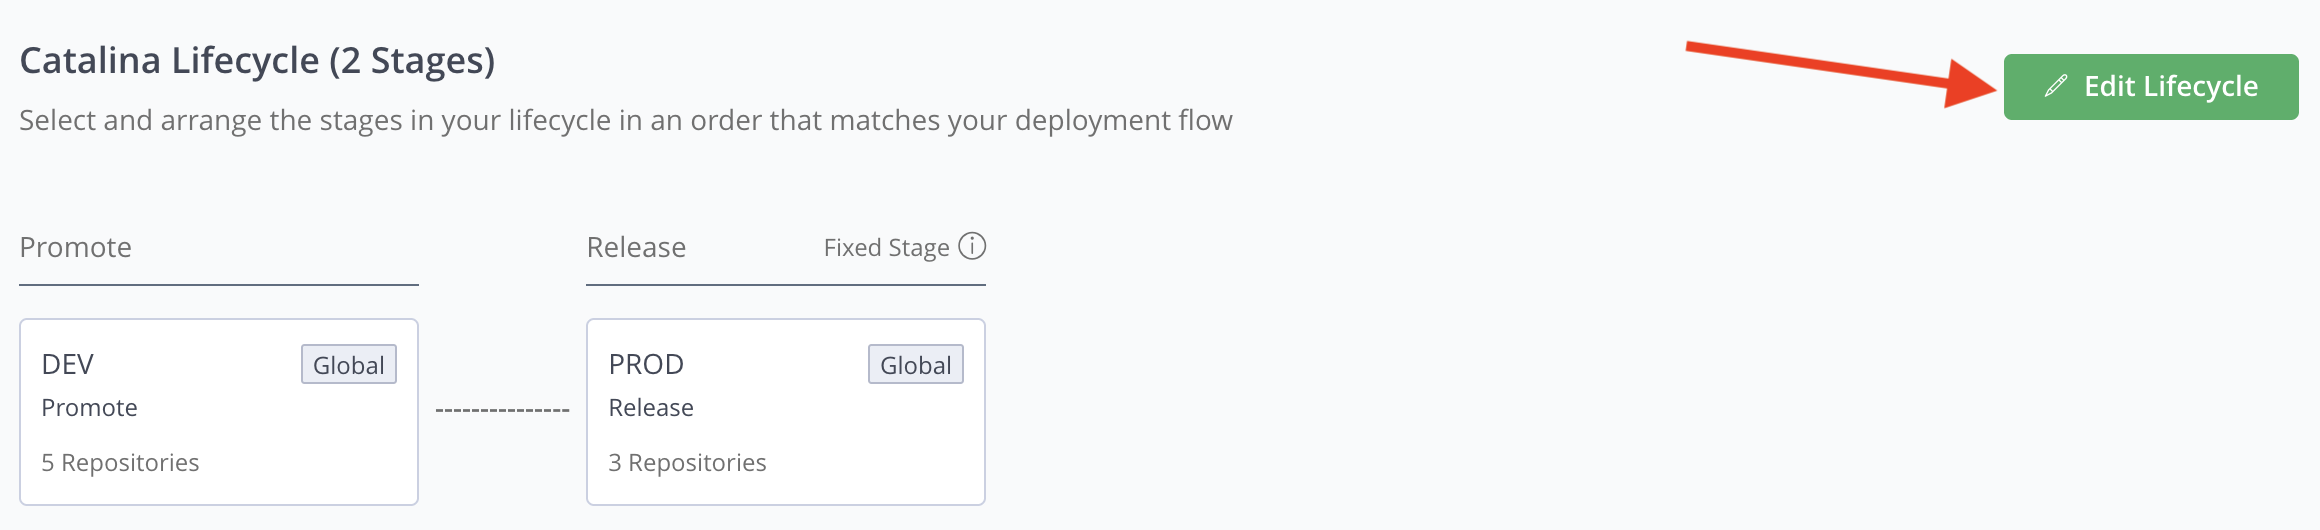
-
In the Edit Lifecycle window, click Attach/Detach Stages.
-
Mark the DEV, and QA checkboxes, and click Apply. (PROD is already marked by default.)
-
To rearrange the stage order, use the handles to click and drag the Stage tiles.
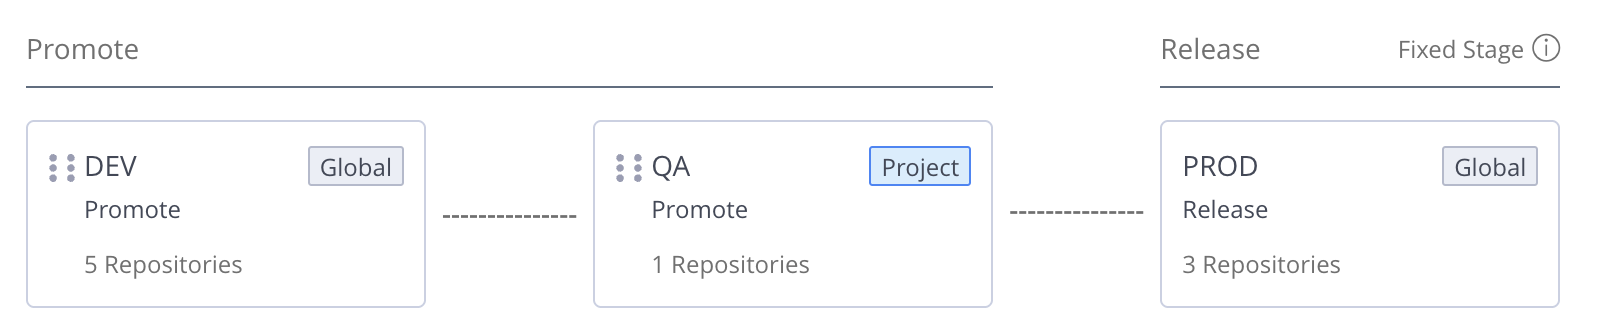
- Ensure the first stage in the lifecycle has at least one repository assigned to it. To assign a repository, see Assign Repositories to Stages in the Platform UI. Other stages do not require a repository to be assigned.
Step 3: Create an Application
An application is any software product developed by your organization for which you want to manage the SDLC and secure with AppTrust. Versions of the application you create will be associated with artifacts generated by your CI/CD pipeline.
To create an application:
- Go to Platform > AppTrust > Applications > Create Application. The New Application wizard appears.
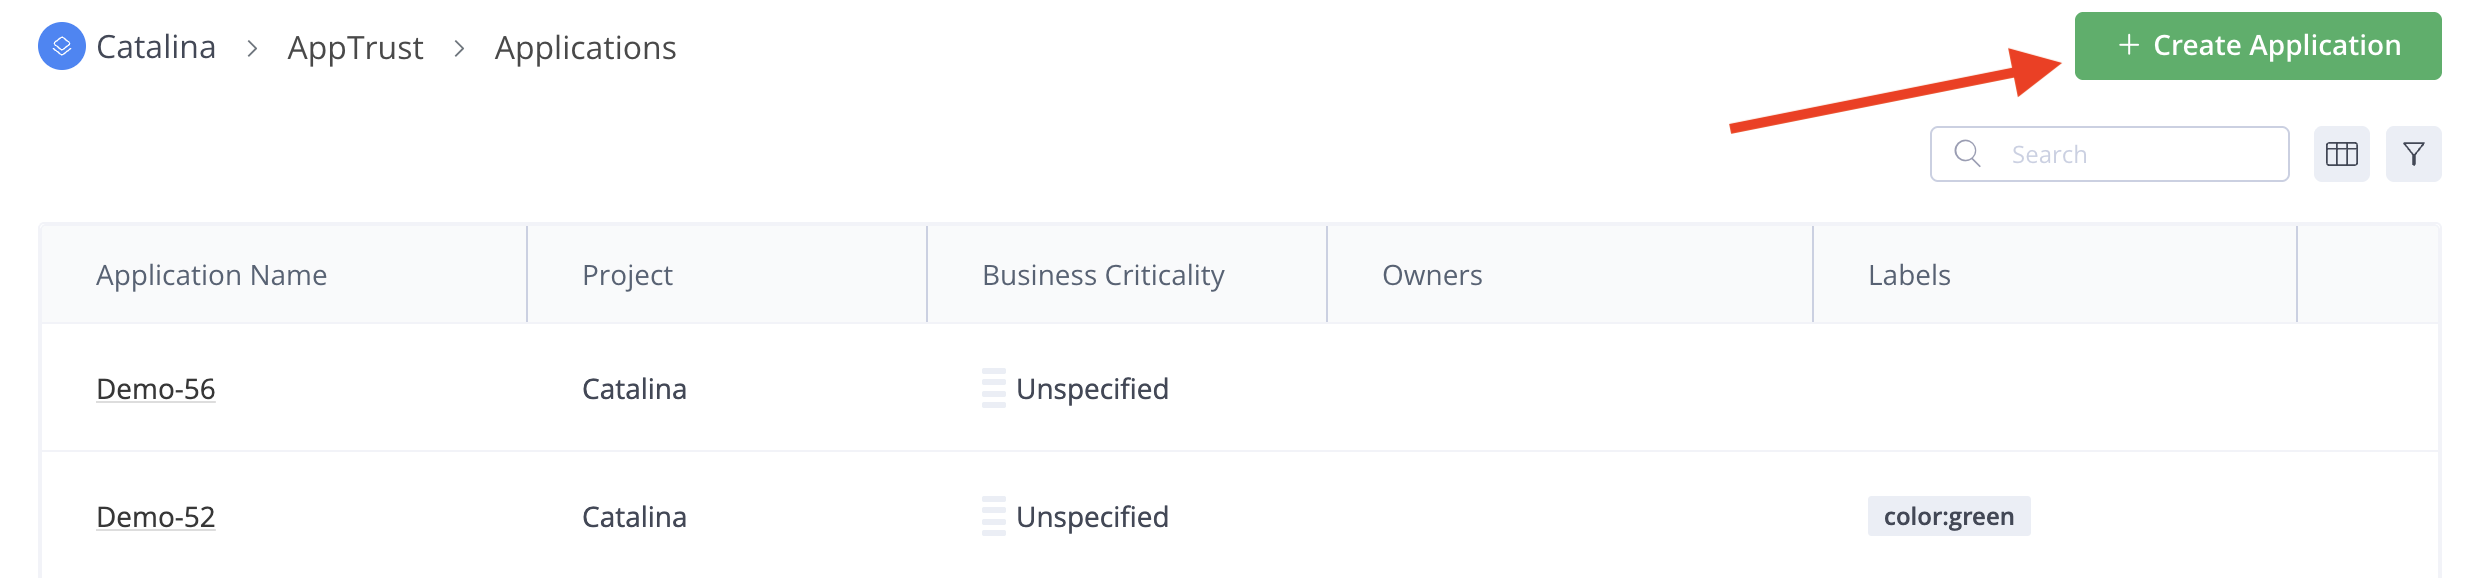
- Enter an Application Name, e.g., my-quickstart-app-01, an Application Key, e.g., my-quickstart-app-01-key and a brief description. This is enough to get you started. You can enter the optional parameters later.
- Click Create Application. Your new application will appear on the Applications page.
Step 4: (Optional) Bind Packages to Your Application
In AppTrust, you can bind a package to a specific application using OIDC integration. This feature enables traceability, as each package is tied to an application that in effect "owns" that package. If an issue is discovered in the package at any stage, this binding makes it easy to turn to the application owners to address the issue, thereby enhancing efficiency and accountability.
Although this step is not required for completion of the Quickstart, you may want to create a binding once you set up AppTrust with your CI/CD pipeline. For more information, see Bind Packages to an Application.
Step 5: Create Policies and Stage Gates
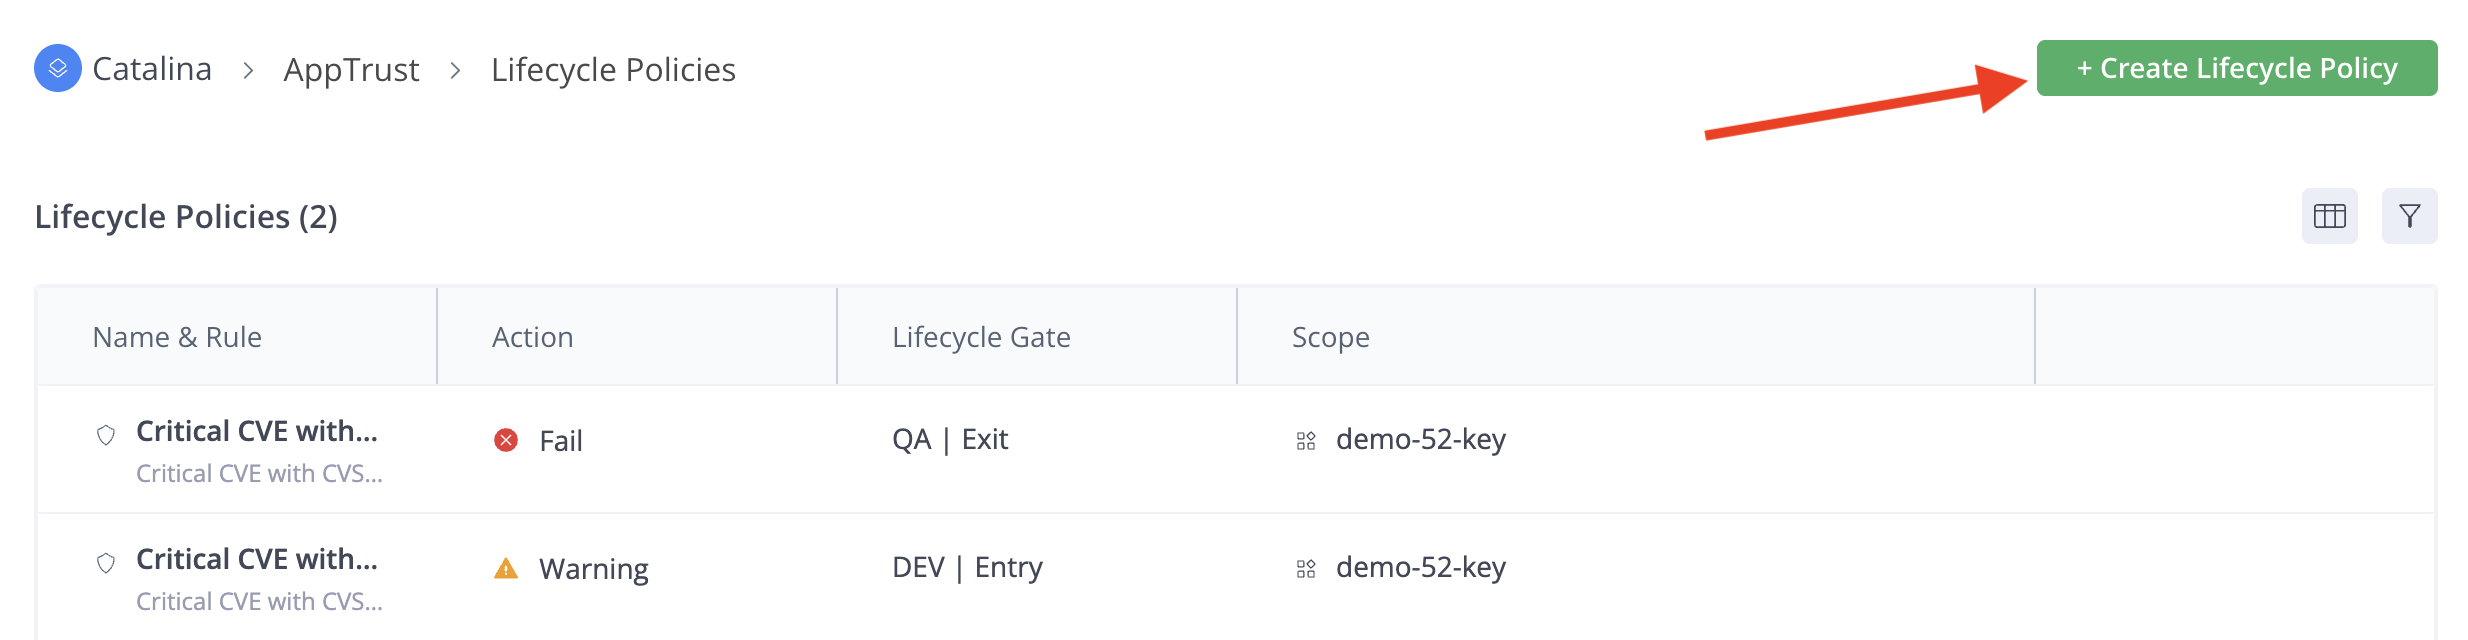
A lifecycle policy determines what conditions must be met for an application version to pass a lifecycle gate and be promoted to the next stage. A policy uses rules that you specify and enforces requirements such as vulnerability scan results, compliance checks, and quality metrics that must be met. You can apply policies to entry gates and exit gates of each stage. For the Quickstart, you will create one policy and gate for each of the stages.
To add policies and gates:
- Go to AppTrust > Lifecycle Policies > Create Lifecycle Policy. The New Policy wizard appears.
- Under Scope, choose Application, select the following, and click Next.
- Application: The name of the application the policy applies to.
- Lifecycle Gate: The stage gate where the policy will be triggered. Choose DEV|Exit gate.
- Under Rule, choose a rule to be triggered at the gate you chose: Evidence slug:cyclonedx-sbom, from:JFrog, version:1.6, exist on evaluated resource. Click Next.
- Under Actions, choose an action to take if the rule is violated: Fail. Click Next.
- Under Name & Description, enter a unique name for the policy: SBOM for Dev exit. Click Create Lifecycle Policy.
- Create two more policies using the following values:
| Lifecycle Gate | Rule | Action | Name |
|---|---|---|---|
| [project-name]-QA|Exit gate | Critical CVE with CVSS score between 9.0 and 10.0 (skip if not applicable) | Fail | Exit QA - Critical CVE score |
| PROD|Release | QA.Exit AppTrust Gate Certification exist | Fail | Passed QA |
On Setting Up Evidence
For the purpose of the Quickstart, we are using default policies and JFrog generated evidence. However, for evidence that relies on actual test results or integration with other systems, for example, GitHub, some setup is required. For more information, see Evidence Quickstart.
Part 2: Day-to-Day Version Tasks
Step 1: Create a Version
An application version bundles together all the relevant artifacts for a potential release. In this step, you will register a new, immutable version of your application. (This is typically triggered automatically by a new build from your CI pipeline, but for the Quickstart, you will do it manually.)
You create an application version using JFrog AppTrust CLI commands or by using the JFrog AppTrust API. The example below uses CLI commands. For more information about the CLI commands, see Create Application Version CLI.
To create an application version:
- Environment information: To configure your AppTrust server in the JFrog CLI, enter the following:
jf c add - When prompted, add the following information:
- Unique Server Identifier: For example, <your-server-name>.jfrog.io
- JFrog Platform URL: For example, https://<your-server-name>.jfrog.io/
- Authentication: When prompted for an authentication method, choose Access Token. Add your access token and authenticate.
- Create Version Command: In your CLI terminal, enter a command in the following format:
jf apptrust version-create \<app-key> \<version> [command options]
The command options depend on the Application Version CLI Commands and the specific artifacts you are using. For the Quickstart, for example, we are using –-source-type-packages with the command options as shown below:
jf apptrust version-create my-quickstart-app-key 1.0 --source-type-packages "type=Docker, name=catalina, version=1.0.2, repo-key=catalina-dev-docker-local" --tag="quickstart"You should see output like the following:
[Info] Application version created successfully.
{"application_key":"my-quickstart-app-key","version":"1.0","created_by":"<your-user-name>","created":"2026-01-01T10:38:11.547Z","status":"COMPLETED","tag":"quickstart"}- In JFrog Platform UI, go to AppTrust > Applications and click the name of the relevant application.
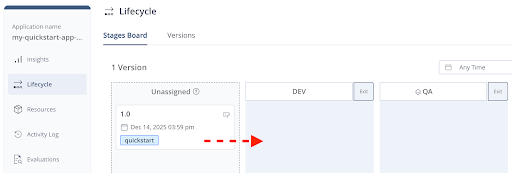
- In the left column of the Applications page, click Lifecycle. The Stage Board appears, and in the Unassigned column, you can see the Application Version that you created. The version has not yet been promoted to a stage.
Step 2: Promote Version and Check Evidence
The promote action represents your explicit approval to advance the version through the stages of its lifecycle. You can move an application version from one stage to the next after it successfully meets all policy requirements defined for its current stage.
Evidence
When an application version is promoted, evidence in the form of a signed and locked file is attached to the version and provides a record of the promotion (when, where, and by whom). This evidence provides full traceability and attests to the immutability of the application version. Each promotion adds another layer of signed evidence that safeguards the immutability of the application version. For more information, see Evidence Management.
To promote an application version:
- Go to AppTrust > Applications > Lifecycle. In the Unassigned column of the Stage Board, grab the application version you created previously and drop it in the Dev column. The New Promotion panel appears.
- In the Promotion Stage tab, under Promotion Type, choose Copy Artifacts, and click Next.
- In the Target Repositories tab, choose one or more target repositories, and click Promote. The version will now appear in the DEV column.
- Promote the version to QA, this time choosing Keep Artifacts for the Promotion Type.
- When the application version appears in the QA column, click the version tile and go to Evidence.
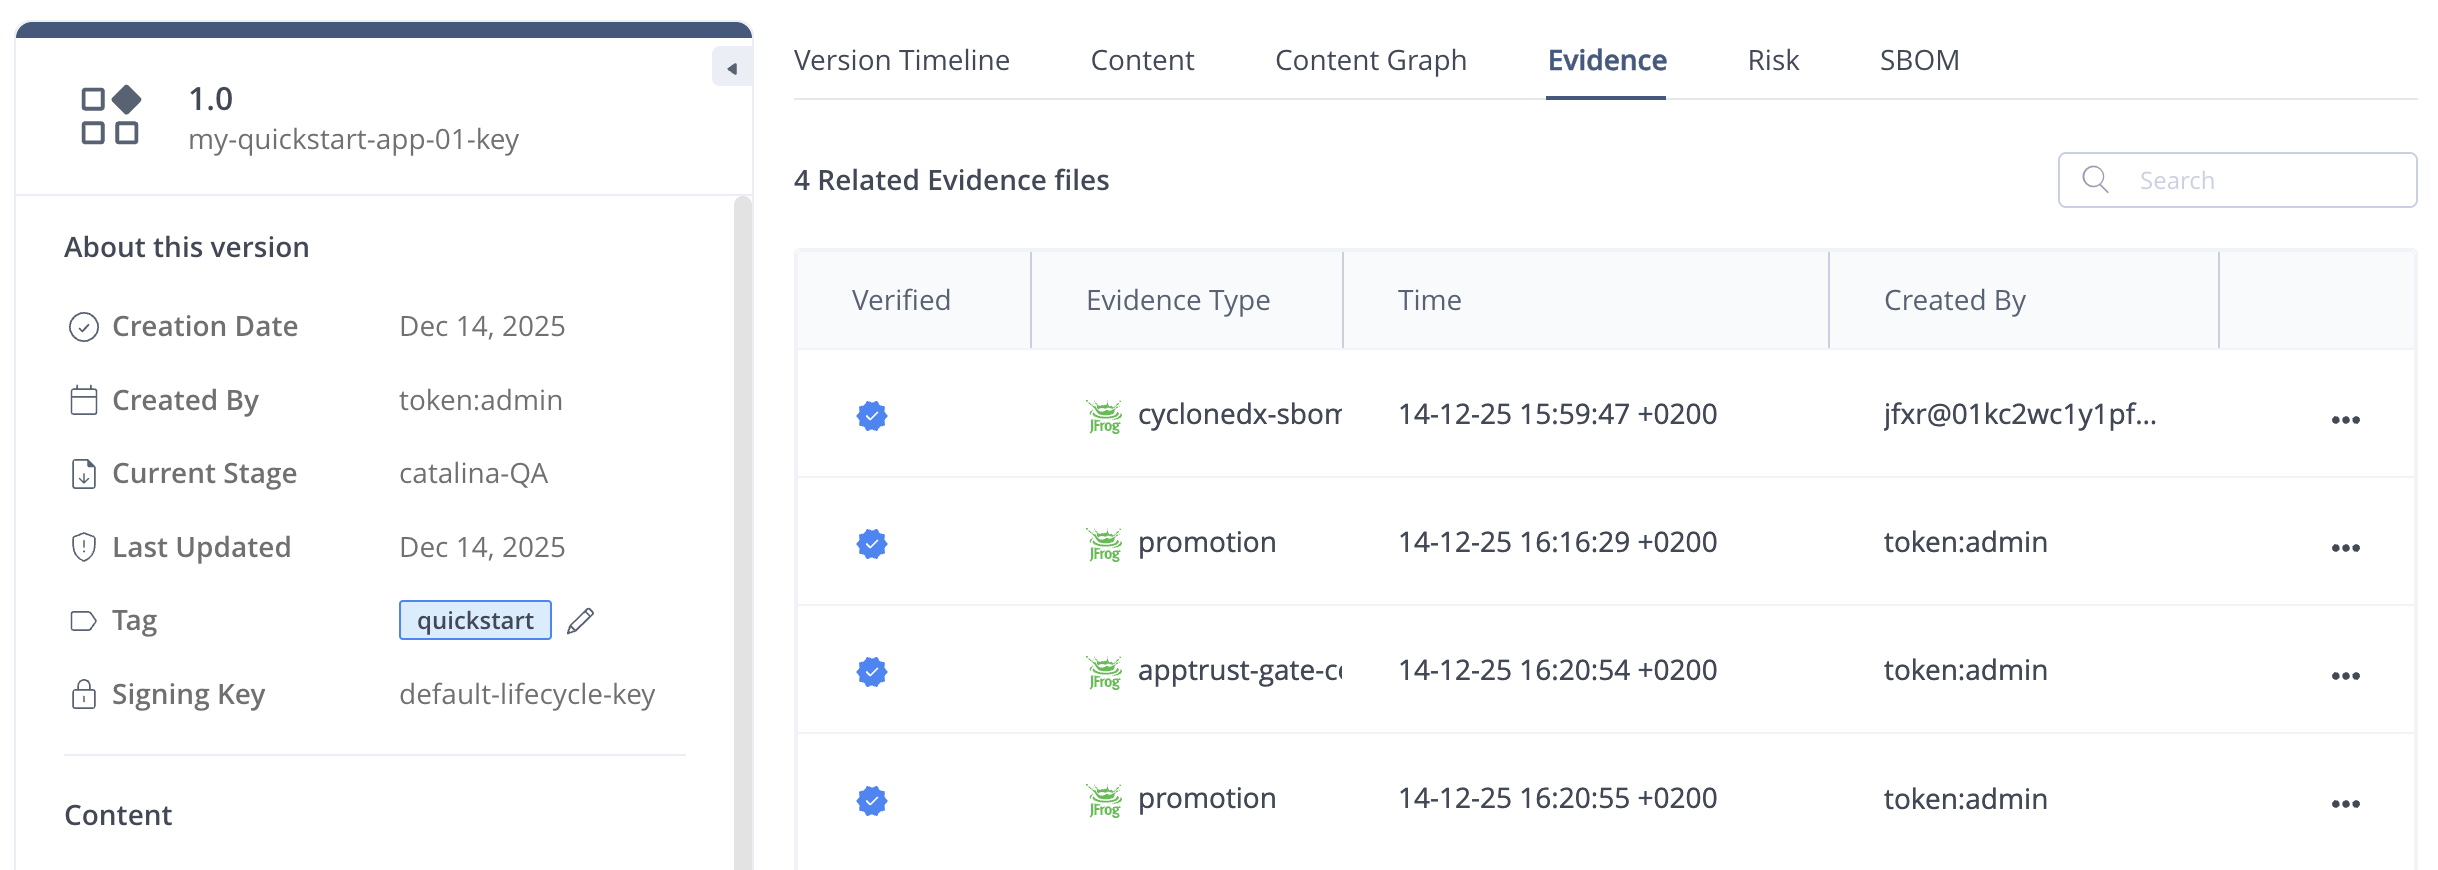
- Notice that there is evidence for each promotion and a certification of the policy that was evaluated. Open each evidence item and review the contents.
Step 3: Release Version
Promotion to the final stage, PROD, creates an officially trusted and immutable release of the application version. This immutable record provides a clear audit trail of what was deployed and confirms its attestation status. Only those versions that pass the release gate successfully are marked as trusted releases.
To release the version:
- On the Stage Board, click the Release gate in the PROD stage and review the policies. Ensure that all the evidence required for the policy evaluations will be available.
- Promote the version to the PROD stage.
Now that you are familiar with the basic AppTrust workflow, you may want to take advantage of the AppTrust REST APIs to automate and incorporate AppTrust functions into your SDLC.
What’s Next?
Learn more about:
Updated about 2 months ago