Set Promote and Release Permissions
JFrog AppTrust uses separate permissions for promoting and releasing application versions. This allows you to control who can promote a version through non-production stages (such as DEV or QA) independently of who can release a version to production.
The permissions are:
- Promote: Grants the ability to promote an application version to a non-production stage. The permission is stage-aware, meaning you can scope it to specific stages in the lifecycle.
- Release: Grants the ability to release an application version to the production stage. This permission is evaluated separately from Promote.
These permissions are independent. A user can have Promote only, Release only, both, or neither. For example, you might grant a developer permission to promote versions through DEV and QA stages but not to release to production, while a release manager might have both. You can further scope the permissions for promotion. For example, you could allow a user to promote to DEV only, a second user to promote to QA and STAGE, and a third user to release to PROD.
Promote and release permissions may be defined using the global or project level roles. This procedure shows an example using a Global Role.
Setting the permissions requires the following main parts:
- Create Role: Create one or more Roles that include the desired promote and/or release permissions.
- Associate User: Assign the required role to the user.
These parts are included in the procedure below.
Prerequisites
- Administrator permissions to manage roles in the JFrog Platform and familiarity with user management.
- The relevant global and/or project lifecycle stages defined.
- An Apptrust user already created, but without the Promote or Release permissions defined yet.
- A Role that includes the Write Artifact permission.
To set up Promote and Release permissions:
-
In the JFrog Platform, set the project to All Projects.
-
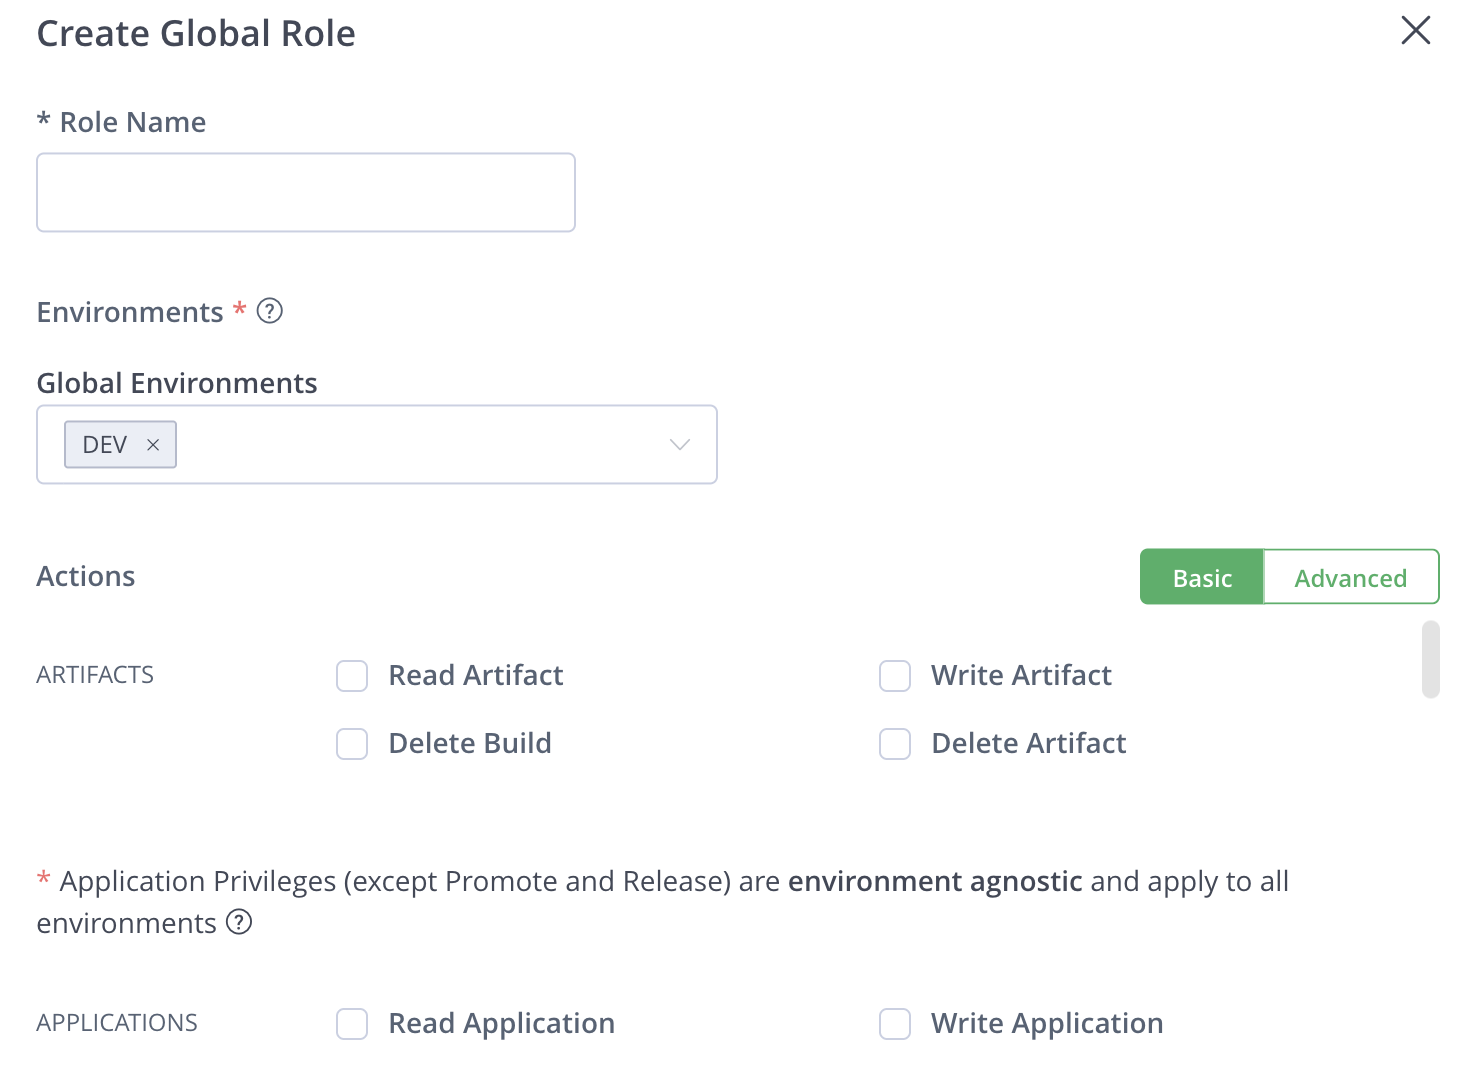
Go to Administration > Global Roles > Create Global Role.
-
Complete the following:
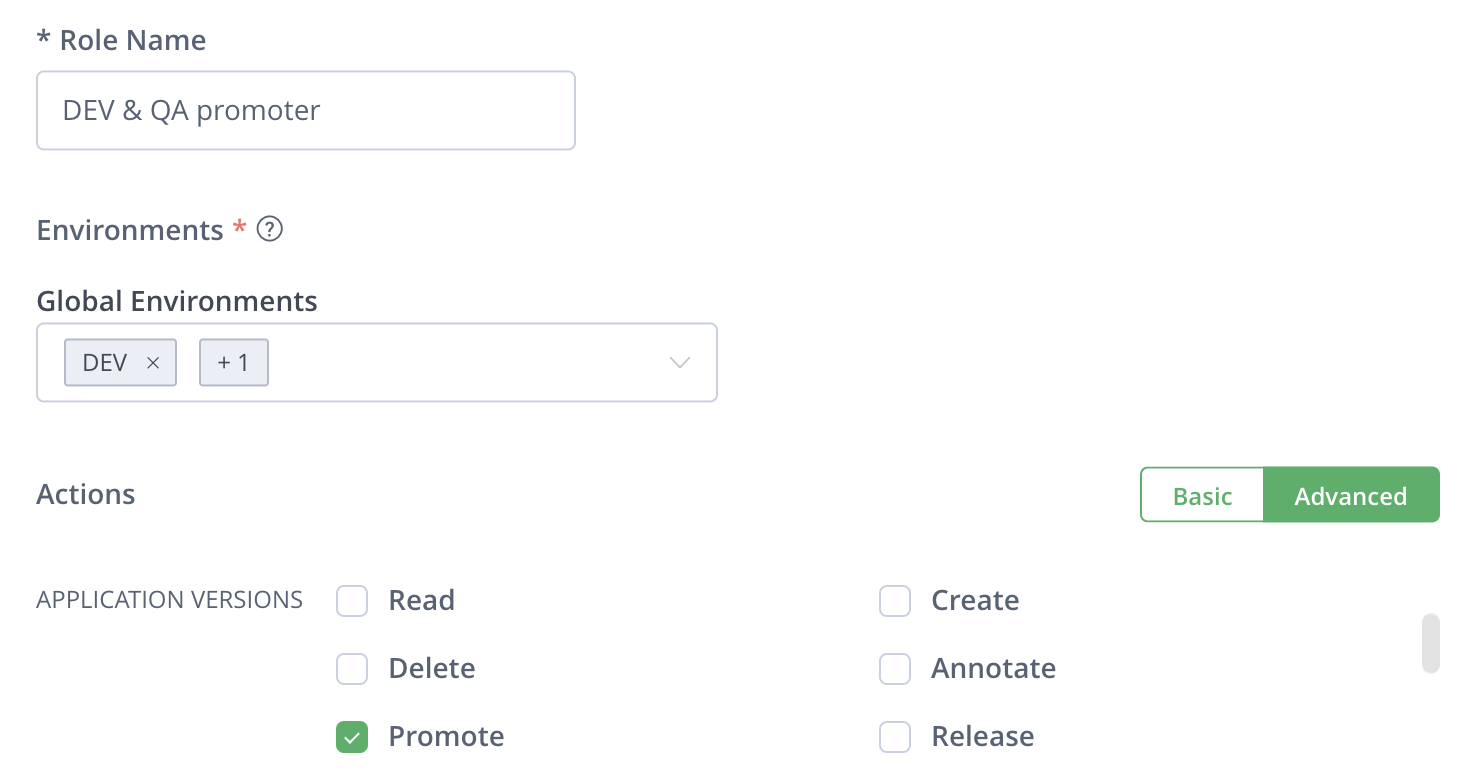
- Role Name: Enter a name describing the role, for example, DEV & QA promoter.
- Global Environments: From the dropdown, choose the stages this role can promote to, for example, DEV and QA. For a global role, you can only choose global stages.
- Actions, Artifacts: Mark Write Artifacts, if it is not marked already.
-
Click Advanced, and scroll down until you see Application Versions. Choose the relevant permissions. For this example, you would mark Promote. Ensure that Release is unmarked.
-
Click Create. The new role now appears in the list of roles.
-
Choose the project where the user is a member. If you have to add the user to a project, do that now.
-
Go to Administration > Members.
-
Locate the relevant project member and click in the Roles column. The list of roles will open.
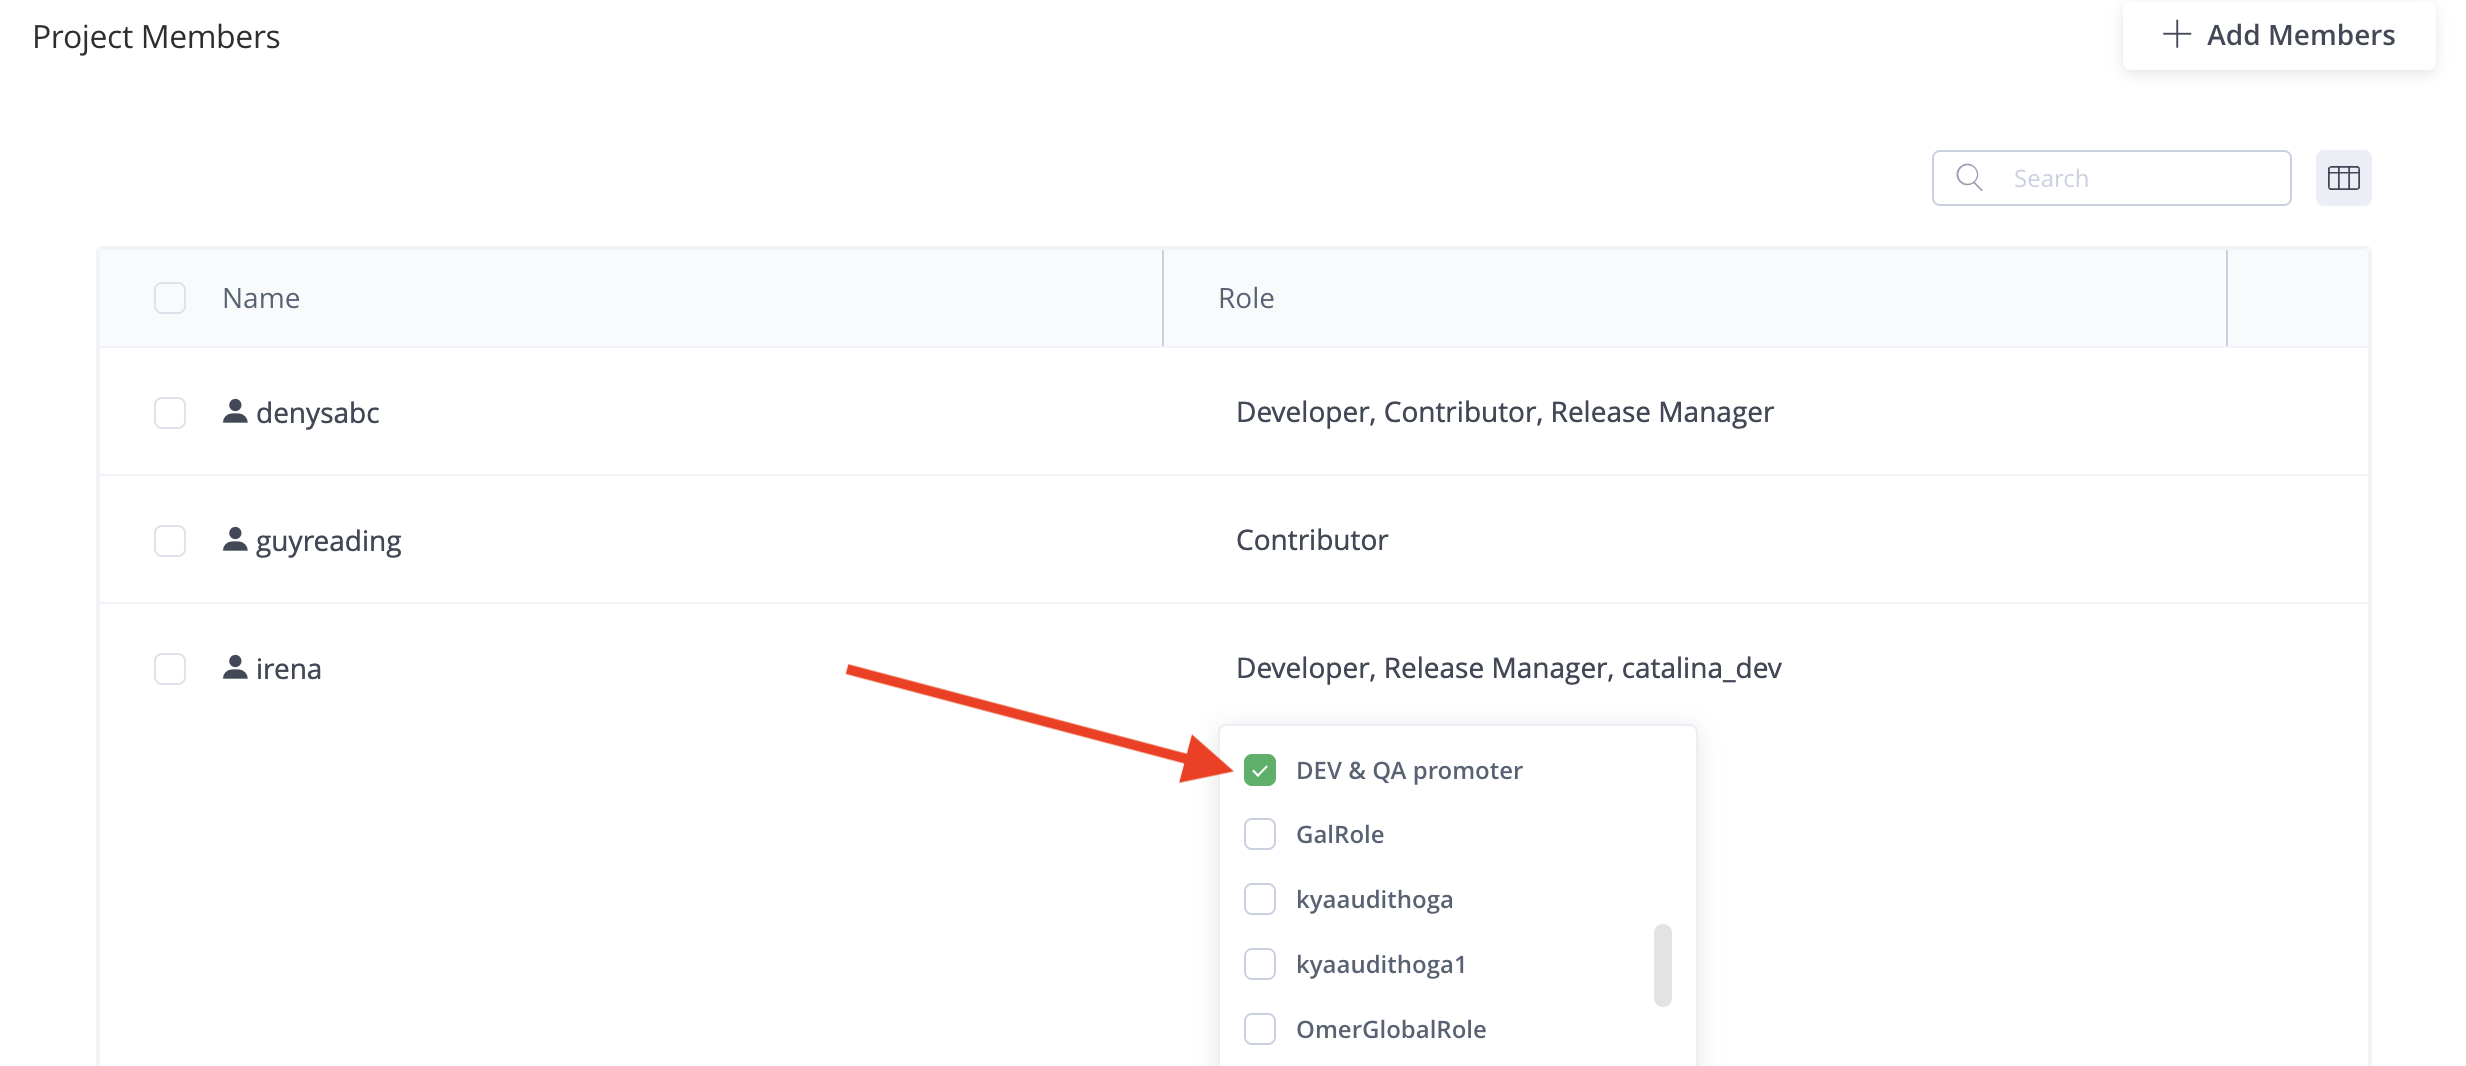
- In the list, mark the new role, for example, DEV & QA promoter. The user will now have permission to promote an application version to the DEV and QA stages only.