Create a Release Bundle v2 in the Platform UI
Learn how to create Release Bundle v2 versions in the JFrog Platform UI from builds, existing Release Bundles, and new versions with optional dependencies.
RLM Deprecation
As of July 31, 2026, all feature development, patches, and security fixes for Release Lifecycle Management will end, except for critical security fixes. RLM End of Life is currently scheduled for January 31, 2028. For more information, see JFrog Release Lifecycle Management Deprecation - End of Life.
You can use the JFrog Platform UI to create Release Bundle v2 versions using the following procedures:
- Create a Release Bundle v2 from Builds
- Create a Release Bundle v2 from Existing Release Bundles
- Create a New Version of an Existing Release Bundle
Create a Release Bundle v2 from Builds
Use the menu on the Release Lifecycle page to create a Release Bundle v2 from one or more builds.
Note
You can also create a Release Bundle v2 directly from the Builds page. For more information, see Create a Release Bundle v2 from the Builds Table.
To create a Release Bundle v2 from a build:
-
In the Platform module, select Artifactory > Release Lifecycle.
-
From the Actions menu, select Create Version from Builds from the list. The New Release Bundle Version window is displayed.

-
In the Release Bundle Details tab, do the following:
-
Enter a name for the Release Bundle. (If a Release Bundle was previously created from the selected build, its name will appear.)
-
Enter the version number of the Release Bundle.
-
Optional. Select a signing key. If you don't select a key, a default key (generated by Artifactory automatically) is used. See Create Signing Keys for Release Bundles v2.
-
Note
Naming restrictions:
- The name is limited to 128 characters. Use the REST API or the JFrog CLI if a longer name is required.
- The version is limited to 32 characters. Use the REST API or the JFrog CLI if a longer version is required.
- The name and version must begin with a letter, digit, or underscore.
- The name must consist only of letters, digits, underscores, periods, and hyphens. The version supports these characters and also supports the plus sign (+).
Warning
Make sure the signing key is valid. The operation will fail if the key has expired.
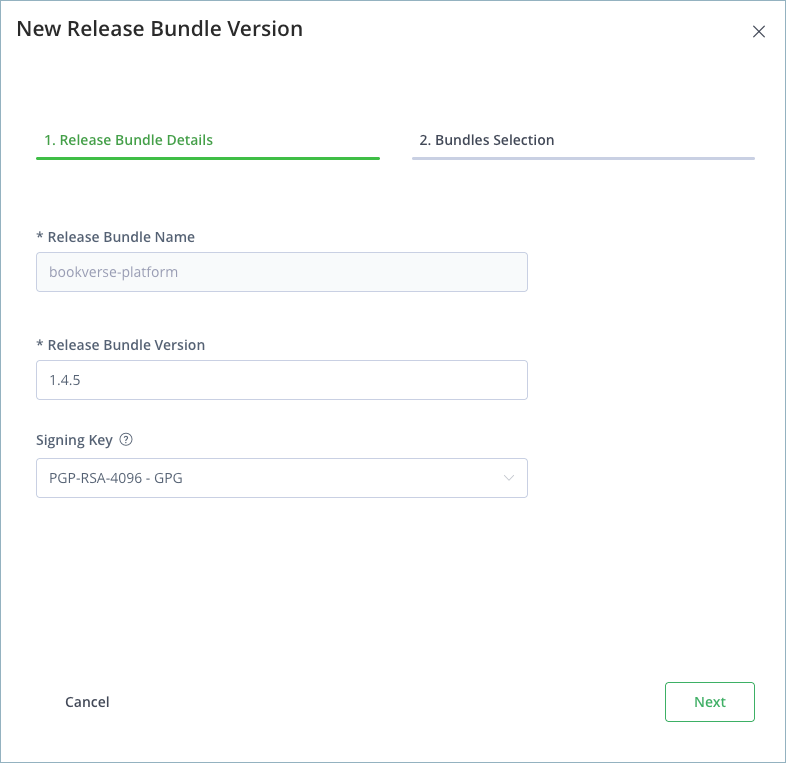
- Click Next to move to the Builds Selection tab.
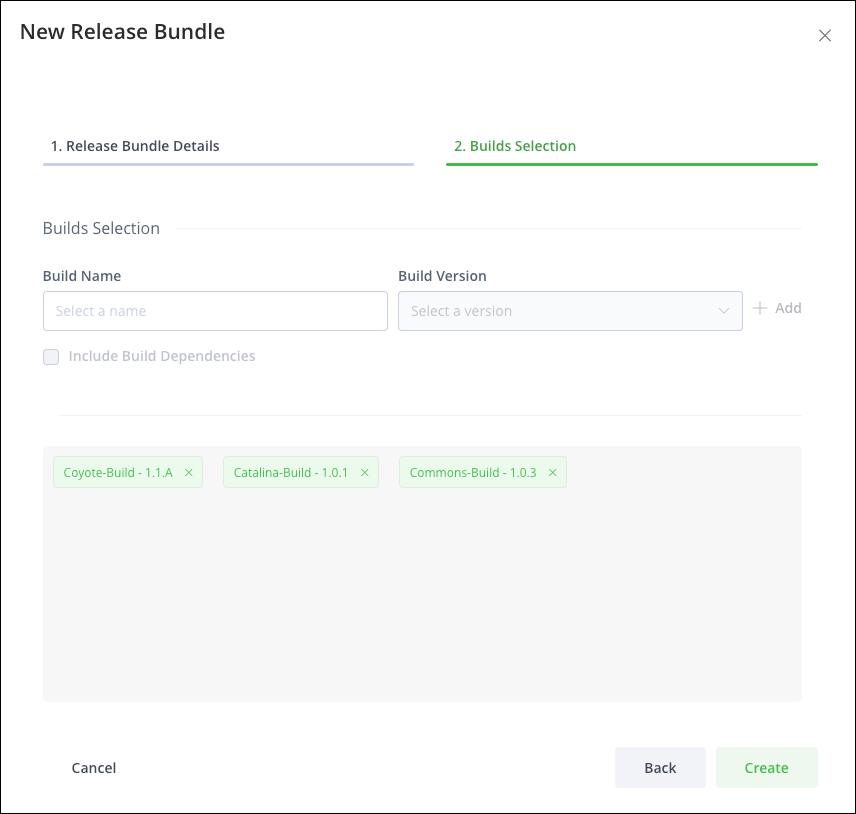
- Define the builds from which to create the Release Bundle:
- Select the build name and version from the lists provided.
- Optional. Select the Include Build Dependencies checkbox to have the Release Bundle include the dependencies associated with the build.
- Click Add. The selected build and version appear in the selection box.
Note
Dependencies located in local, Federated, and remote repositories can be included in the Release Bundle. To include dependencies from a remote repository, you must first ensure that they exist in the remote cache. If they are not in the cache, you need to download them before creating the Release Bundle.
- (Optional) Repeat step 5 to add additional builds to the new Release Bundle.
- Click Create.
Create a Release Bundle v2 from the Builds Table
You can use the Builds table to create a Release Bundle v2 from one or more builds, as an alternative to using the Release Lifecycle UI.
The procedures are described in the following sections:
Note
If the Release Bundle is created from a build associated with a project, the Release Bundle will also be associated with the project, even when you work in a global context with All Projects selected from the project selector.
Create a Release Bundle v2 from One or More Builds
To create a Release Bundle v2 from one or more builds:
-
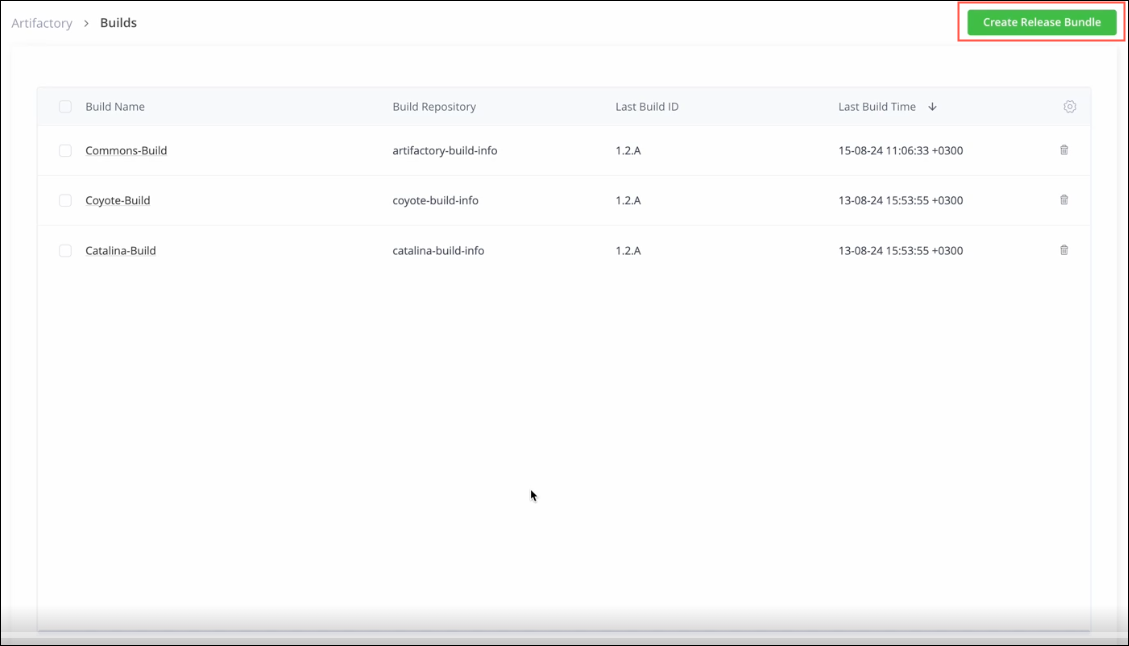
In the Platform module, select Artifactory > Builds.
-
Click Create Release Bundle.
-
In the Release Bundle Details tab of the New Release Bundle window, do the following:
-
Enter a name for the Release Bundle. (If a Release Bundle was previously created from the selected build, its name will appear.)
-
Enter the version number of the Release Bundle.
-
Select a signing key. If you don't select a key, a default key (generated by Artifactory automatically) is used. See Create Signing Keys for Release Bundles v2.
-
Note
Naming restrictions:
- The name is limited to 128 characters. Use the REST API or the JFrog CLI if a longer name is required.
- The version is limited to 32 characters. Use the REST API or the JFrog CLI if a longer version is required.
- The name and version must begin with a letter, digit, or underscore.
- The name must consist only of letters, digits, underscores, periods, and hyphens. The version supports these characters and also supports the plus sign (+).
Warning
Make sure the signing key is valid. The operation will fail if the key has expired.
-
Click Next to move to the Builds Selection tab.
-
Define the builds from which to create the Release Bundle:
-
Select the name and version of the build from the lists provided.
-
Optional. Select the Include Build Dependencies checkbox to have the Release Bundle include the dependencies associated with the build.
-
Click Add. The selected build and version appear in the selection box.
-
-
Click Create.
The Release Bundle appears:
- On the stages board.
- As an event in the Release Bundle version timeline.
- In the Release Bundle column of the Builds table.
Note
Dependencies located in local, Federated, and remote repositories can be included in the Release Bundle. To include dependencies from a remote repository, you must first ensure that they exist in the remote cache. If they are not in the cache, you need to download them before creating the Release Bundle.
Create a Release Bundle v2 from a Single Build
Perform the procedure below to create a Release Bundle v2 from a single, selected build.
-
In the Platform module, select Artifactory > Builds.
-
Click the name of the desired build, and then select Create Release Bundle from the actions menu.
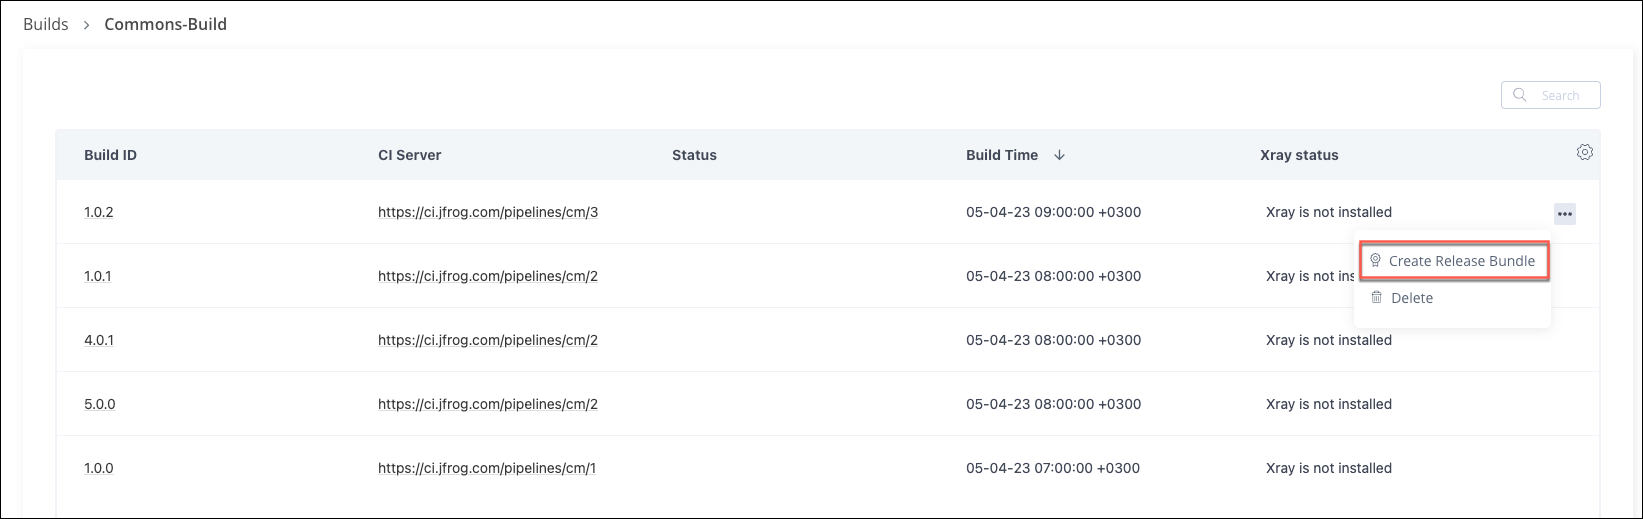
Tip
Alternatively, click the name of a specific Release Bundle version and then click Create Release Bundle.
-
In the Release Bundle Details tab of the New Release Bundle window, do the following:
-
Enter a name for the Release Bundle. (If a Release Bundle was previously created from the selected build, its name will appear.)
-
Enter the version number of the Release Bundle.
-
Optional. Select a signing key. If you don't select a key, a default key (generated by Artifactory automatically) is used. See Create Signing Keys for Release Bundles v2.
-
Note
Naming restrictions:
- The name is limited to 128 characters. Use the REST API or the JFrog CLI if a longer name is required.
- The version is limited to 32 characters. Use the REST API or the JFrog CLI if a longer version is required.
- The name and version must begin with a letter, digit, or underscore.
- The name must consist only of letters, digits, underscores, periods, and hyphens. The version supports these characters and also supports the plus sign (+).
-
Click Next.
-
In the Contents tab, review the list of modules (containing artifacts and dependencies) to be included in the Release Bundle.
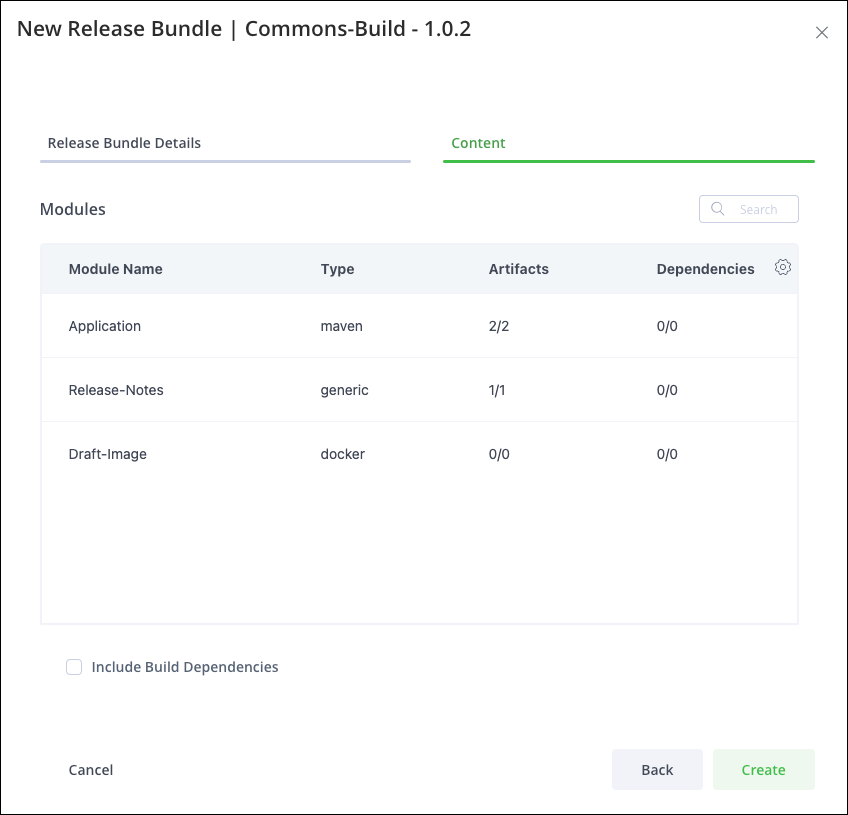
-
Optional. Select the Include Build Dependencies checkbox to have the Release Bundle include the dependencies associated with the build.
Warning
Dependencies located in local, Federated, and remote repositories can be included in the Release Bundle. To include dependencies from a remote repository, you must first ensure that they exist in the remote cache. If they are not in the cache, you need to download them before creating the Release Bundle.
-
Click Create. The Release Bundle appears:
- On the stages board.
- As an event in the Release Bundle version timeline.
- In the Release Bundle column of the Builds table.
Create a Release Bundle v2 from Existing Release Bundles
In addition to creating a Release Bundle v2 from builds, it is possible to create a Release Bundle from one or more existing Release Bundles. For example, this can be used when multiple development teams are working on different microservices, each of which has its own Release Bundle. When it comes time to release a new version of the entire product, the various Release Bundles for the microservices can be combined into a single Release Bundle containing the complete release.
To create a Release Bundle v2 from existing Release Bundles:
-
In the Platform module, select Artifactory > Release Lifecycle.
-
From the Actions menu, select Create Version from Release Bundles. The New Release Bundle Version window is displayed.

-
In the Release Bundle Details tab, do the following:
-
Enter a name for the Release Bundle. (If a Release Bundle was previously created from the selected build, its name will appear.)
-
Enter the version number of the Release Bundle.
-
Optional. Select a signing key. If you don't select a key, a default key (generated by Artifactory automatically) is used. See Create Signing Keys for Release Bundles v2.
-
Note
Naming restrictions:
- The name is limited to 128 characters. Use the REST API or the JFrog CLI if a longer name is required.
- The version is limited to 32 characters. Use the REST API or the JFrog CLI if a longer version is required.
- The name and version must begin with a letter, digit, or underscore.
- The name must consist only of letters, digits, underscores, periods, and hyphens. The version supports these characters and also supports the plus sign (+).
Warning
Make sure the signing key is valid. The operation will fail if the key has expired.
-
Click Next to move to the Bundles Selection tab.
-
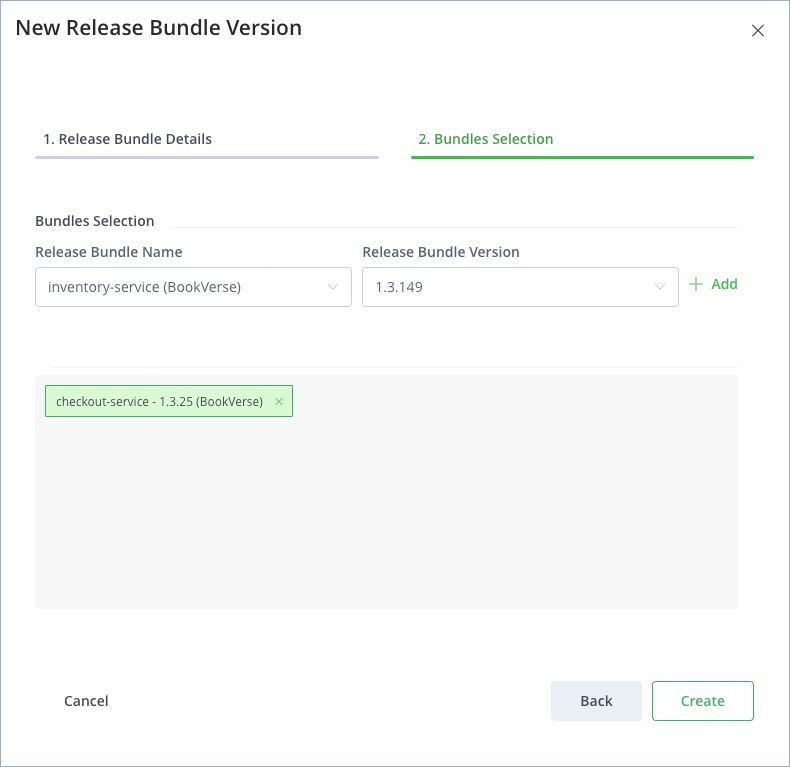
Define the Release Bundle from which to create the new Release Bundle:
-
Select the name and version of the Release Bundle from the list provided.
-
Click Add. The selected Release Bundle and version appear in the selection box.
-
-
Optional. Repeat step 5 to add additional Release Bundles to the new Release Bundle.
-
Click Create.
Create a New Version of an Existing Release Bundle
You can create a new version of an existing Release Bundle v2.
To create a new version of an existing Release Bundle v2:
-
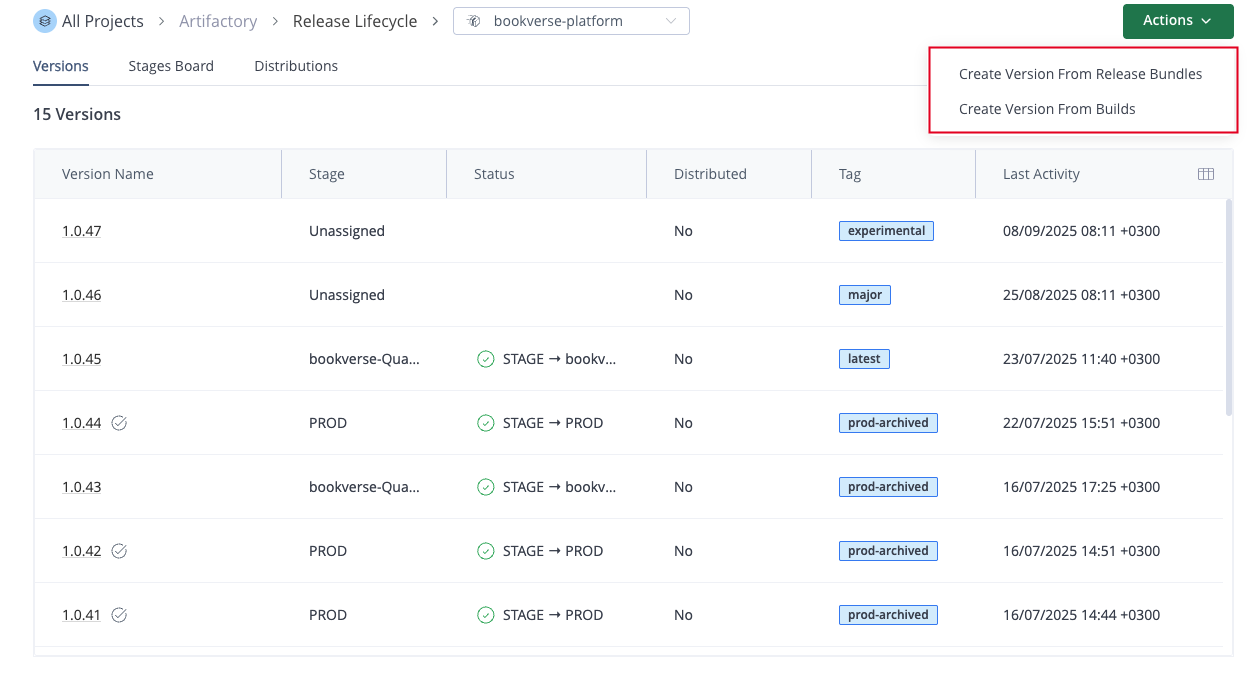
In the Platform module, select Artifactory > Release Lifecycle. The Versions tab is displayed.
-
Click the name of the relevant Release Bundle.
-
From the Actions menu, select one of the following:
-
Create Version from Release Bundles
-
Create Version from Builds
The New Release Bundle Version window is displayed with the name of the current Release Bundle.
-
-
Enter a new version number in the field provided.
Warning
Version number restrictions:
- The version is limited to 32 characters.
- The version must begin with a letter, digit, or underscore.
- The version must consist only of letters, digits, underscores, periods, hyphens, and the plus sign (+).
- Select a signing key.
- Click Next.
- Select the Release Bundles or builds to include in the new version.
- Click Create.
Note
To change the signing key of an existing Release Bundle version, see Change the Signing Key.
Create a New Release Bundle Version from the Build Page
If the Release Bundle was created from a single build, you can also return to the build from which the previous version was created and create a Release Bundle with a different version number. By default, the name is the same one that was used for the previous version. (Defining a new name creates a new Release Bundle.) The signing key is predefined with the key that was used for the previous version.
Create a New Release Bundle from the Same Build
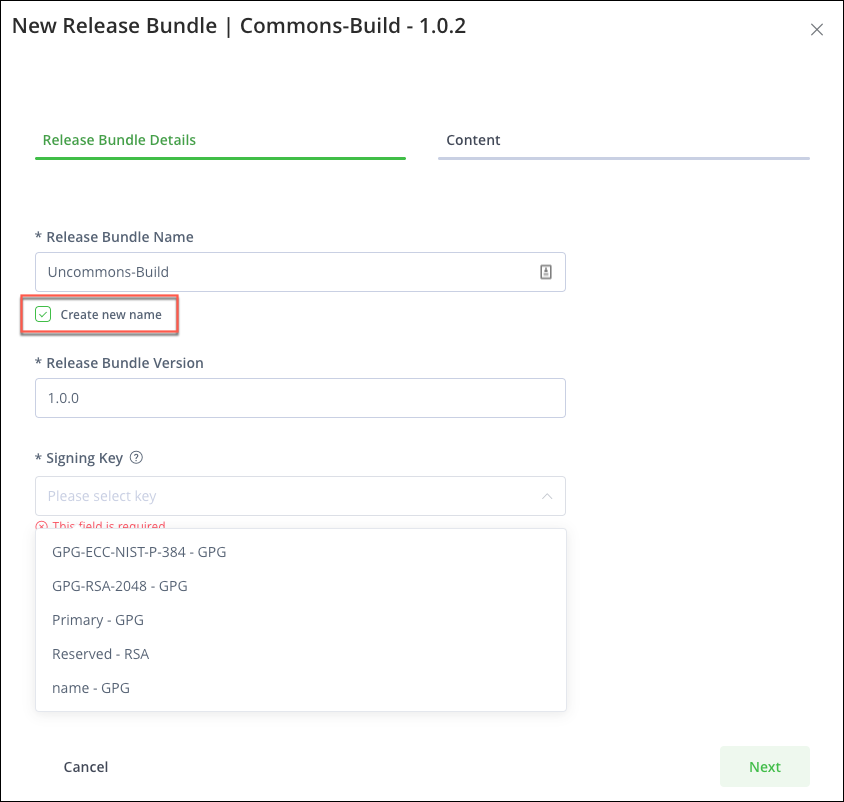
To create a new Release Bundle from the same build:
- Select the Create new name checkbox and enter a new name.
- After you enter a unique name for the new Release Bundle, select a different signing key if you don't want to reuse the key from the previous Release Bundle.
Note
This option is not available for Release Bundles created from multiple builds or from other Release Bundles.
Frequently Asked Questions
This section provides answers to frequently asked questions about creating Release Bundle v2 versions in the JFrog Platform UI.
FAQs
Q: How do I create a Release Bundle v2 from builds in the JFrog Platform UI?
A: On the Release Lifecycle page, select Actions > Create Version from Builds, or use Artifactory > Builds and click Create Release Bundle. See Create a Release Bundle v2 from Builds and Create a Release Bundle v2 from the Builds Table.
Q: Can I combine existing Release Bundles into a new Release Bundle v2?
A: Yes. On the Release Lifecycle page, select Actions > Create Version from Release Bundles, then add one or more existing Release Bundles. See Create a Release Bundle v2 from Existing Release Bundles.
Q: What happens if I don't select a signing key when creating a Release Bundle v2?
A: Artifactory uses a default signing key automatically. You can also select a key you created beforehand. See Create Signing Keys for Release Bundles v2.
Q: How do I include build dependencies when creating a Release Bundle v2?
A: Select the Include Build Dependencies checkbox when you add a build. Dependencies in local, Federated Repositories, and remote repositories can be included; remote dependencies must exist in the remote cache first. See the dependency Warning callouts in Create a Release Bundle v2 from Builds.
Q: How do I create a new version of an existing Release Bundle v2 in the UI?
A: Open the Release Bundle on the Release Lifecycle page, choose Create Version from Release Bundles or Create Version from Builds from the Actions menu, enter a new version number, and click Create. See Create a New Version of an Existing Release Bundle.
Related Topics
- Creating Release Bundles (v2)
- Release Lifecycle Management Setup
- Create a Release Bundle v2 using the REST API
- Promote a Release Bundle v2 Version
- Understanding Release Bundles v2
Updated 11 days ago