Browsing Artifacts
In JFrog Artifactory, you can use the Artifacts page to find and view information about folders, repositories, and artifacts. There are three browsing experiences for finding artifacts: the repository tree, the native browser, and WebDAV.
Repository Tree
The repository tree displays the full repository hierarchy and information about each level. For any repository, folder, or artifact you select, you can see item details in the pane next to the repository tree and perform different management actions. The details and tabs available are context-sensitive and depend on the selected item.
You can apply filters to get a reduced, specific view of repositories, folders, and artifacts in the repository tree. For more information, see one of the following based on your Artifactory hosting method:
Tip
You can configure a repository to allow viewing the content of HTML, Javadoc, JSON, and other files directly from the file URL in the repository tree. For more information, see Advanced Settings for Local Repositories.
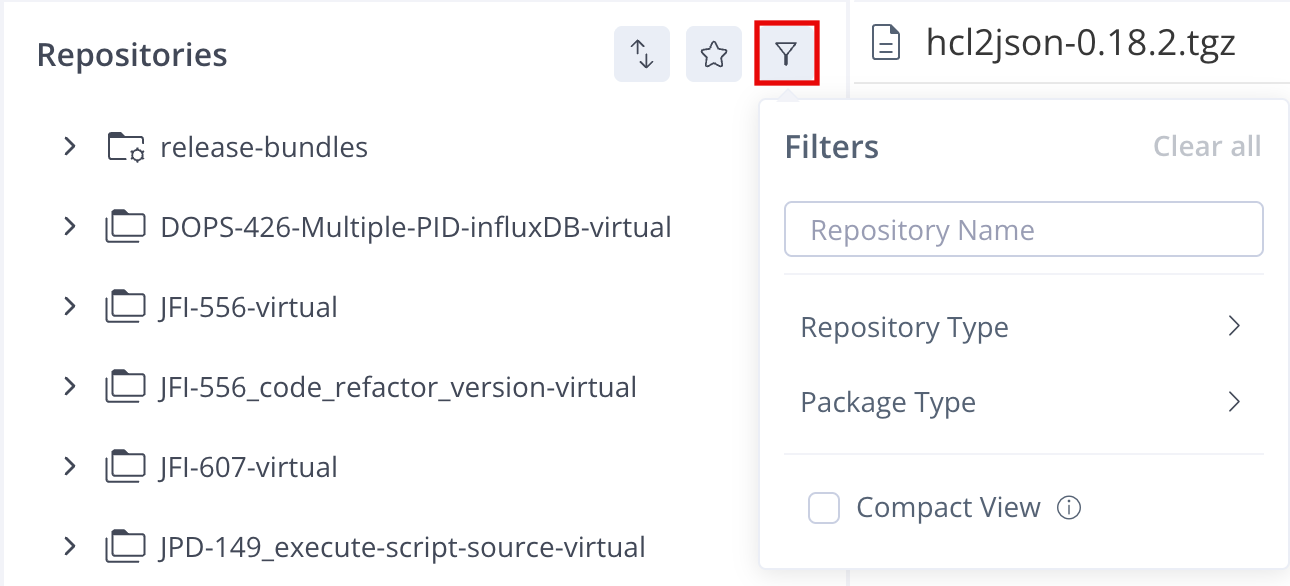
Apply Artifact Filters (SaaS)
Note
This section applies to SaaS instances of Artifactory. For more information about searching for artifacts in Artifactory SaaS, see Search for Artifacts.
To make browsing easier, you can apply filters and narrow which items appear in the repository tree.
To apply filters in the tree:
-
In the Platform module, click Artifactory > Artifacts. The Artifacts page opens and displays the tree.
-
On the Repositories menu, select Filters. The Filters menu opens.
-
On the Filters menu, do any of the following:
- Enter a repository name in the text box to filter by that repository.
- Repository Type: Select one or more repository types.
- Package Type: Select one or more package types.
- Compact View: Select to simplify the tree view and collapse nested single-item folders into one path.
-
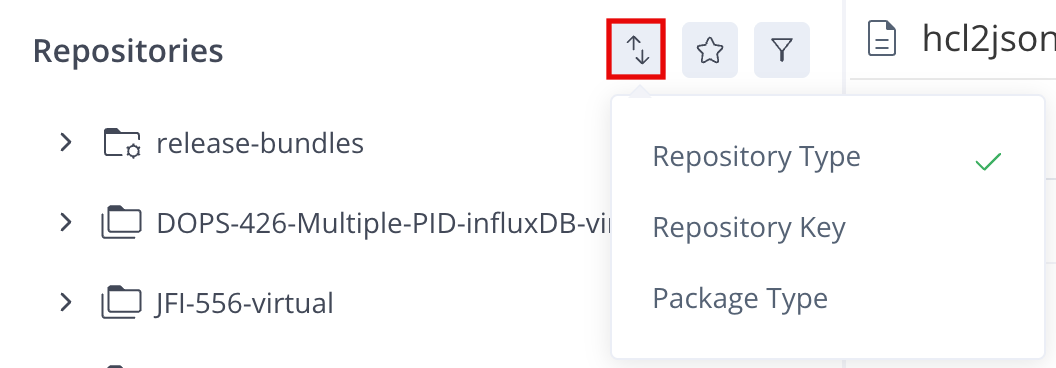
Optionally, click Sort and choose whether to sort the repositories by repository type, repository key, or package type.
-
Optionally, click Filter by favorites to view only items that you have added to your favorites.

Apply Artifact Filters (Self-Managed)
Note
This section applies to self-managed instances of Artifactory.
You can use filters to reduce the number of items that appear in the repository tree and easily find relevant artifacts. Filters are saved as cookies in your browser.
To apply filters in the tree:
-
In the Platform module, navigate to Artifactory > Artifacts. The Artifacts page opens and displays the tree.
-
In the Repository Name field, enter the name of the repository you want to search.
-
Apply any of the following filters:
- Package Types: Select the type of package you want to find.
- Repository Types: Select the type of repository you want to search.
- My Favorites: Click the My Favorites button to view only items you have favorites. For more information, see Add a Repository to Favorites.
- Sort By: Choose to sort the repositories alphabetically by Repository Type, Repository Key, or Package Type.
The results are automatically filtered according to your selections.
-
Click Clear to clear filters and reset the repository tree view.
Repository Sort Order
The default sort order for repositories in the repository tree is: virtual, local, remote, cached.
You can modify this order through the artifactory.treebrowser.sortRepositories.sortByType system property. For example, to reverse the sort order, the property would be set as follows:
artifactory.treebrowser.sortRepositories.sortByType=cached,remote,local,virtualIf you omit any repository type in the specified sort order, it will be ordered according to the default setting.
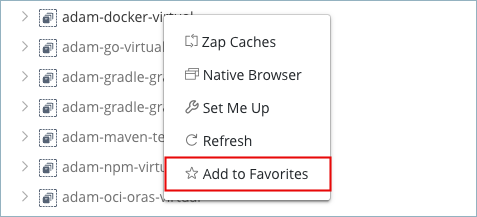
Add Repository to Favorites
You can mark a repository as a favorite to make it easier to search for the repository and its contents.
To add a repository to Favorites:
-
On the Artifacts page, in the repository tree, do one of the following:
-
Hover over the repository name in the tree and click Add to favorites.

-
Right-click the repository name in the tree and select Add to Favorites.
-
Select the repository and in the artifact information, click Add to Favorites.
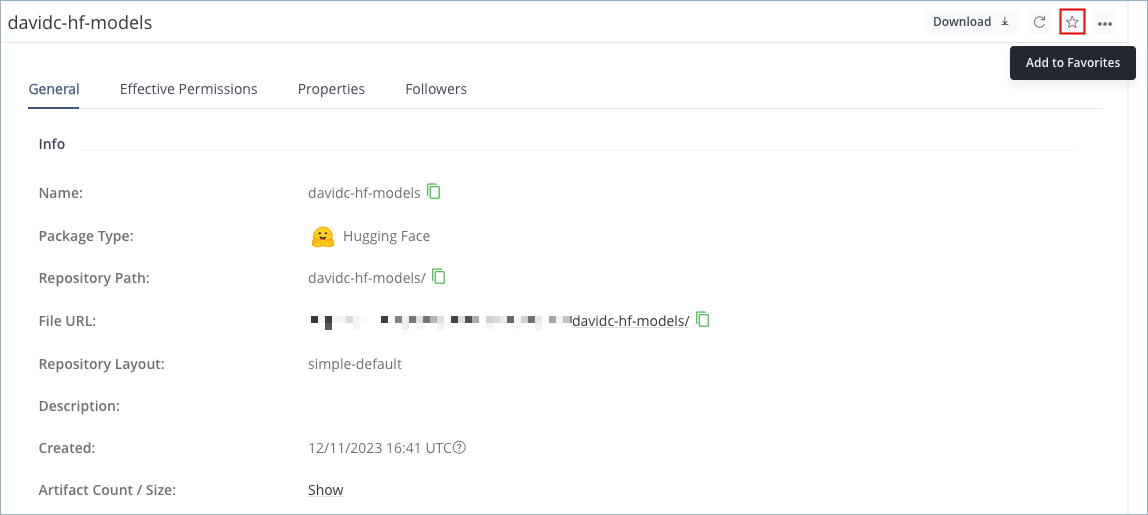
Repositories now appear in the My Favorites list.
-
Use the Native Browser
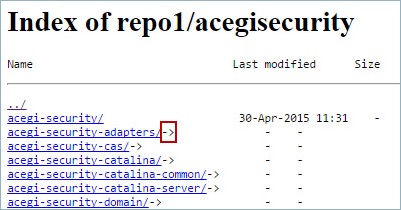
The native browser is a highly responsive, read-only view where you can browse the contents of a repository outside of the Artifactory UI. The native browser is similar to a directory listing provided by HTTP servers.
To use the Native Browser:
-
On the Platform module, navigate to Artifactory > Artifacts. The repository tree and item details appear.
-
Do one of the following:
-
In the repository tree, right-click an item and select Native Browser.

-
In the repository tree, select an item. In the item details, open the actions menu and select Native Browser.
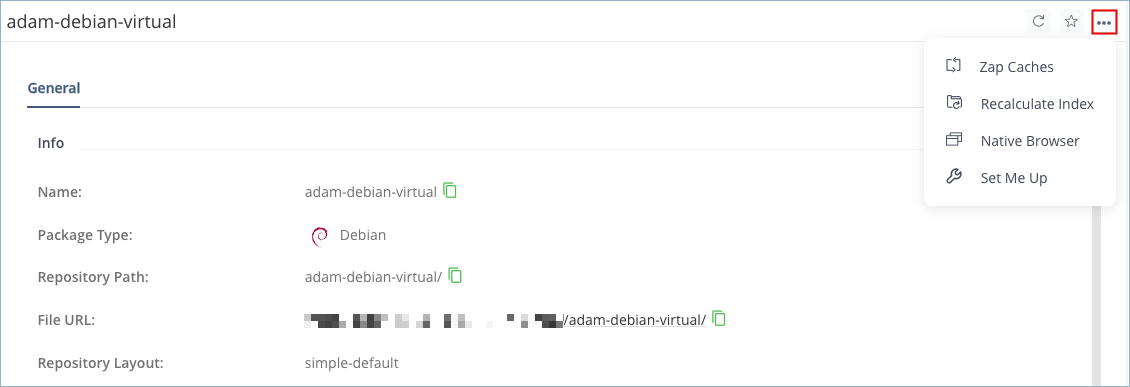
The selected item opens in the native browser.
-
-
Use the links in the native browser to navigate through the repository and view item information.
Tip
If you have Artifact Content Browsing enabled, you can view the contents of HTML, Javadoc, JSON, and other files directly in the native browser by clicking the filename. For more information, see Advanced Settings for Local Repositories.
Public Repository Views
You can create a public repository view with the native browser by mounting the repository on a well-known path prefix. This allows system administrators to create a virtual host that exposes the native browser to public users while maintaining write and other advanced privileges. The public repository view also limits access to the intensive UI and REST API features to internal use only.
The public repository view URL follows this structure:
https://<ADDRESS>/artifactory/<PREFIX>/<REPO>Where:
<ADDRESS>: The Artifactory server address, either a URL likecompany.jfrog.ioor a<HOST>:<PORT>pair.<PREFIX>: The path prefix<REPO>: The name of the repository you want to make public
For example:
https://localhost:8082/artifactory/npm/npm-localRemote Browsing
For a Smart Remote Repository, you can navigate the contents of the repository on the remote Artifactory instance even if the artifacts are not cached locally.
Remote browsing is enabled with the List Remote Folder Items checkbox in the remote repository configuration. For more information, see Configure a Smart Remote Repository.
Note
Initial remote browsing might be slow, especially when browsing a virtual repository containing multiple remote repositories. However, browsing speeds up since remote content is cached for browsing according to the Retrieval Cache Period defined in the remote repository configuration panel.
Artifact Information
You can view artifact information and metadata next to the repository tree. Depending on the artifact you selected, one or more tabs appear and display information associated with the selected item. The following table includes some of the most common artifact information tabs.
| Tab | Description | Diagram |
|---|---|---|
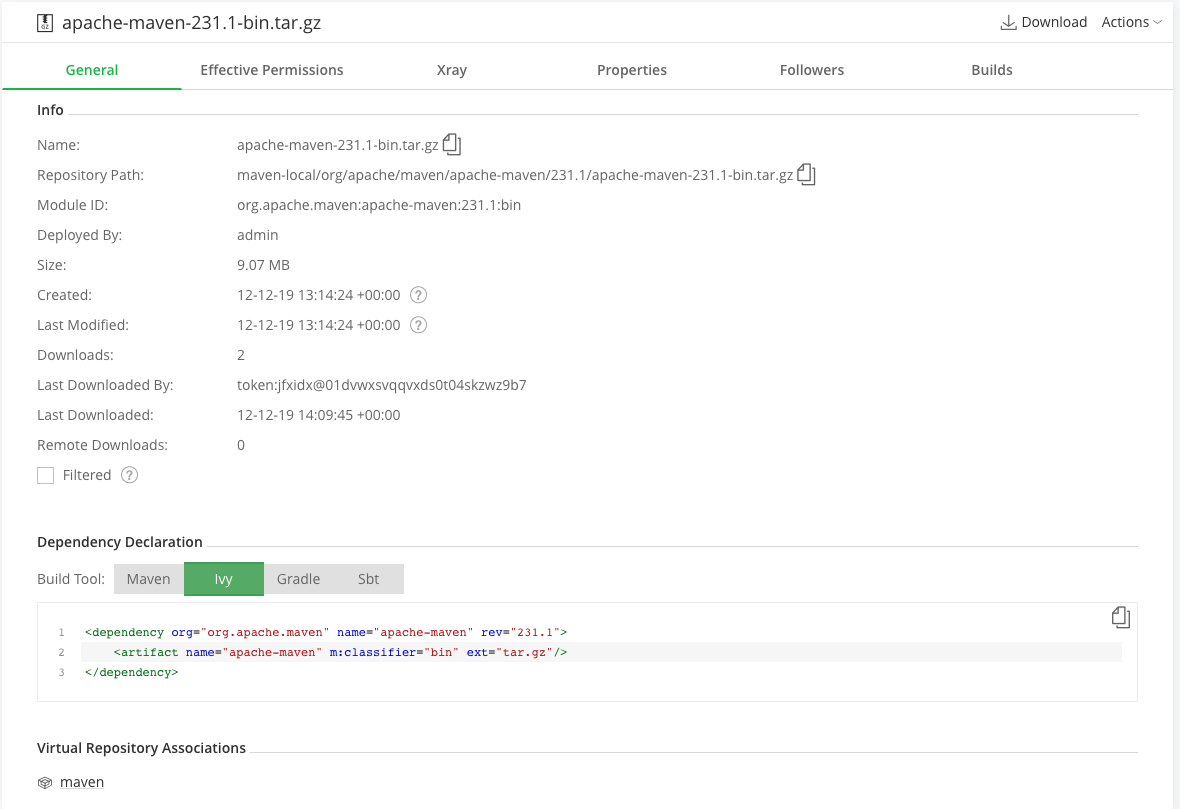
| General | General information including Info, Dependency Declaration, Virtual Repository Associations, Checksums, and other sections. If Artifact Content Browsing is enabled for the repository, you can click the file URL to view the content of HTML, Javadoc, JSON, and other files. For more information, see Advanced Settings for Local Repositories.
|  |
| Effective Permissions | Lists users, groups, or permission targets on the artifact level. For more information, see Permissions. | 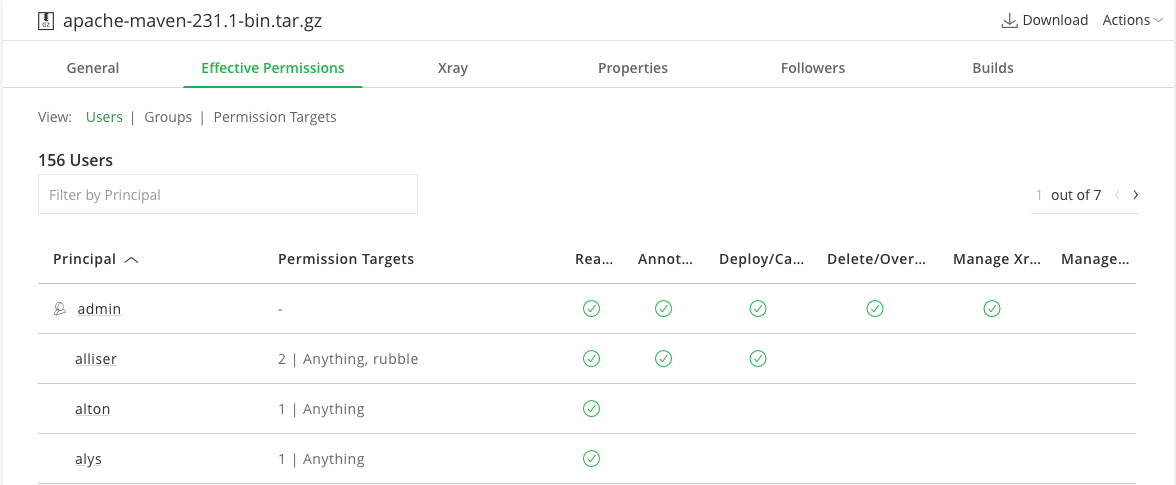 |
| Xray | Displays the status of the most recent scan, a summary of any security issues encountered and their severity, and the contents of the artifact's SBOM (software bill of materials). If there item has violations that block downloading, you can click Ignore Violation on the item you want to ignore. | 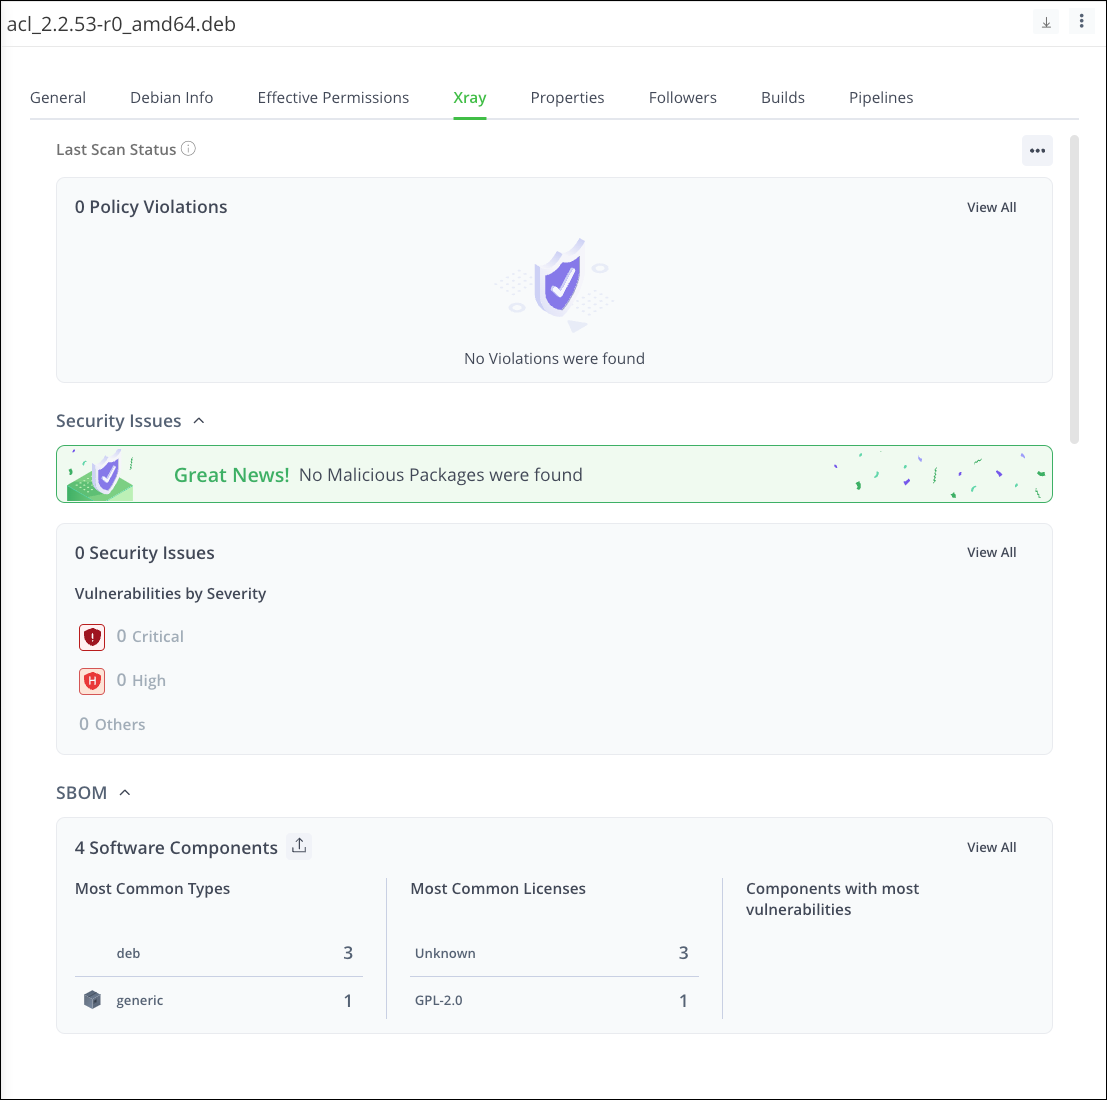 |
| Evidence | Displays a list of evidence files associated with the selected item. For more information, see View the Artifact Evidence Table. | |
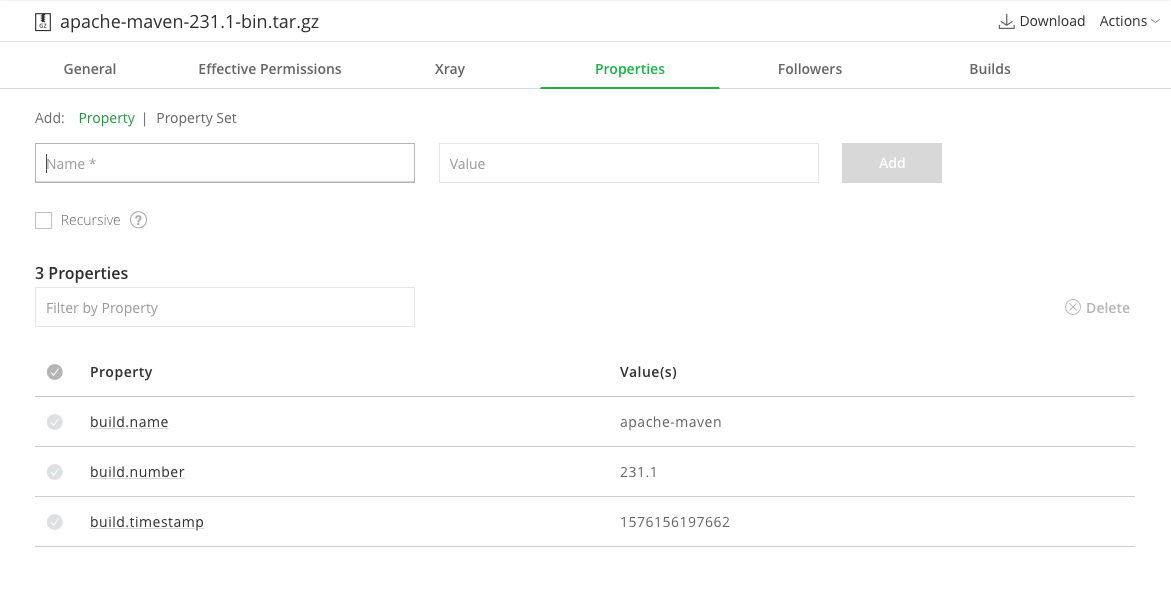
| Properties | Displays the list of properties annotating the selected item.
|  |
| Followers | Displays the list of followers using this item. The Followers feature allows you to monitor selected artifacts, folders, or repositories for storage events (create, delete, or modify) and receive detailed email notifications on repository changes that are of interest to you. Followers or folders intercept changes on all children. An admin or users with the Manage permission can view and manage followers via the Followers tab. Follow notifications are aggregated at around 1-minute intervals and sent in a single email message. All notifications respect the read permissions of the watcher on the followed item(s). | 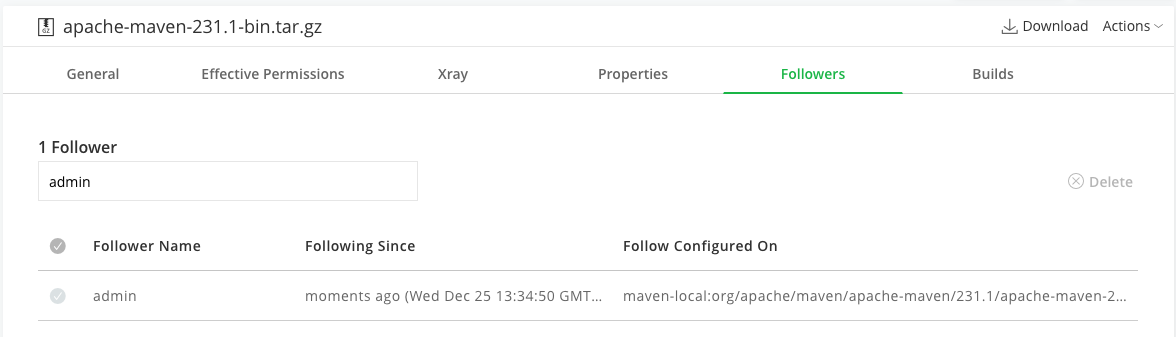 |
| Builds | Displays the list of builds that either produce or use the selected item. |  |
Using WebDAV
Artifactory supports WebDAV shares. You can mount a local or cached repository as a secure WebDAV share and make it accessible from any WebDAV-supporting file manager. Access a secure WebDAV-share by referencing the URL of the target repository as follows:
http://<HOST>:<PORT>/artifactory/<REPO_KEY>
File Locking in WebDAV
When deploying a file through WebDAV where file locking is enabled, the Artifactory log may display the following message:
"Received unsupported request method: lock"
In some cases, you can solve this issue by disabling file locking before mounting the repository. This process is done differently for each WebDAV client. For example, for davfs2 file locking is disabled with this command:
echo "use_locks 0" >> /etc/davfs2/davfs2.confNote
While for some clients file locking is disabled by default, it may not be possible to disable file locking in all clients.
Authenticate davfs2 Clients
Because davfs2 does not use preemptive authentication, the client must be authenticated using two requests in order to authenticate with user credentials. The first request is sent without credentials and receives a 401 challenge in response. Then, a second request is sent, this time with the credentials.
To access your repository through Artifactory with your full user permissions, you need to add an authorization header to the client configuration. This ensures that all requests sent to Artifactory are preemptively authenticated, eliminating the need for a 401 challenge and response. In this way, you are immediately granted access based on your user credentials instead of being initially treated as an anonymous user.
Anonymous access with Artifactory
If Artifactory is configured to allow anonymous access, there will be no 401 challenge response. You will be granted file access with anonymous user permissions, which may be less than your own user permissions.
To add an authorization header to the client configuration:
-
Encode your username and password credentials in base64 using the following Groovy script:
Basic ${”<USERNAME>:<PASSWORD>".bytes.encodeBase64()}Where:
<USERNAME>: Your Artifactory username<PASSWORD>: Your Artifactory password
For example:
Basic ${”jeffry:Fr0gP4sswOrd!".bytes.encodeBase64()} -
Open one of these configuration files in a text editor:
/etc/davfs2/davfs2.conf~/.davfs2/davfs2.conf
-
Add the encoded credentials to the authorization header as follows:
add_header Authorization “Basic <AUTH>”Where
<AUTH>is the Base64-encoded username and password. For example:add_header Authorization “Basic amVmZnJ5OkZyMGdQNHNzd09yZCE=”
Authentication for Windows and other WebDAV clients
It is recommended to use a tool like as Cyberduck (Open Source) when using Windows with WebDAV shared Artifactory repositories.
Windows Limitation
Using Windows with WebDAV and Artifactory provides limited functionality. Browsing and listing files is supported, but Artifactory doesn't support some specific WebDAV commands for operations like copy and move.
Updated 3 months ago