Manage Release Bundle Retention Policies in the JFrog Platform UI
Subscription Information
This feature is supported with the Enterprise+ license.
Important
This section describes how to manage Release Bundles v1. For information about managing Release Bundles v2, which were introduced in Artifactory 7.63.2 and Distribution 2.19.1, see Release Lifecycle Management.
If the retention policies feature has been enabled, navigating to the Received tab displays a Cleanup button (available only to admin users), which opens a Cleanup Candidates window, where you can now do the following:
- Set a Release Bundle to Keep or Don't Keep
- Clean up (i.e., delete) Release Bundles that meet the retention policies
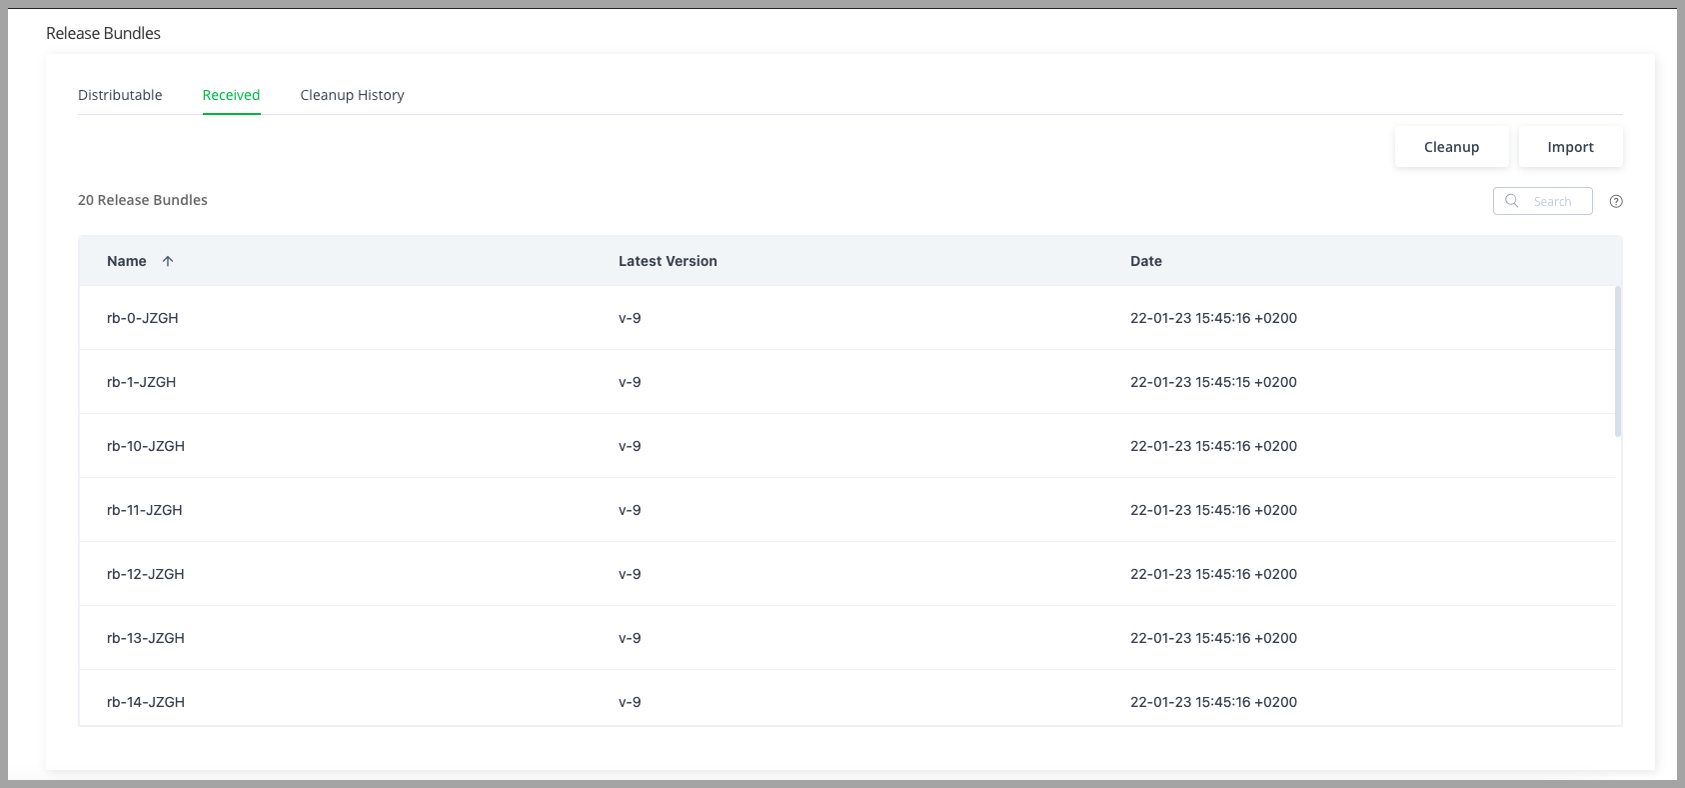
In addition to automated retention and cleanup using REST APIs, you can manage Release Bundles in the JFrog platform UI using the Distribution > Release Bundles > Received tab.
Set a Release Bundle to Keep or Don't Keep
The Platform UI provides an easy-to-use interface that lets you determine which Release Bundles (v1 & v2) should be deleted and which should be kept, regardless of whether that Release Bundle meets the deletion criteria (see Cleaning up Artifactory Edge Release Bundles). You can also access the Cleanup History tab from this space (see Cleanup History Tab).
-
Go to the Received tab and click the Cleanup button.
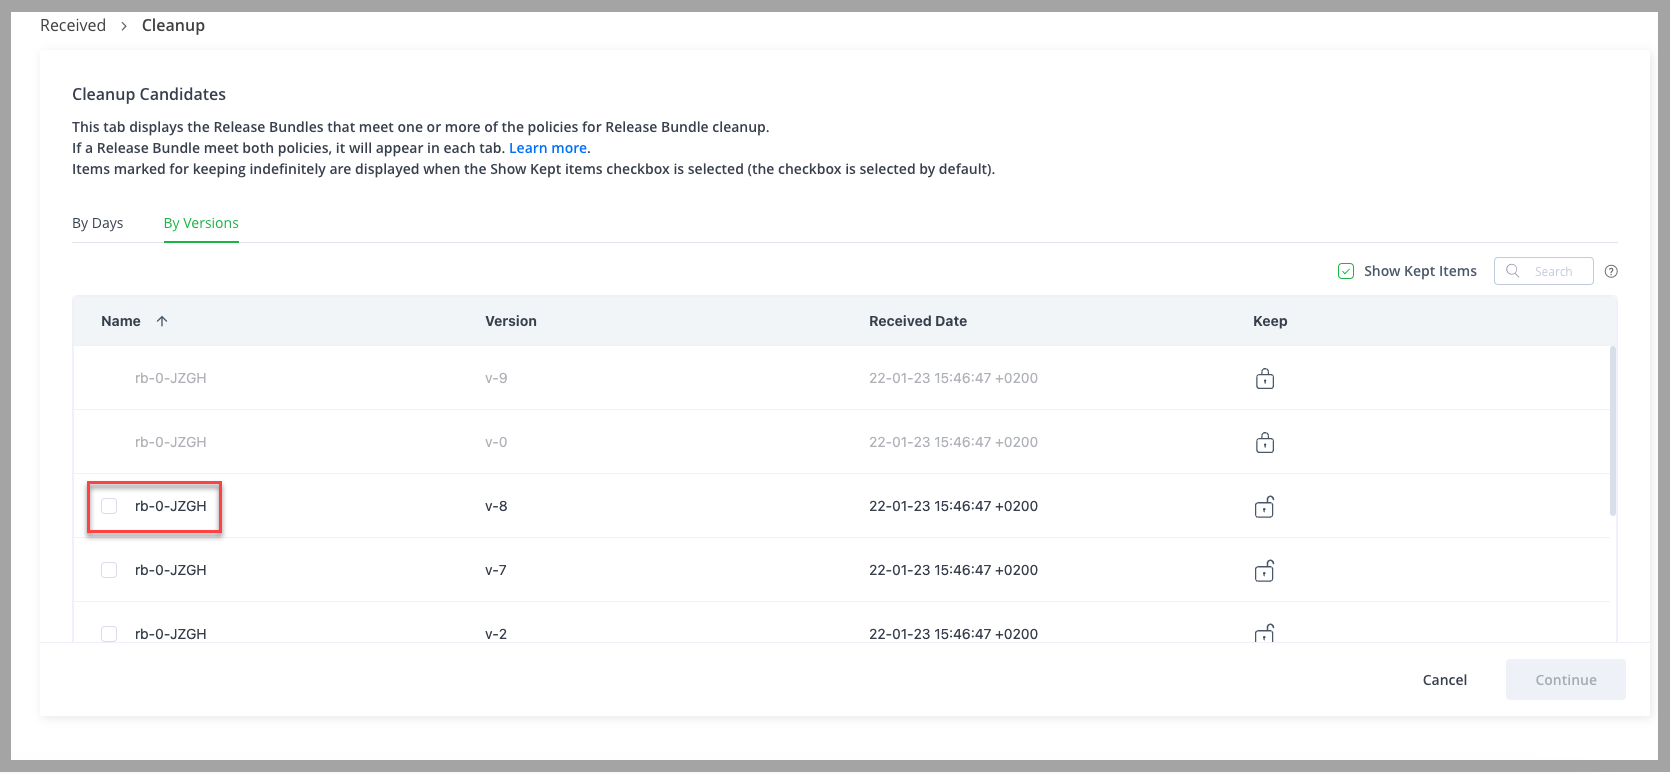
This displays the Cleanup Candidates window, which is comprised of two tabs: By Days and By Versions.
Note
The two tabs in the Cleanup Candidates provide you with the same functionality for the purpose of cleaning up the Release Bundles. You can choose to work in either tab depending on your preference: days or versions.
You can also search for a specific Release Bundle using the name or a wildcard + name in the search field.

Note
The Release Bundles that are currently marked to keep show a closed lock in the Keep column while those that can be deleted show an open lock.
By default, the checkbox to show the kept items (so that you don't try to inadvertently delete a Release Bundle that is marked Keep) is selected.
-
To change a Release Bundle's status from Don't Keep to Keep (or from Keep to Don't Keep), click the lock or unlock icon in the Keep column. Note that standing on the lock/unlock icon displays a tooltip that tells you the current status of the Release Bundle.
-
Once you have set the Release Bundles to their correct status, click Continue.
-
You can now continue to deleting Release Bundles, or go to the Cleanup History tab to view your changes.
Note
Any changes you make to the Release Bundle's status will be automatically noted as an action in the Cleanup History tab and you will not be asked to confirm them.
Clean up Release Bundles from Edge Nodes
-
To clean up (delete) Release Bundles (v1 & v2) from Distribution Edge nodes, go to Distribution > Release Bundles and select the Received tab.
-
Select one of the tabs in the Cleanup Candidates window (By Days or By Versions).
Note
The two tabs of the Cleanup Report provide you with the same functionality for the purpose of cleaning up the Release Bundles. You can choose to work in either tab depending on your preference: search for Release Bundles according to the number of days that the Release Bundle has been released (time) or according to the version of the release bundle.
You can also search for a specific Release Bundle using the name or a wildcard + name in the search field.
- In the Name column, select the checkboxes of the Release Bundles you wish to delete.
Note
You will only be able to select the checkboxes of Release Bundles that are marked Don't Keep. Items marked for keeping will appear grayed-out.
- Click Continue.
- Any Release Bundles you delete through the UI cannot be retrieved. This operation is permanent and cannot be undone. Therefore, you will now need to verify your selection, and confirm the deletion by clicking Delete in the Confirm Release Bundle Deletion popup.
Note
Sometimes simply selecting a Release Bundle for deletion - even if it meets the deletion criteria - does not always mean the Release Bundle will be deleted. Because this operation is asynchronous, there might be situations where items you selected to delete are no longer available or cannot be deleted for other reasons.
In this case, a Deletion Failure window will be displayed instead. You will need to go back to the list of Release Bundles and clear the selection of those that cannot be deleted.
Once your selection is approved and confirmed, the deletion process will begin, and you will receive a notification that the process has begun.
- Once the deletion process is completed, you can view the results of your actions in the Cleanup History tab. As explained above, this operation is asynchronous, and may take some time depending on the amount of bundles and artifacts that are being deleted.
Note
If an artifact is included in more than one Release Bundle, when you delete a Release Bundle that contains that artifact, the artifact will remain via the remaining Release Bundle.
Best Practice
For the best performance of the clean-up process, it is recommended to bulk Release Bundles into smaller groups and to delete a group at a time.
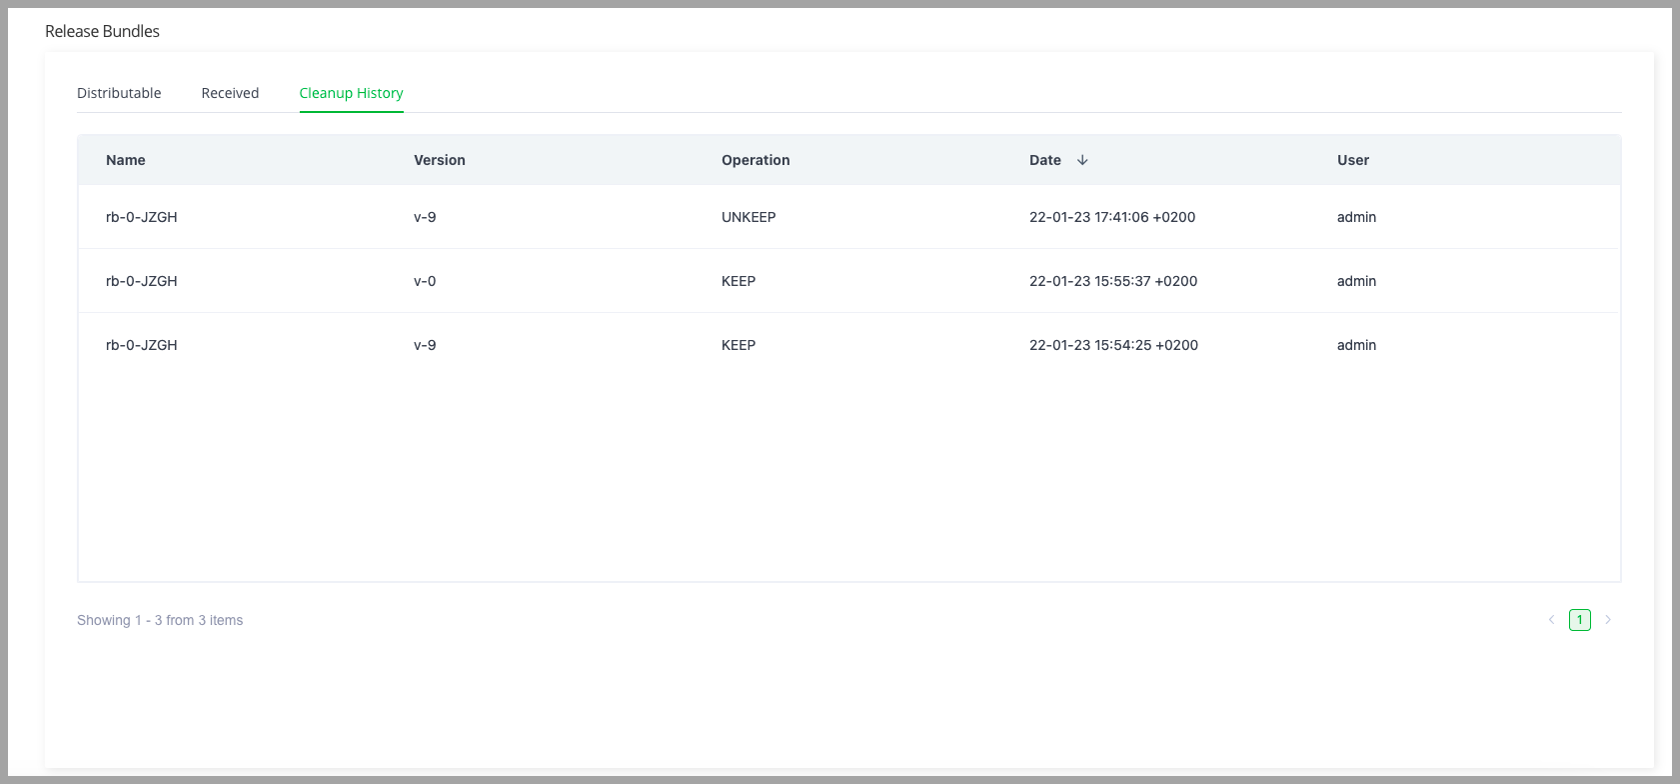
Cleanup History Tab
Use the Cleanup History tab to view the changes you apply to Release Bundles through the Cleanup Report, including deletions, and status changes from Keep to Don’t Keep or from Don't Keep to Keep.
Note
Release Bundle v1 deletions from the source Artifactory using JFrog Distribution will not be listed here.
The columns in this history tab can be sorted, and you can paginate through the complete list of actions taken.
Updated 7 months ago