

Configure Project Compliance
After your AppSec team activates a compliance framework, you (the project administrator) decide how the framework applies to your project’s applications.
After your AppSec team activates a compliance framework, you (the project administrator) decide how the framework applies to your project’s applications. You choose which of your applications need to comply with the framework and configure how strictly each rule is enforced per application.
In JFrog AppTrust, you do the following:
- Choose Scope: Select the applications in your project that the framework applies to.
- Configure Rules: For each application in scope, enable the rules that apply and set their enforcement to Warning or Fail.
When you first open a framework for your project, all rules are switched off. You implement the framework for each application by enabling the rules. When you enable a rule, the default enforcement action is Warning. If you want a failure to block a release, change the enforcement to Fail.
Rules are evaluated at the Production (PROD) stage gate.
Prerequisites
- The Configure a Framework procedure is complete.
- Project administrator permissions
Step 1: Select Applications
To select the applications in a framework:
-
In the JFrog Platform, go to Platform > AppTrust > Compliance.
-
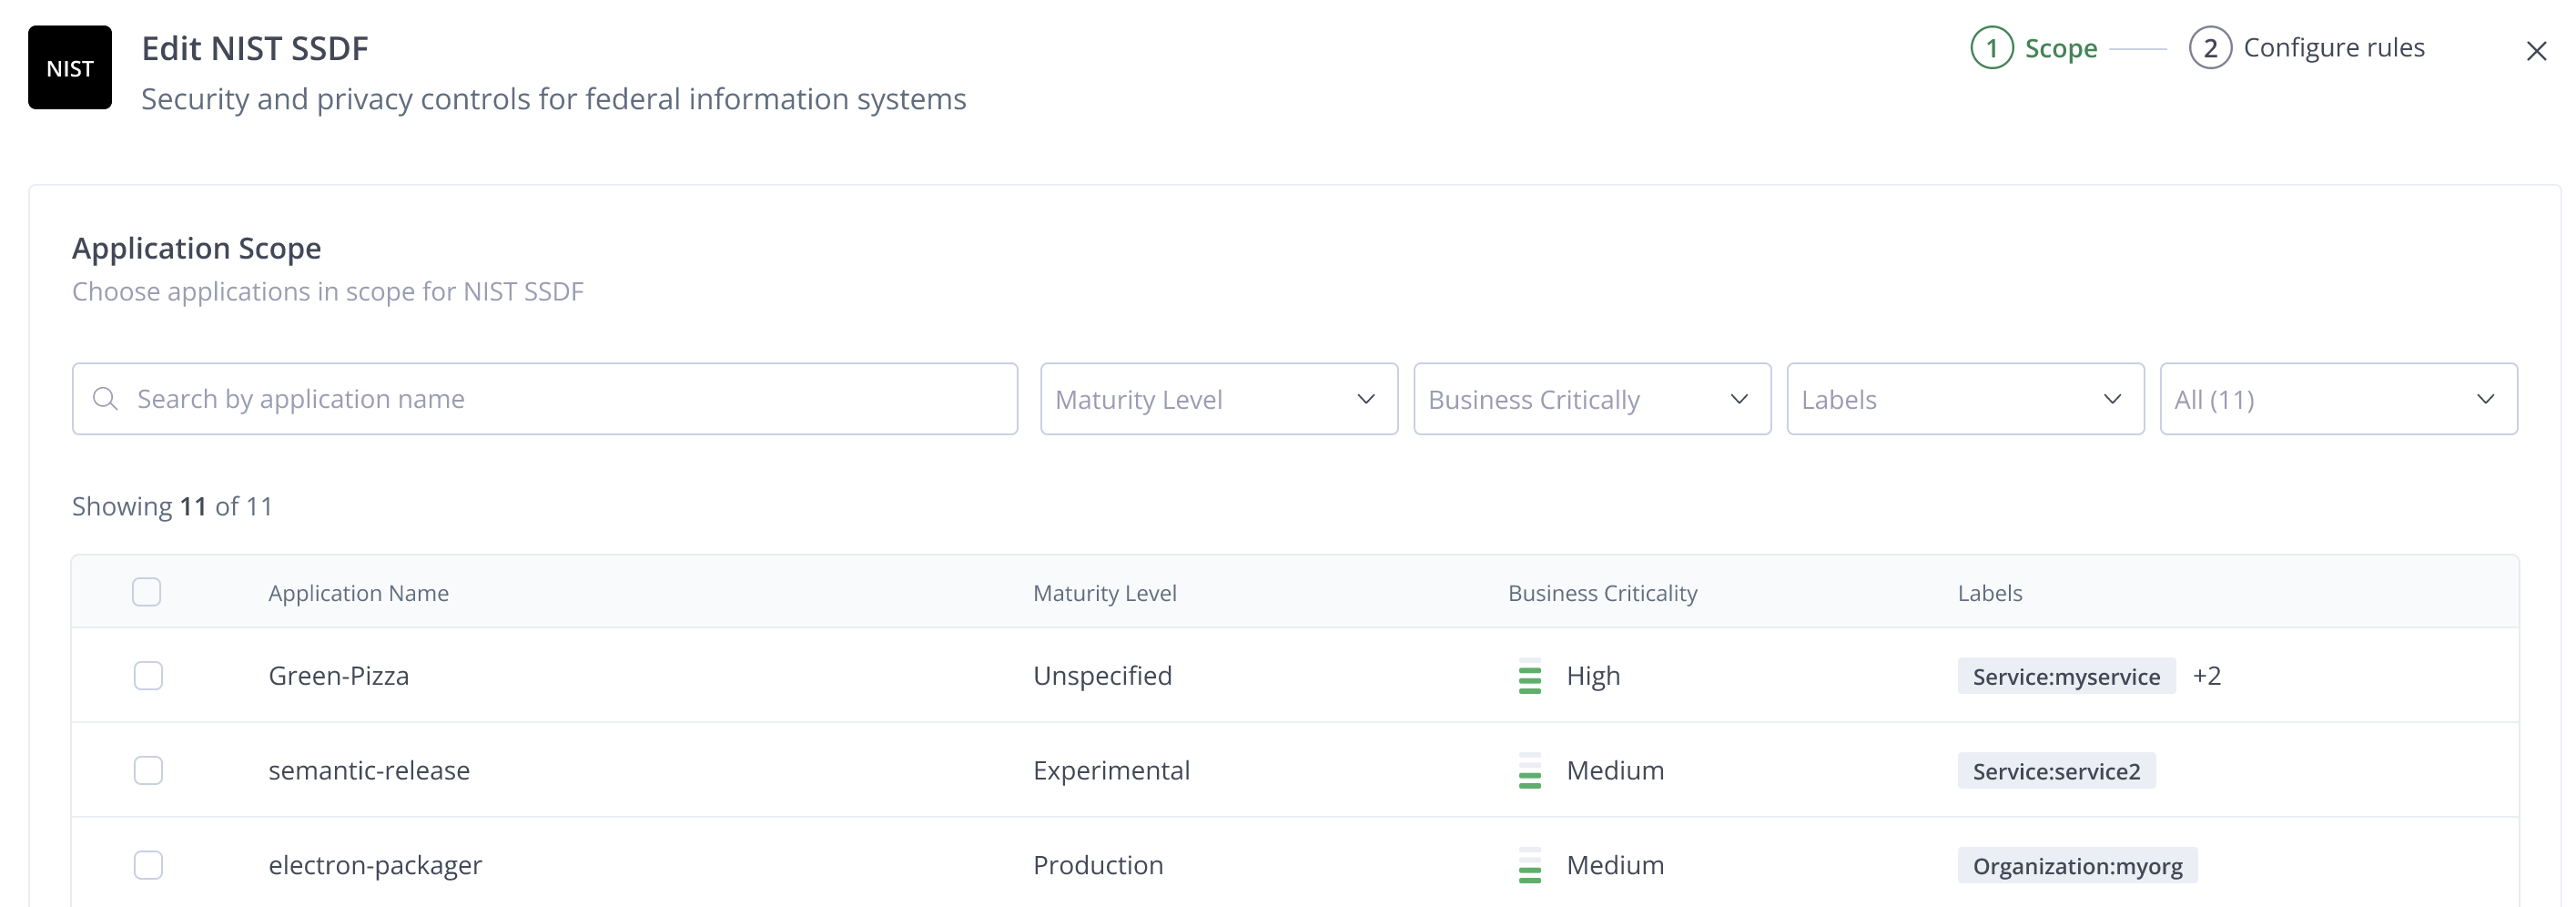
Click anywhere on a framework to open its editing panel. For example, click NIST SSDF. The Application Scope panel opens for the framework you chose.
-
Mark the applications that are in scope for the framework. Use the Search or the filters above the application list to find your applications. If you apply more than one filter, AND logic is used to display the applications.
-
Click Save and Continue. The Configuration Rules panel appears with the list of applications you chose on the left, and a listing of controls and rules for the selected applications on the right.
Adding Applications Later
You can return to Step 1: Select Applications anytime and add or remove applications without losing any rule configuration you’ve done in Step 2: Configure Rules. Use the + Add applications dropdown to bring in additional applications from your project. This shows first the applications in scope and afterward the applications that are not in scope (not marked).
Removing Applications
If you remove an application that already has active rules, AppTrust warns you that its policies will be detached and enforcement will stop. Confirm only if that’s what you intend.
Step 2: Configure Rules
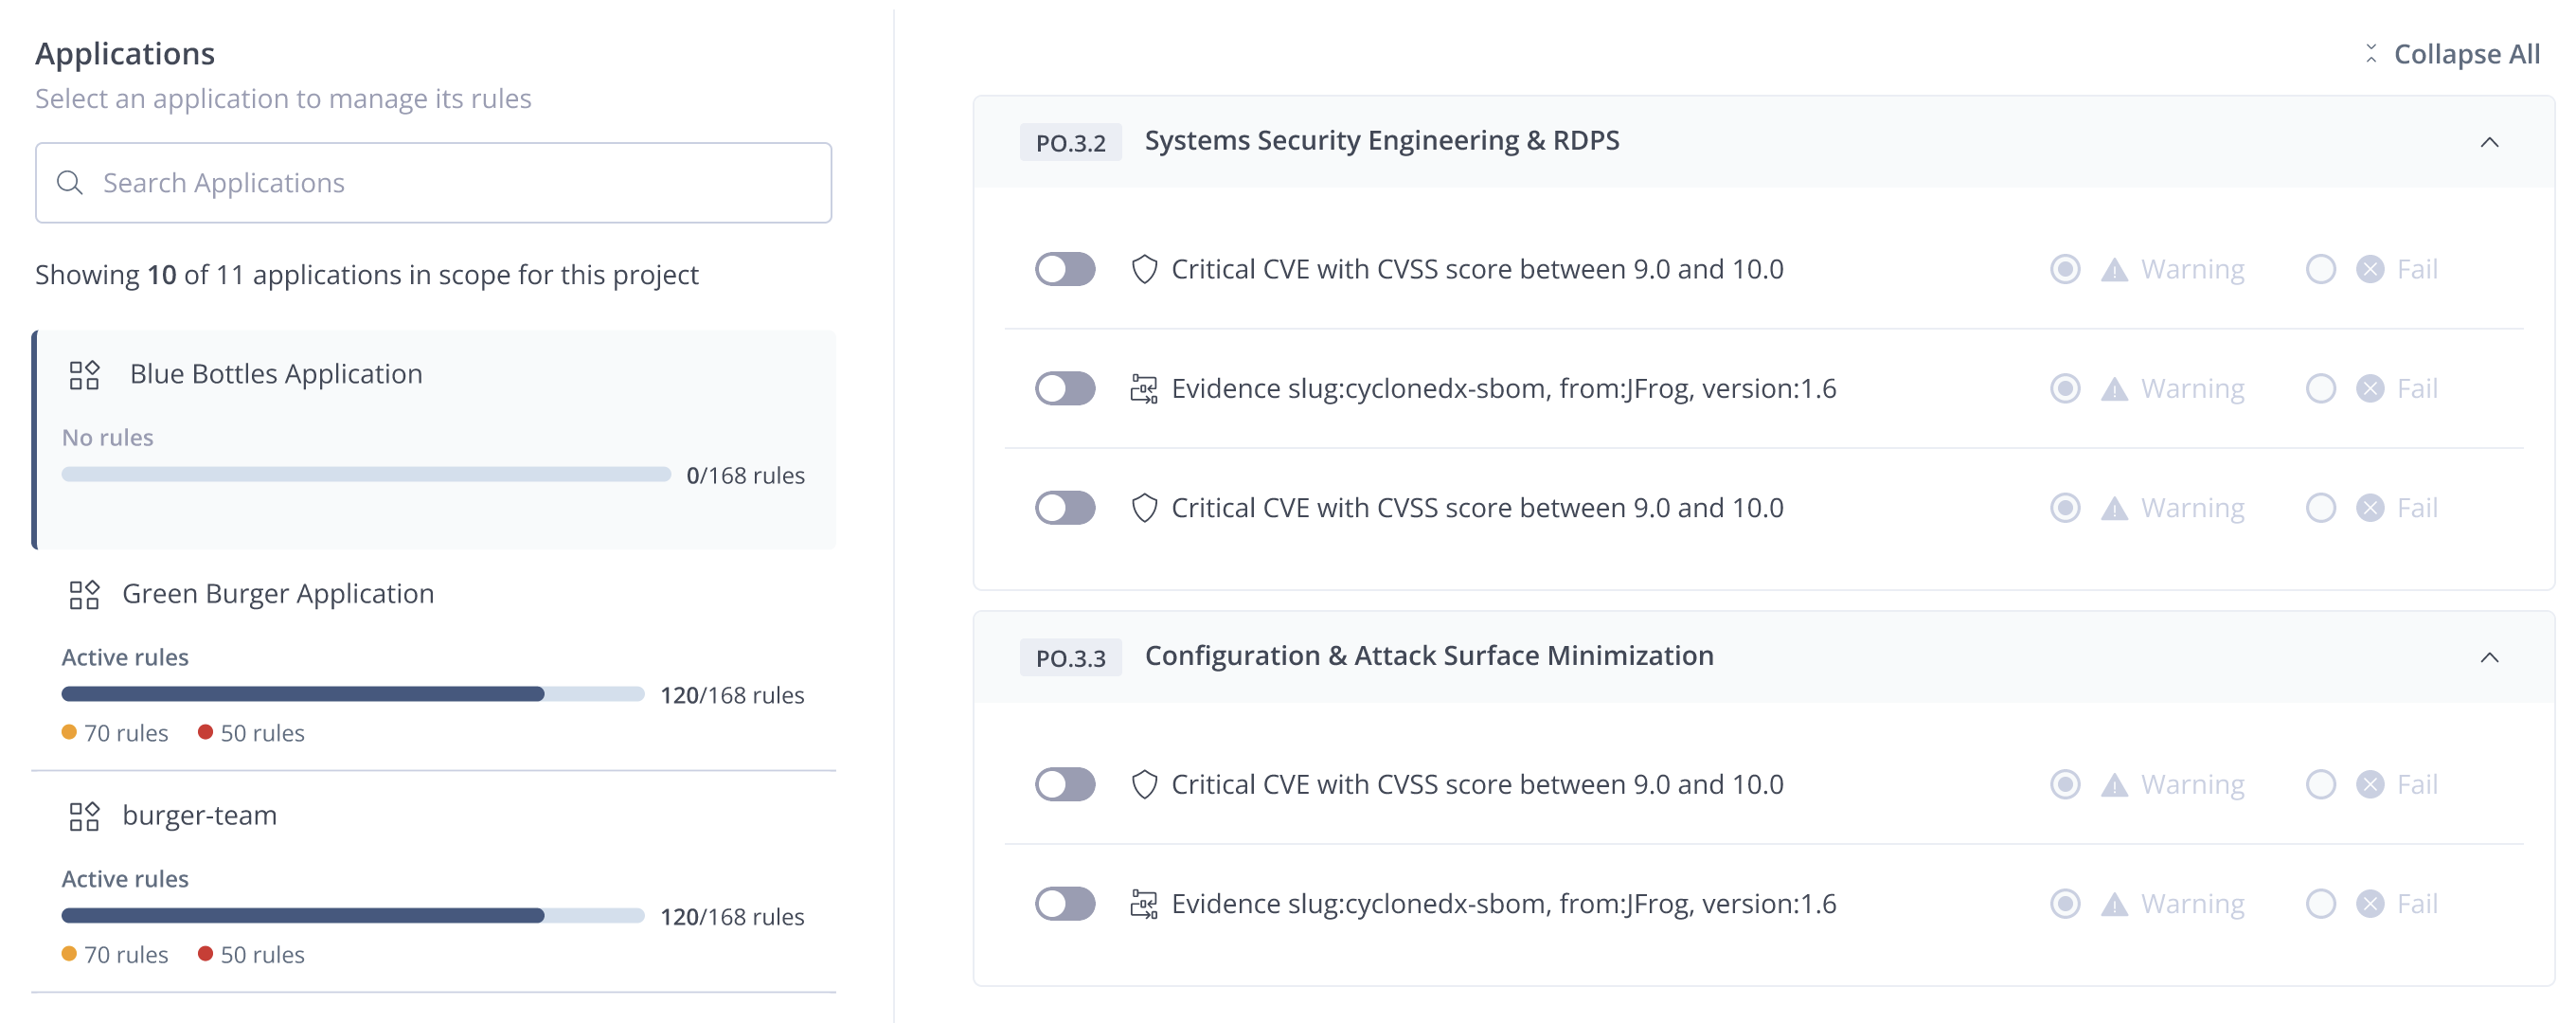
The left panel lists the applications you selected. The right panel shows the rules for the selected application, grouped by the control they belong to.
To configure rules and actions:
-
On the left side of the panel, click an application. The list of controls and the rules applying to each control appears on the right. To find a specific application, scroll down or use the Search, then click the application.
-
Review all of the controls and rules. To see a rule’s full description, hover over the rule row. For each rule, do the following:
- For each rule that applies to this application, use the toggle to switch it on.
- The default enforcement action for all the rules is Warning. For any rule where a failure should actually block a release, change the enforcement to Fail.
-
After you have configured all the controls in all the applications you selected, click Save.
After you save, for each application you’ll see:
- Enabled rules out of total (for example, 70/168) with a progress bar
- Number of enabled rules set to Warning and Fail
Changing Enforcement Action
You can change the enforcement action of a rule at any time.
- From Warning to Fail: Takes effect when you click Save.
- From Fail to Warning: This means that you’re removing a block on PROD. AppTrust opens a confirmation dialog, and you enter a reason for the change. The reason is saved to the Activity Log.
What's Next?
Learn how to Add an Evidence Document to an Application.
Updated 12 days ago